Migrating to WebUI Unified Theming
We’ve recently released our new Unified Theming for WebUI, which will dramatically alter the look and feel of your WebUI-powered apps, giving it a fresh, modern look and feel. But, how will you be able to take advantage of this new feature? In this post, I’m going to show you how convert the WebGrid Enterprise sample to use the new WebUI Unified Theming. At the end of this post, you should have the following result.
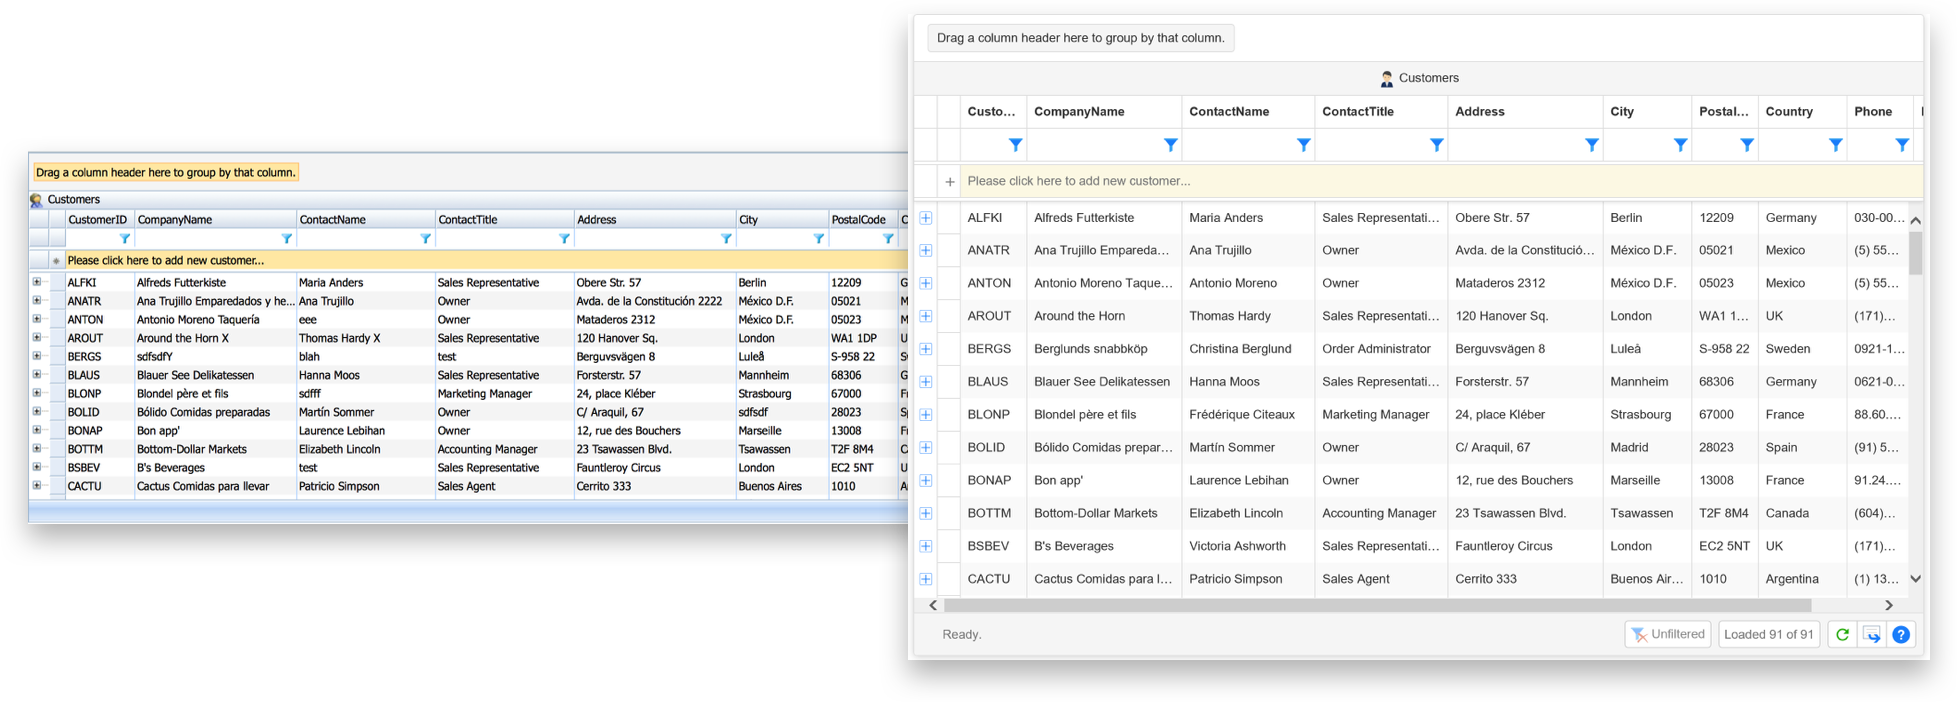
Here’s a single image of the revamped sample in full Unified Theming glory.
Ready to begin?
What You’ll Need
Before you begin, you’ll need to ensure that you have properly installed Visual Studio 2012 or higher and have installed Premier Studio 2016 (or higher). If not, feel free to perform Request Trial from our site to get the latest installer. Or, if you have purchased a subscription, you can easily obtain the latest version of the installer by simply signing in to your account.
Let’s Begin.
In overview, here’s what we’re going to accomplish:
- Create a new Unified Theming project using the new Project Template.
- Import the existing WebGrid’s Enterprise sample (from the old sample) to the new project.
- Remove all style-related attributes.
- Convert the sample to use the new Unified Theming.
Create New Unified Theming Project
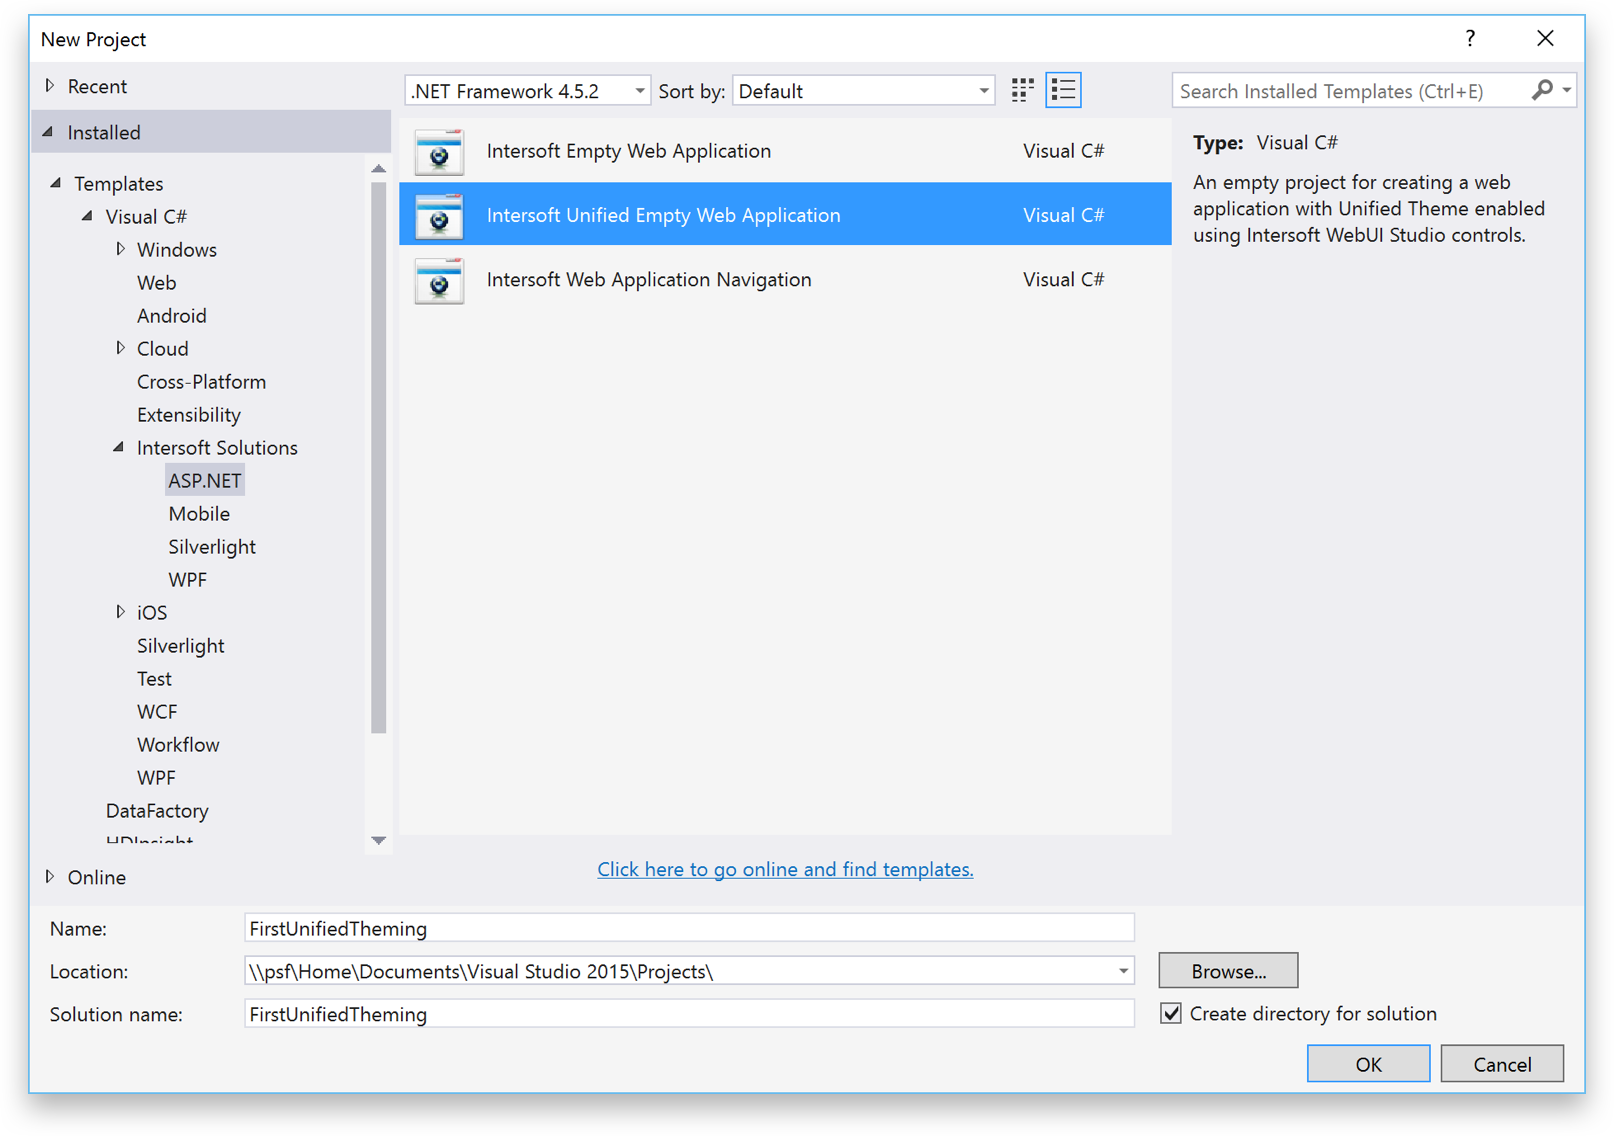
Open up Visual Studio and create a new Unified Theming project by selecting Visual C#, Intersoft Solutions, ASP.NET, Intersoft Unified Empty Web Application, as shown in the illustration below. Let’s call this project FirstUnifiedTheming and hit OK.
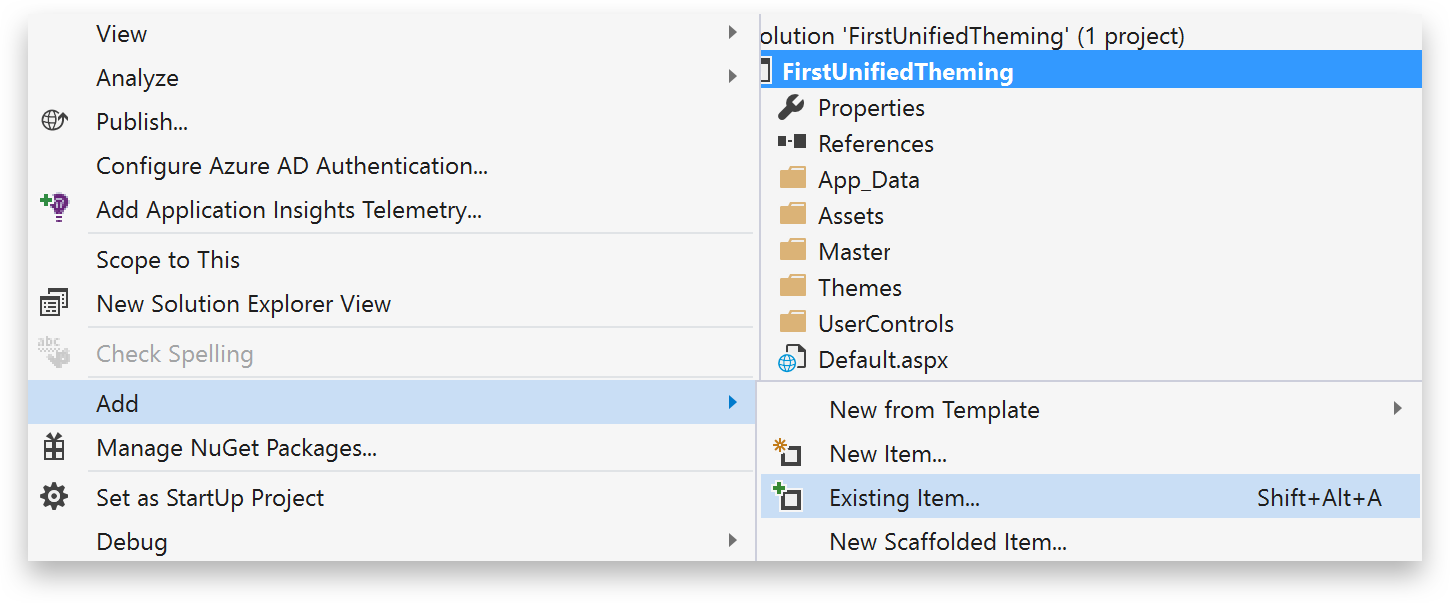
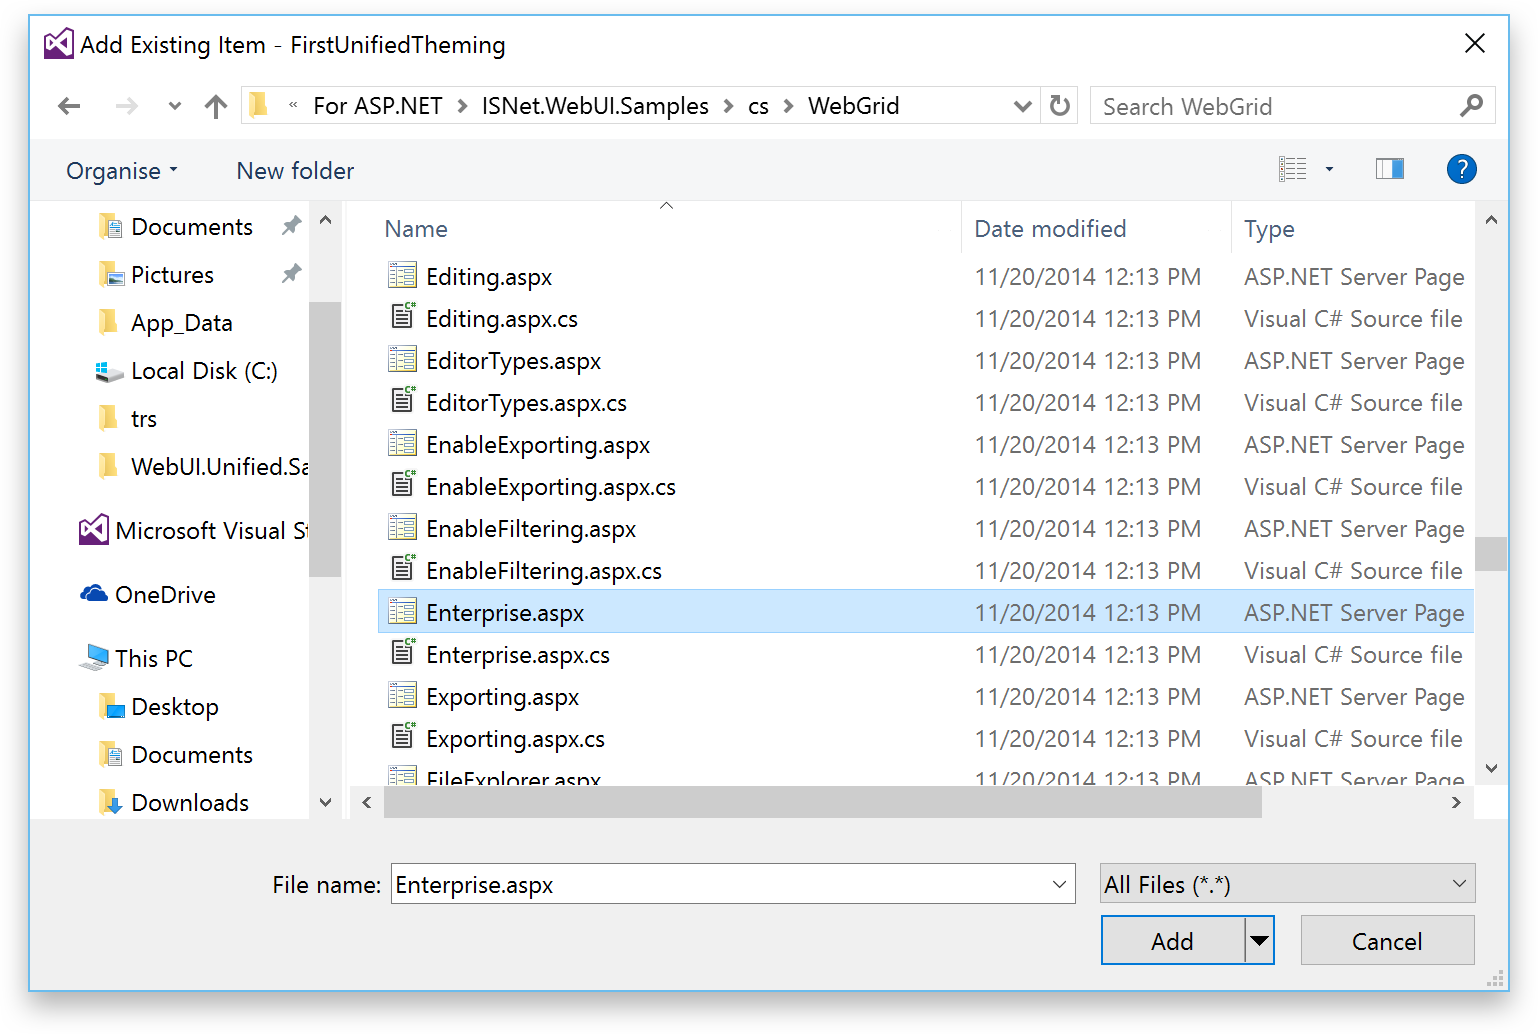
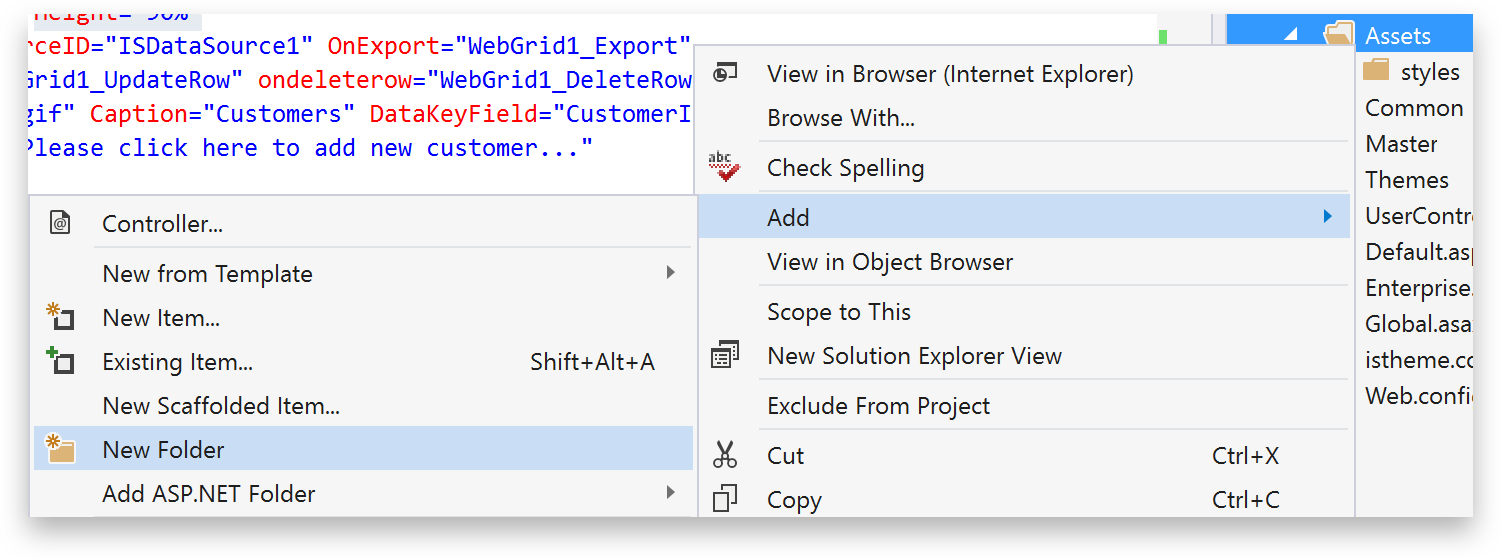
Let’s import the Enterprise.aspx from the old sample to our project. To do this, right-click on your solution, then choose Add, Existing Item.
Navigate to C:\Program Files (x86)\Intersoft Solutions\Samples\For ASP.NET\ISNet.WebUI.Samples\cs\WebGrid and select Enterprise.aspx. Just select the .aspx file and its code-behind will be automatically added as well.
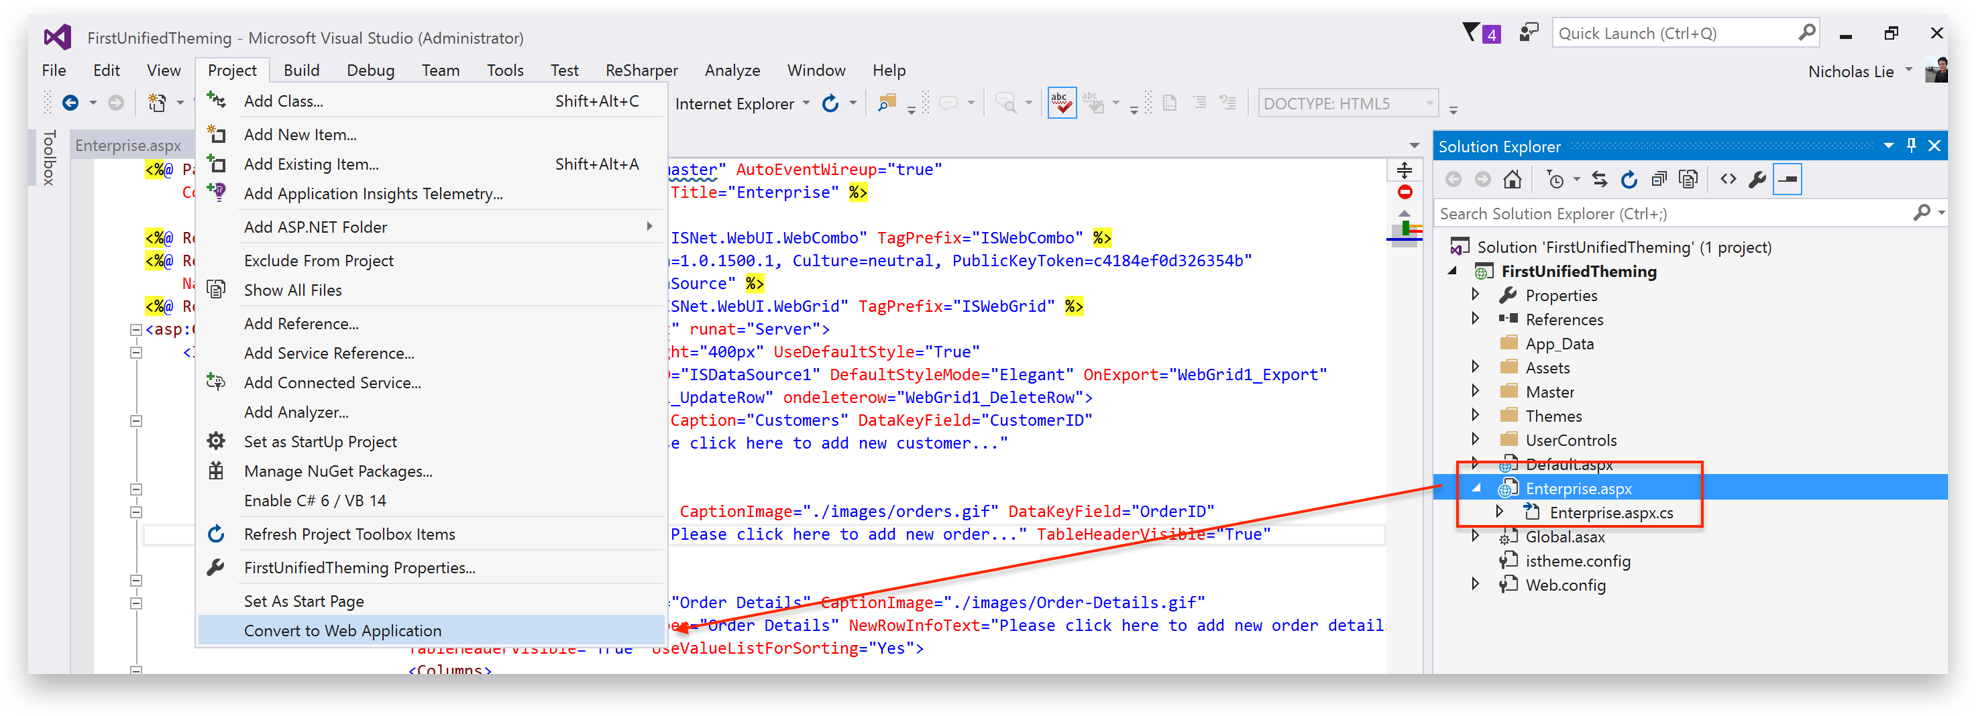
Now that you have the file imported, we need to convert it so that it will be compatible with Web Application. Select the file, then go to Project, then choose Convert to Web Application as shown below.
Removing Unnecessary Styles
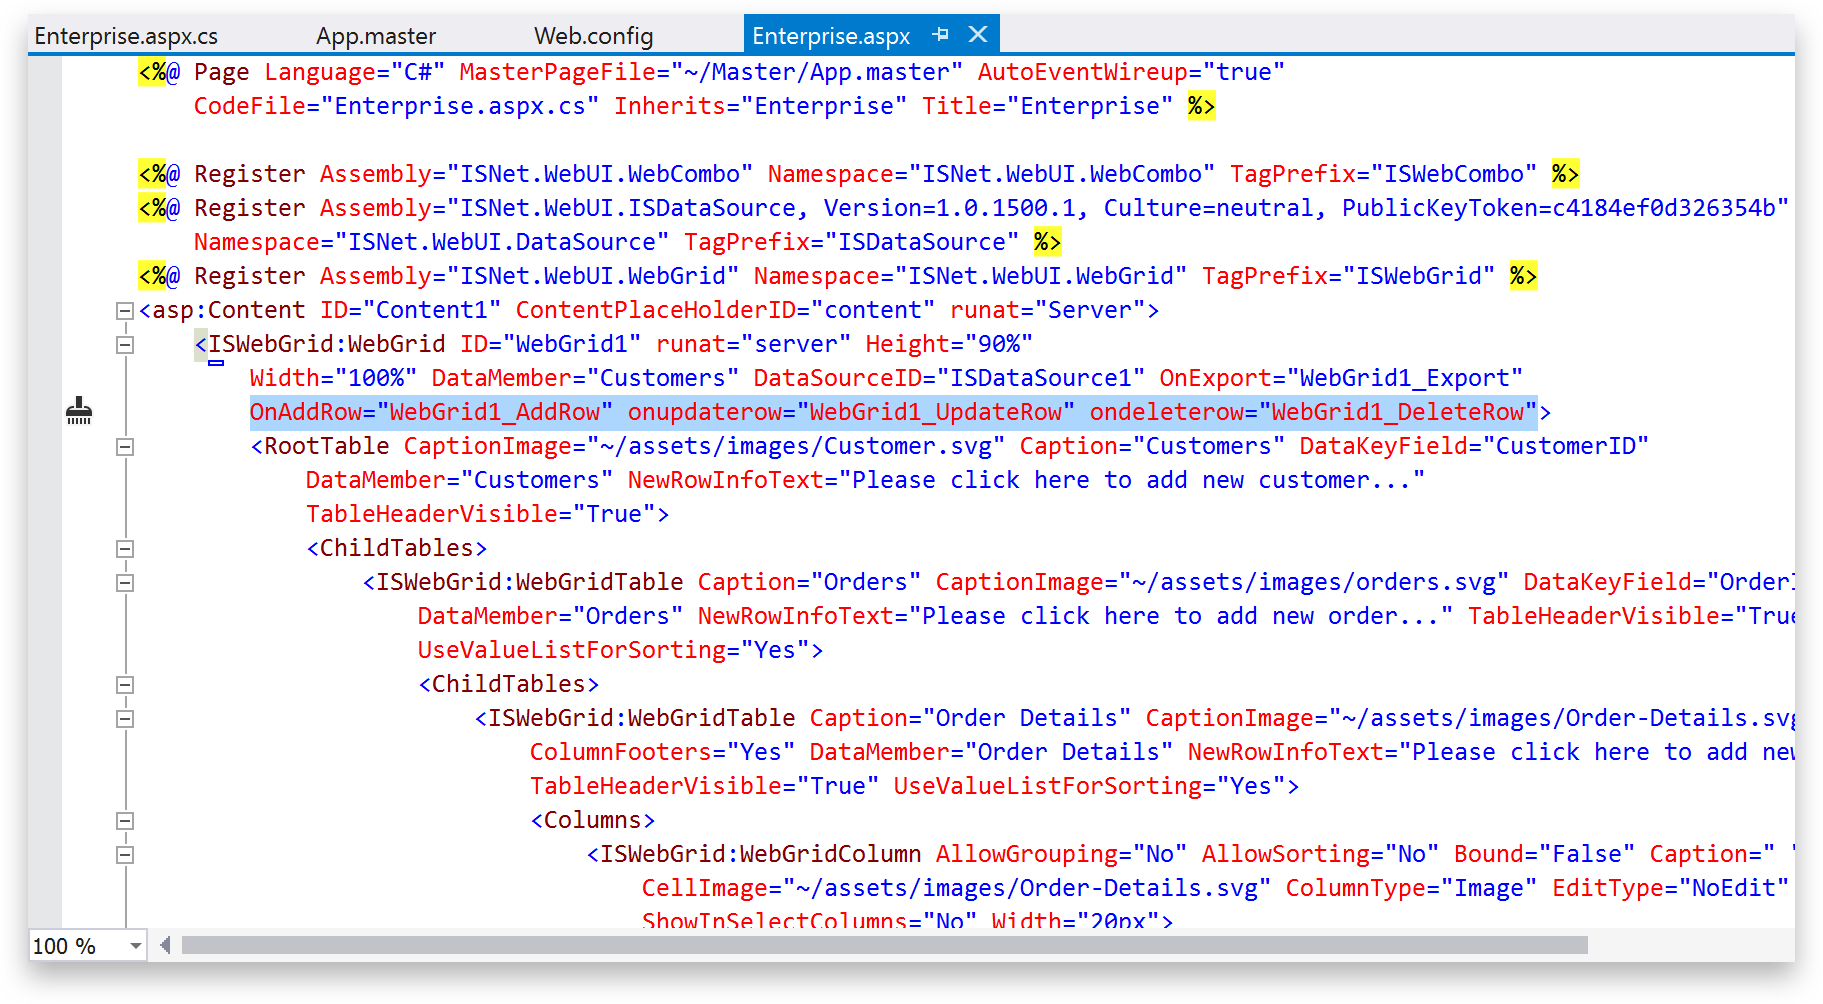
By default, the Unified Theming project template provides a handy App.master file contained in the Master folder. So, we can use this master file for our imported sample. Change the MasterPageFile for the Enterprise.aspx from ./DefaultMaster.master to ~/Master/App.master.

Next, search for this file that contains any “style” attributes. To do this, press Ctrl+F on your keyboard and search for “style” (without the quotes).
Here are the list of attributes / elements that you have to remove within this file:
-
UseDefaultStyle=”True”
-
DefaultStyleMode=”Elegant”
-
<CellStyle HorizontalAlign=”Right”></CellStyle>
- <CellStyle HorizontalAlign=”Center”></CellStyle>
Note that these are the attributes contained in this file. In your existing project there might be more “style-related” attributes that you need to remove.
Next, let’s fix the code-behind so that this project is compile-able. To do this, open Enterprise.aspx.cs, and delete this line.
using Intersoft.SampleFramework.V2009;
Also remove, the three methods: WebGrid1_AddRow, WebGrid1_UpdateRow, WebGrid1_DeleteRow. Then, in Enterprise.aspx, remove this line.
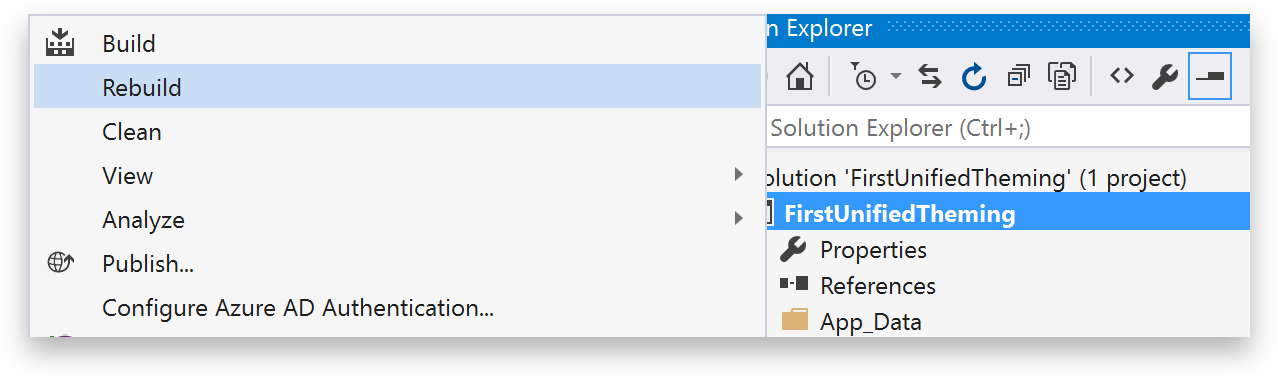
Since this is a Web Application project, not a Web Site project, you’ll need to rebuild it once before you can preview the result in the browser. To rebuild the project, right-click on the project/solution, and hit Rebuild.
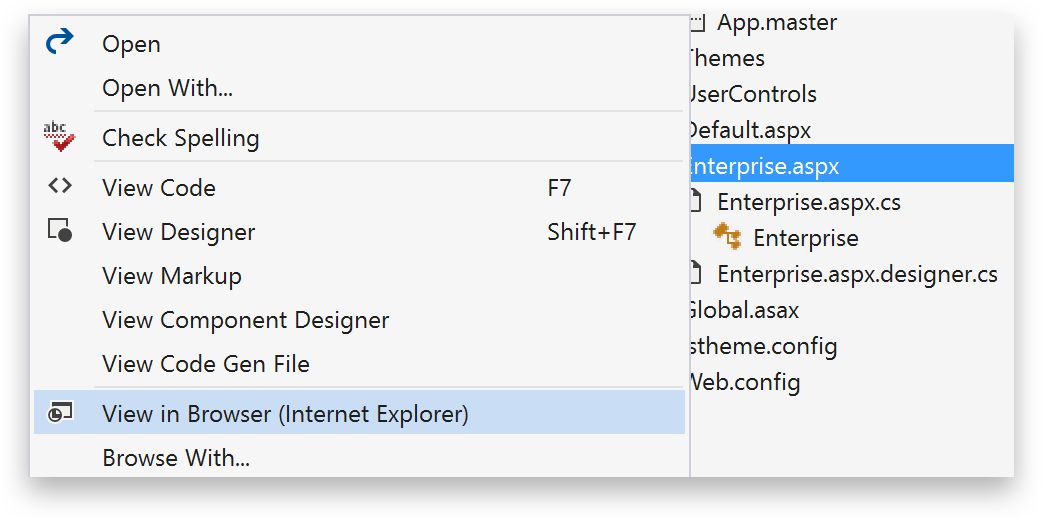
After the rebuild process is done, let’s try viewing this project in the browser. Right-click on the Enterprise.aspx file and choose View in Browser.
When you run the project, you’ll get the following error.
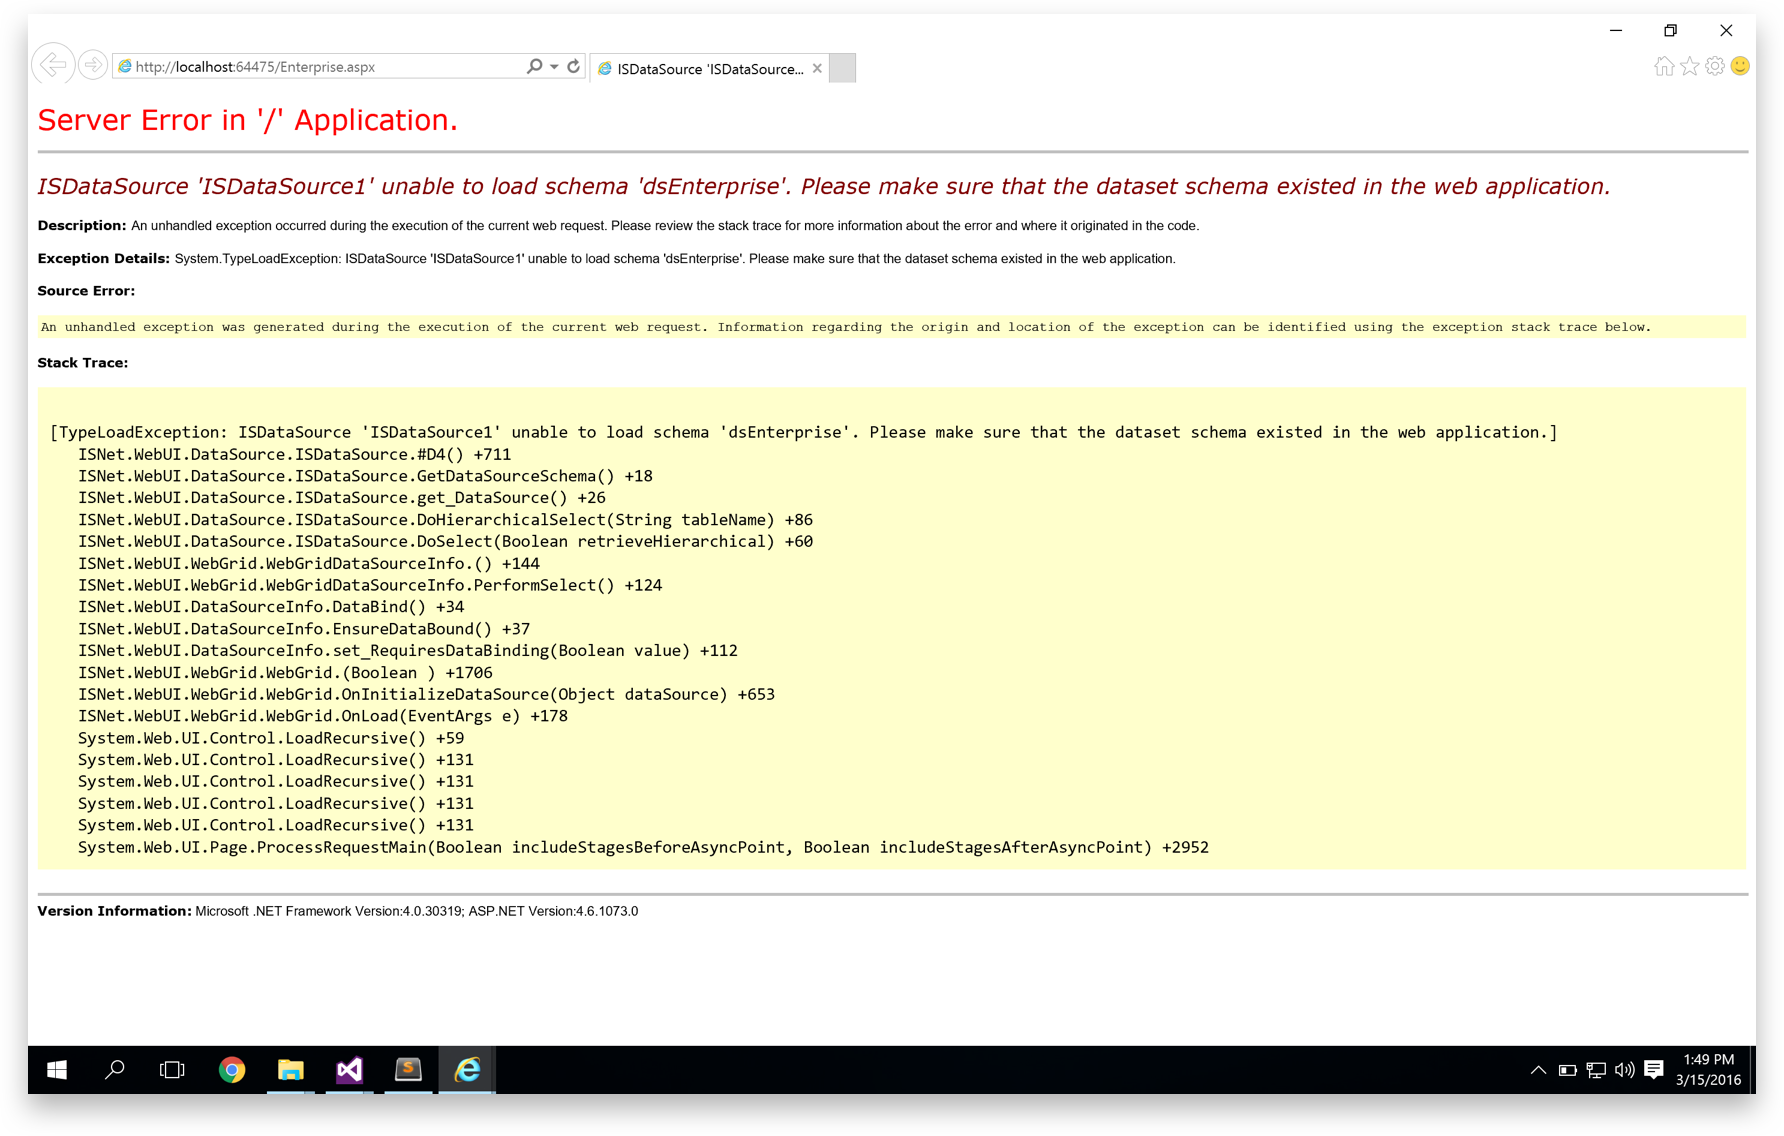
This indicates that the WebGrid was unable to connect with the data source. Let’s resolve this by adding the necessary database file and modifying the Web.config‘s connection string.
Adding the Database
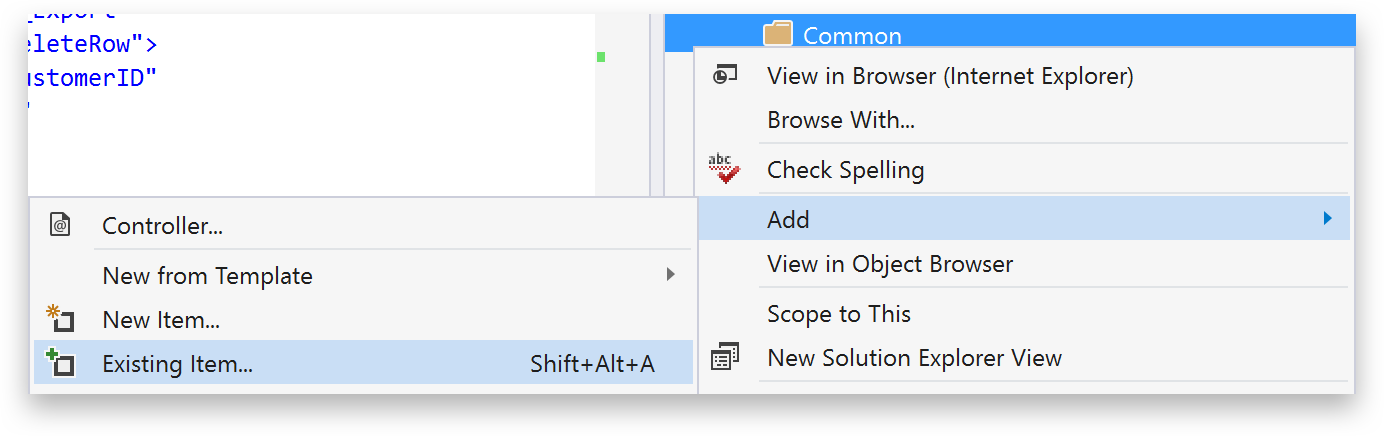
To make our project’s file organization neat and less cluttered, let’s create a new folder called Common at the root of the project. Right-click on the project and select Add, New Folder.

Give it a name of Common. Let’s add the database file used for the project. Right-click on the newly-created Common folder and choose Add, Existing Item.
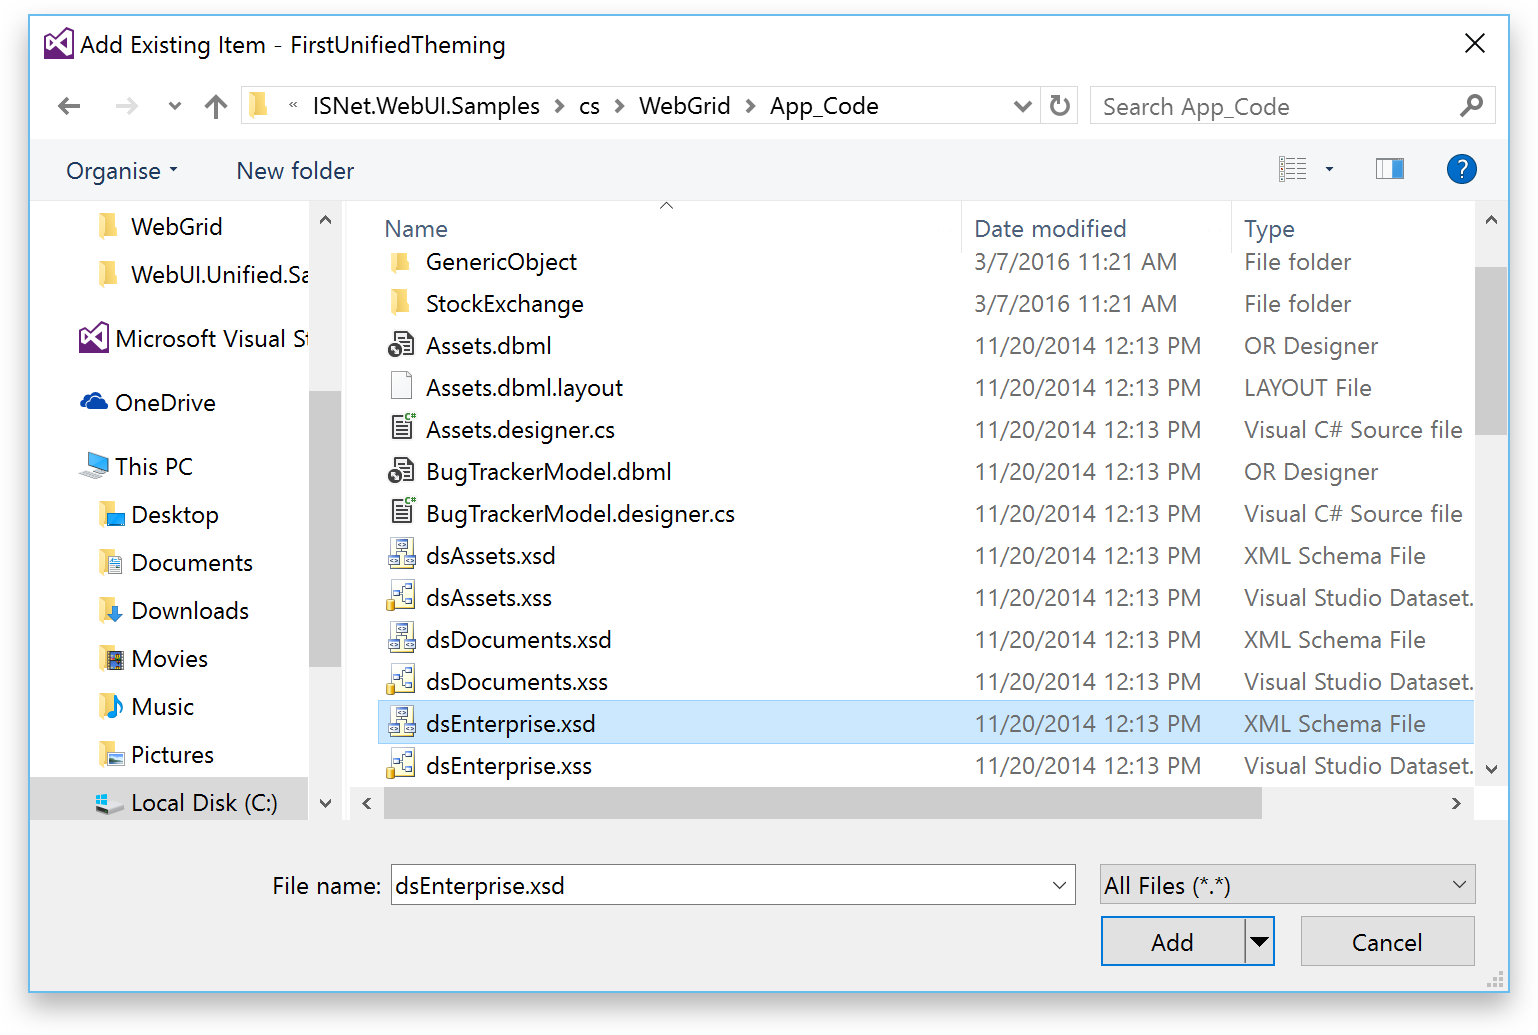
Choose the file named dsEnterprise.xsd contained in the C:\Program Files (x86)\Intersoft Solutions\Samples\For ASP.NET\ISNet.WebUI.Samples\cs\WebGrid\App_Code.
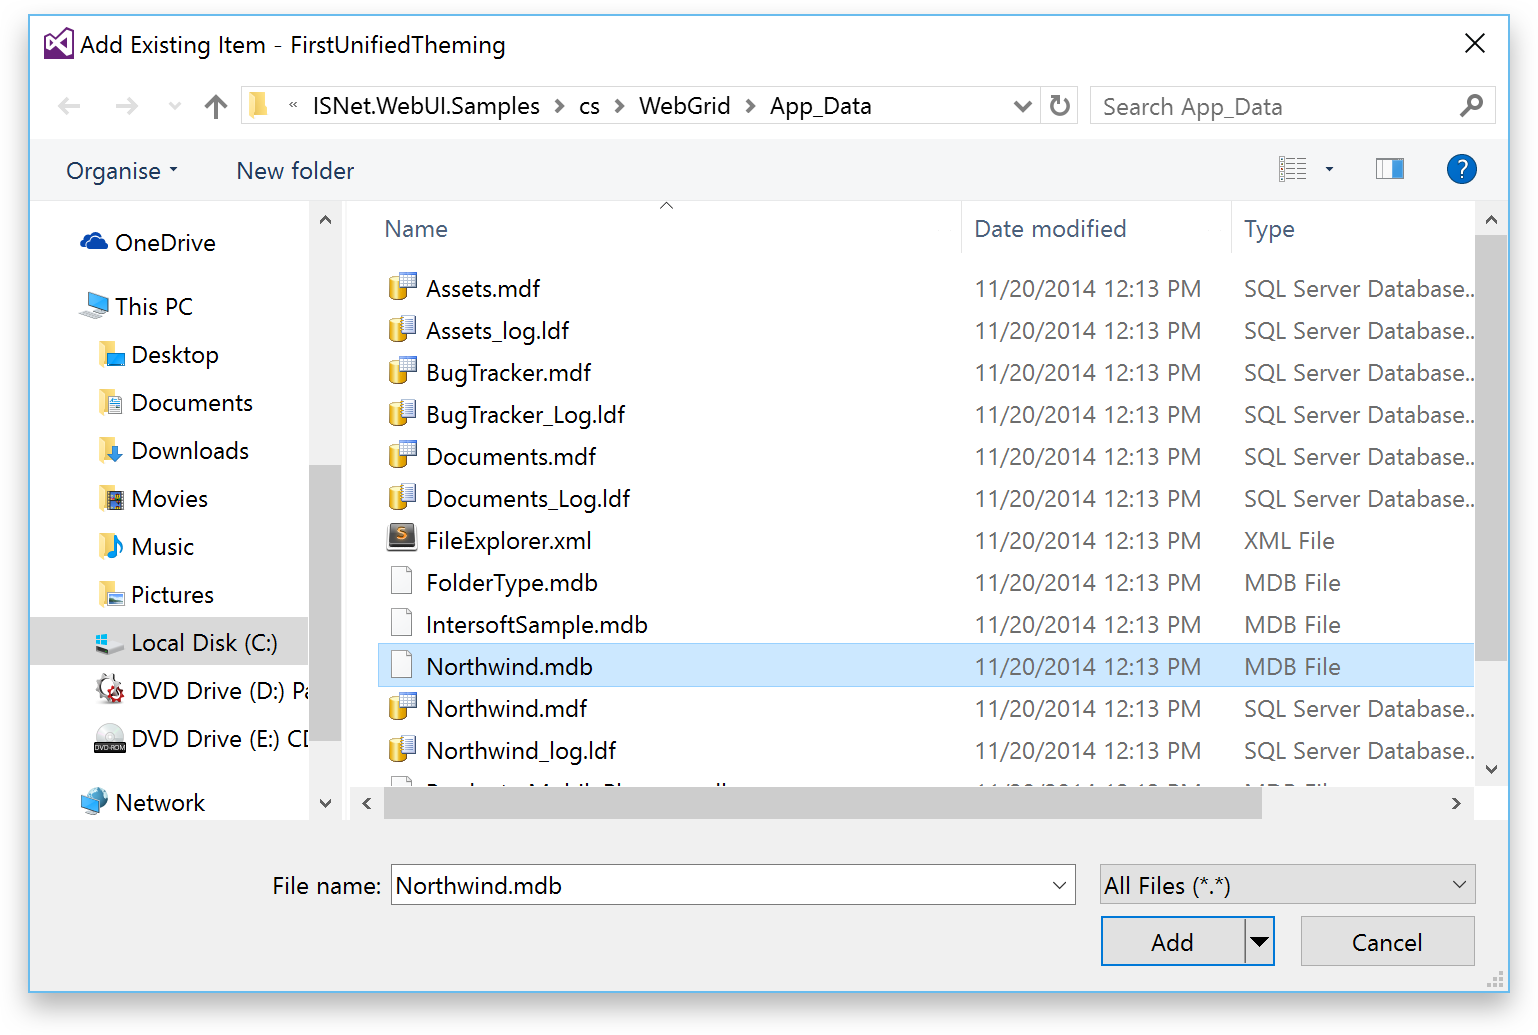
Repeat the process for AppData folder. Right-click the AppData folder, choose Add, Existing Item. Then choose Northwind.mdb file contained in C:\Program Files (x86)\Intersoft Solutions\Samples\For ASP.NET\ISNet.WebUI.Samples\cs\WebGrid\App_Data.
Next, we need to modify the SchemaType and TypeName of ISDataSource so that it will point to the correct database file. To do this, open the Enterprise.aspx file and perform a Replace All for the following string: SchemaName=”dsEnterprise (the unclosed quotes are intentional) to SchemaName=”FirstUnifiedTheming.Common.dsEnterprise (again, the unclosed quotes are intentional).
Repeat the process one more time for the TypeName. Search for TypeName=”dsEnterprise and replace it with TypeName=”FirstUnifiedTheming.Common.dsEnterprise. Save the file.
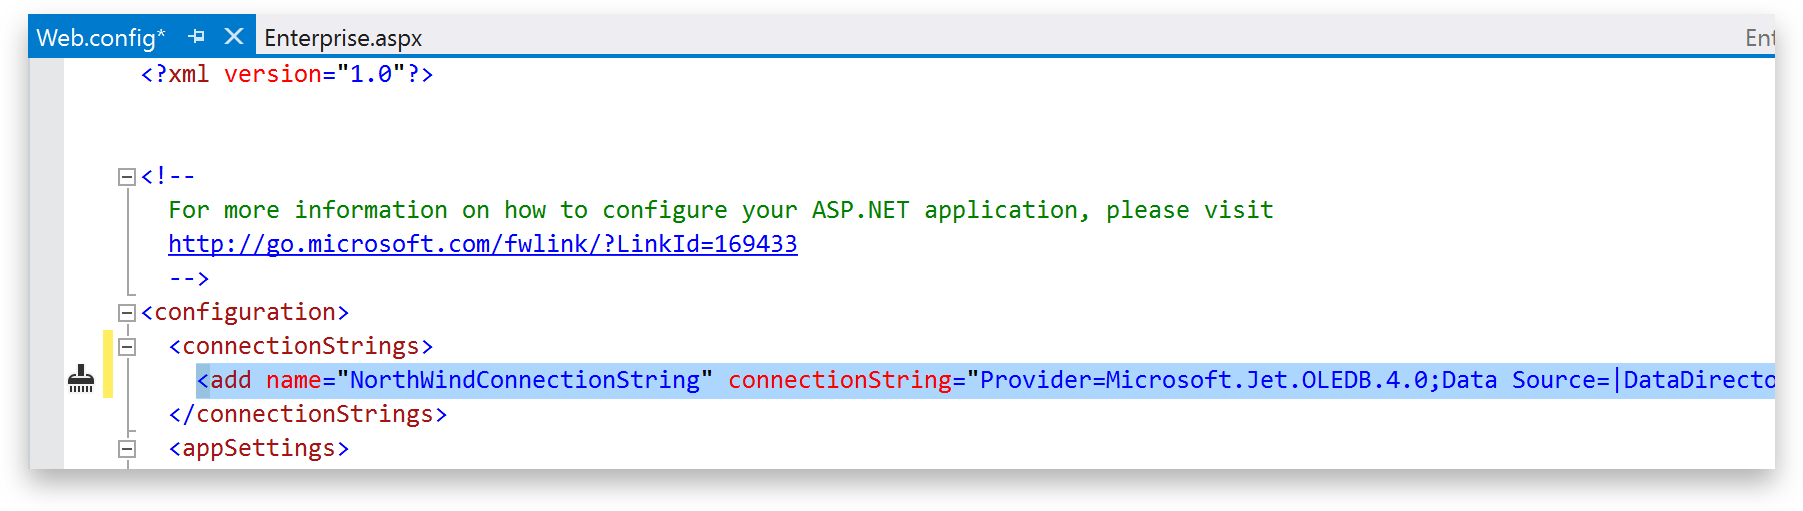
Lastly, let’s add a connection string in the Web.config file for this a new connection the Northwind database. Open up Web.config and add the following connection string to the ConnectionStrings node:
<add name=“NorthWindConnectionString“ connectionString=“Provider=Microsoft.Jet.OLEDB.4.0;Data Source=|DataDirectory|\NorthWind.mdb;Persist Security Info=True“ providerName=“System.Data.OleDb“/>
You’re Almost There.
We’ve roughly finished the migration, but it’s still missing a few final touches. For now, refresh your browser to see the result.
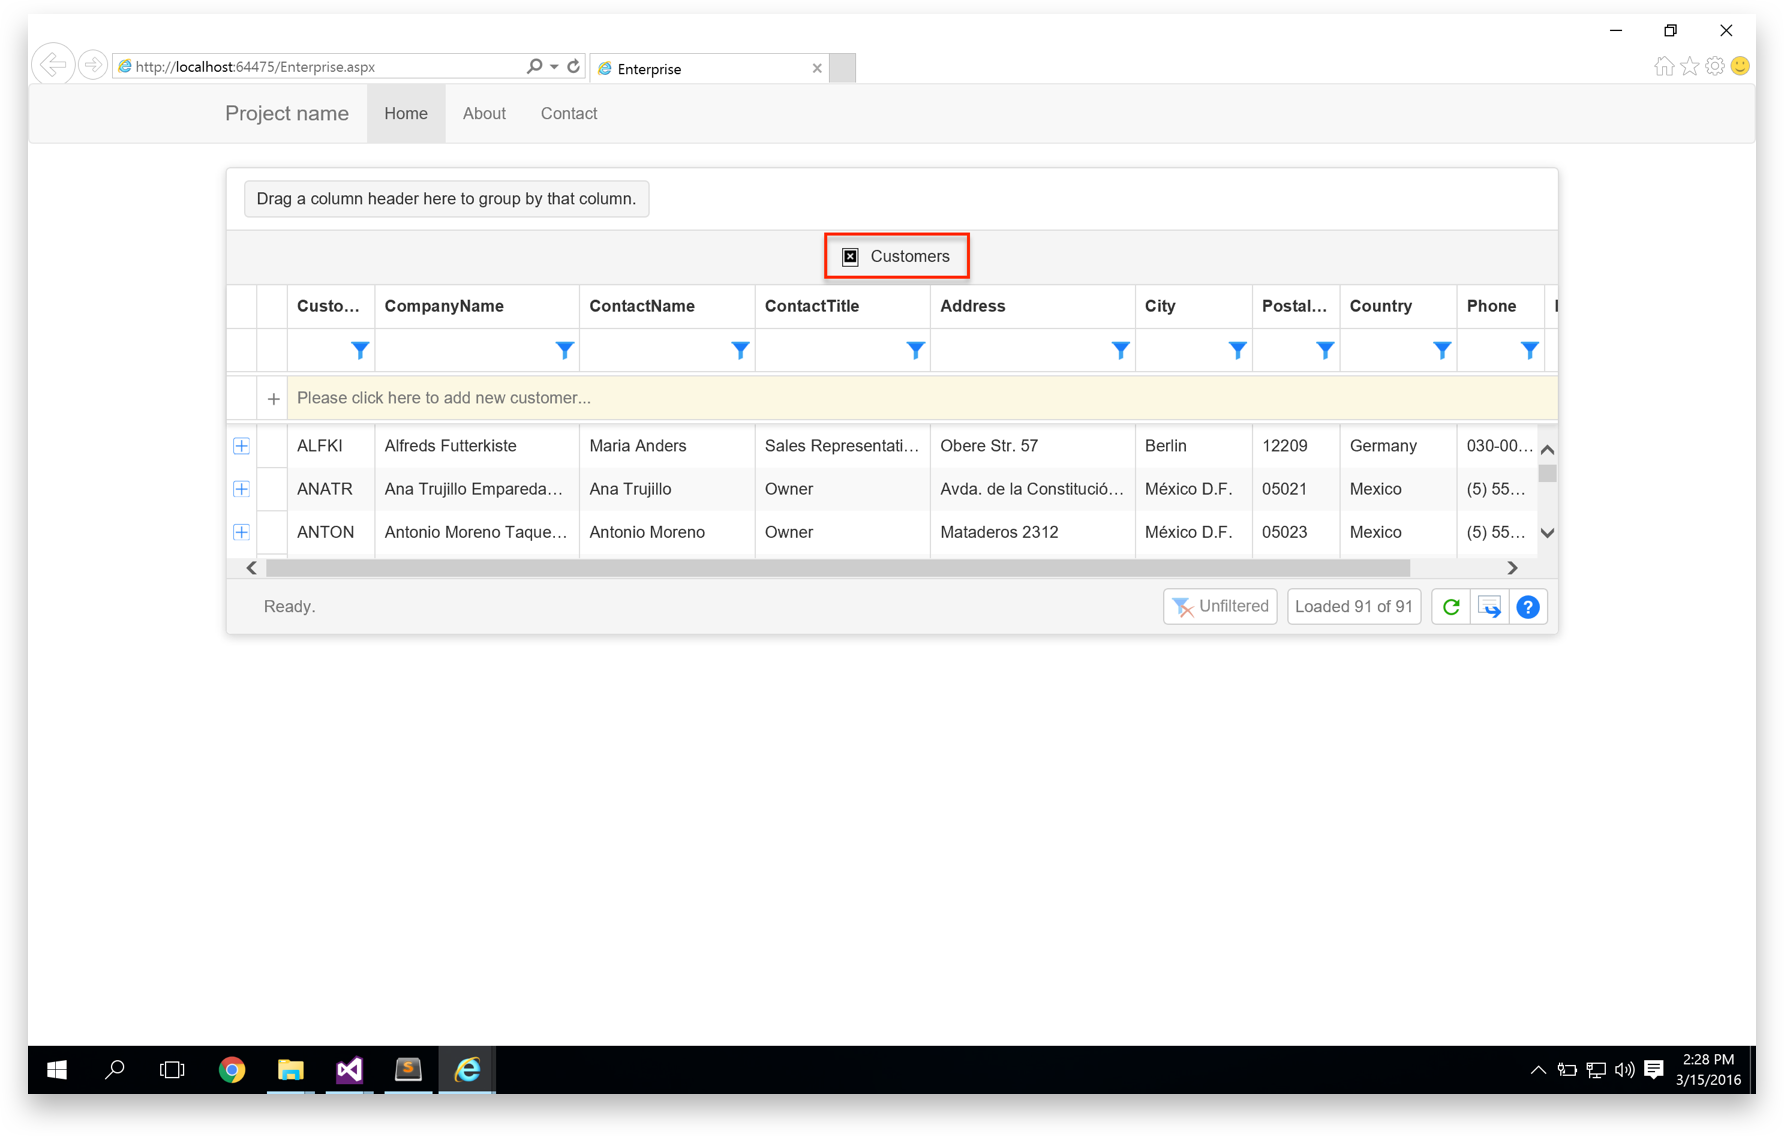
As you can see, the WebGrid is now applied with Unified Theming. But there are are still two issues left:
- Adjusting the height of the WebGrid
- Providing the missing icons.
Let’s address these issues. To adjust the height of the WebGrid, you can easily do so by modifying the Height attribute of the WebGrid inside the Enterprise.aspx file. Give it a good value, perhaps 90%.

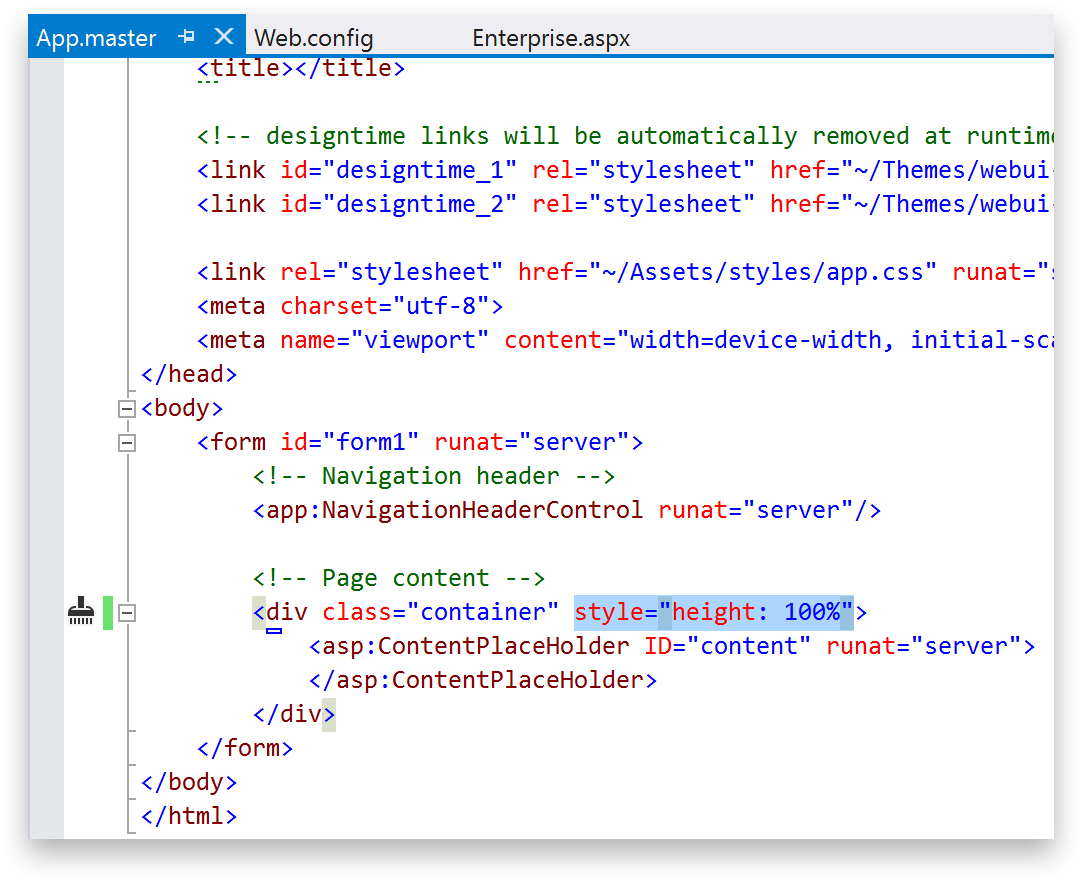
We also need to modify the height of the parent container to 100%. To do this, open up App.master inside the Master folder and add inline-style for the parent container with height set to 100%.
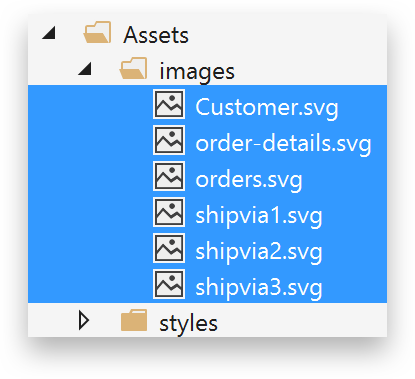
Next, let’s provide the missing image icons. To do this, right click on the Assets folder and select Add, New Folder.
Give it a name of images. Add the following images from this folder C:\Program Files (x86)\Intersoft Solutions\Samples\For ASP.NET\WebUI.Unified.Samples\assets\images:
- Customer.svg
- order-detail.svg (rename this file to order-details.svg)
- orders.svg
- shipvia1.svg
- shipvia2.svg
- shipvia3.svg
You should have the following images as follows.
Lastly, perform a Find and Replace for the following string inside the Enterprise.aspx file. Replace ./images with ~/assets/images.
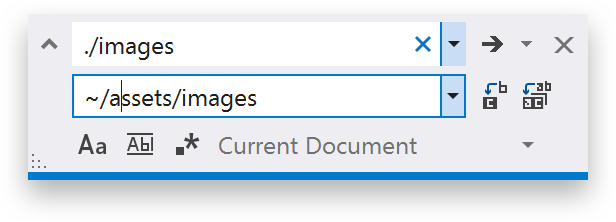
Then, another Find and Replace for .gif to .svg. Save the file, rebuild the project and refresh your browser.
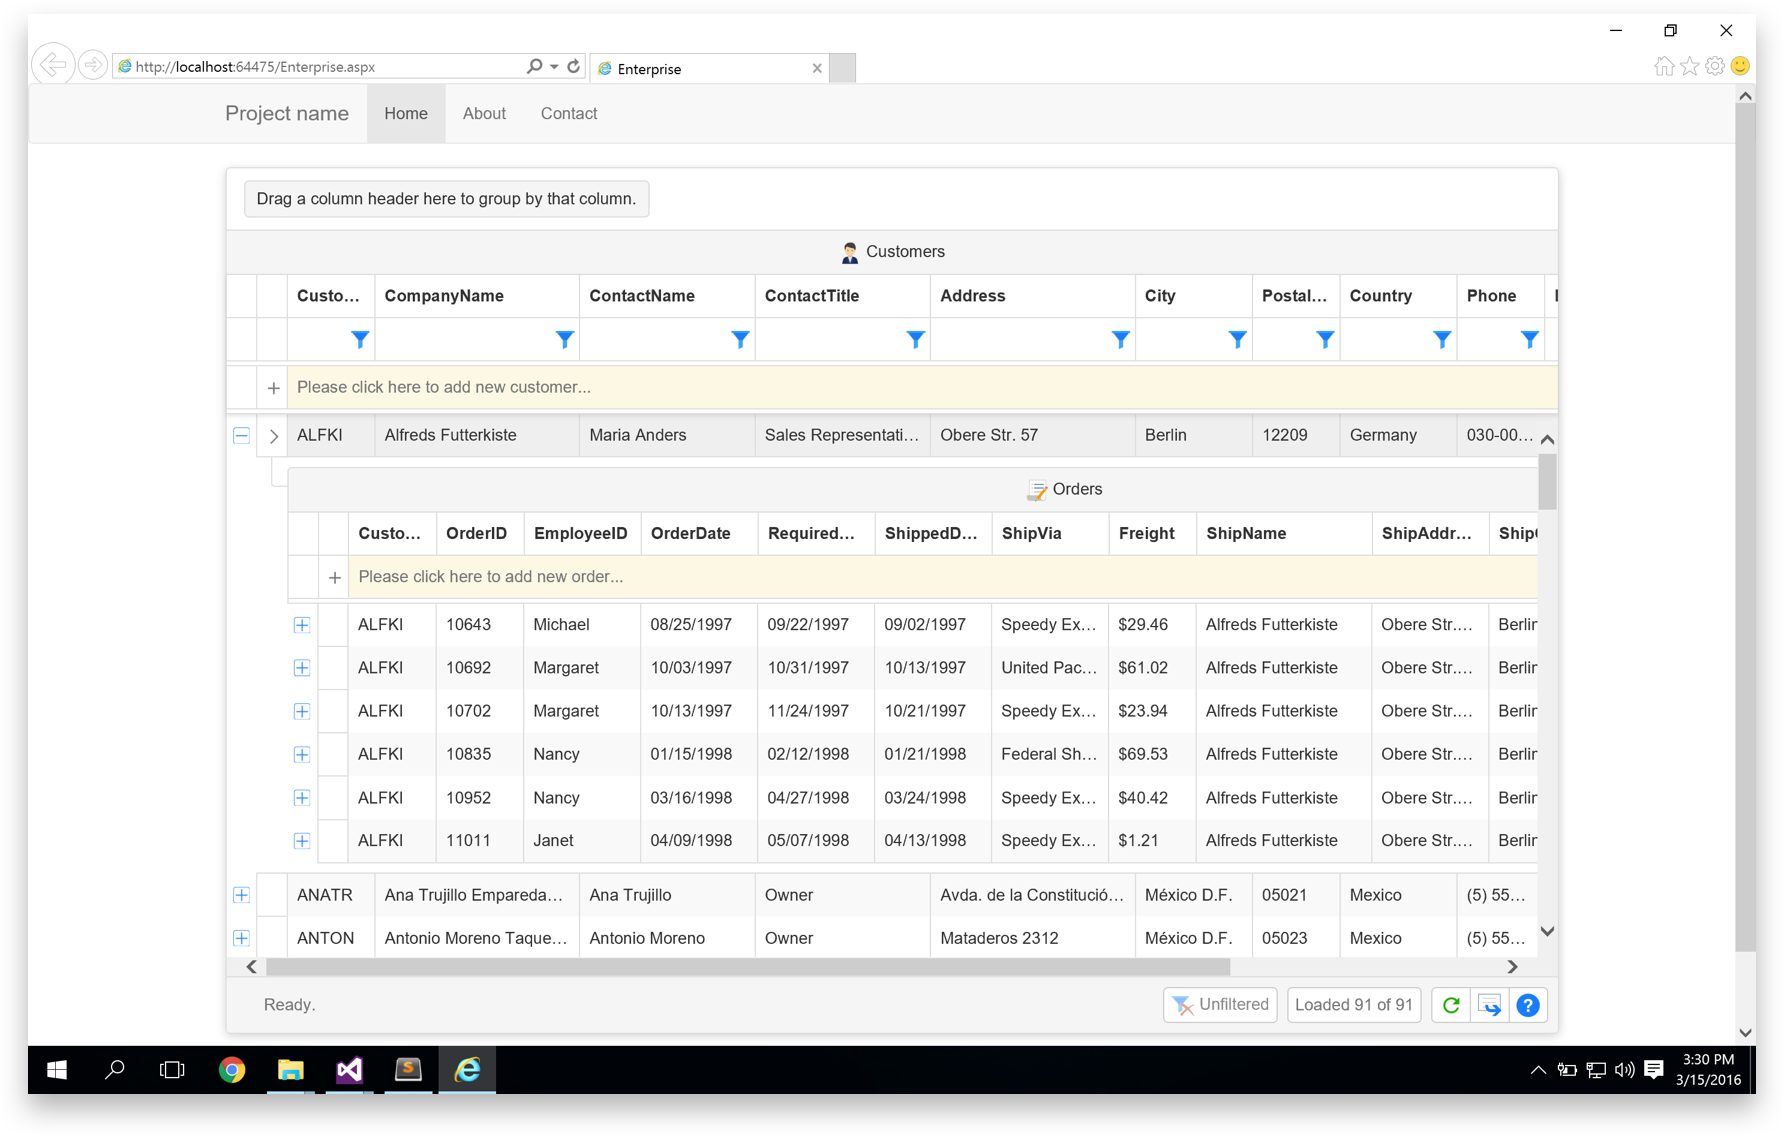
We’ve successfully set the WebGrid height to fill 90% of the parent container, in which the parent container has been set to 100% height, as well as providing the correct SVG icons for the WebGrid.
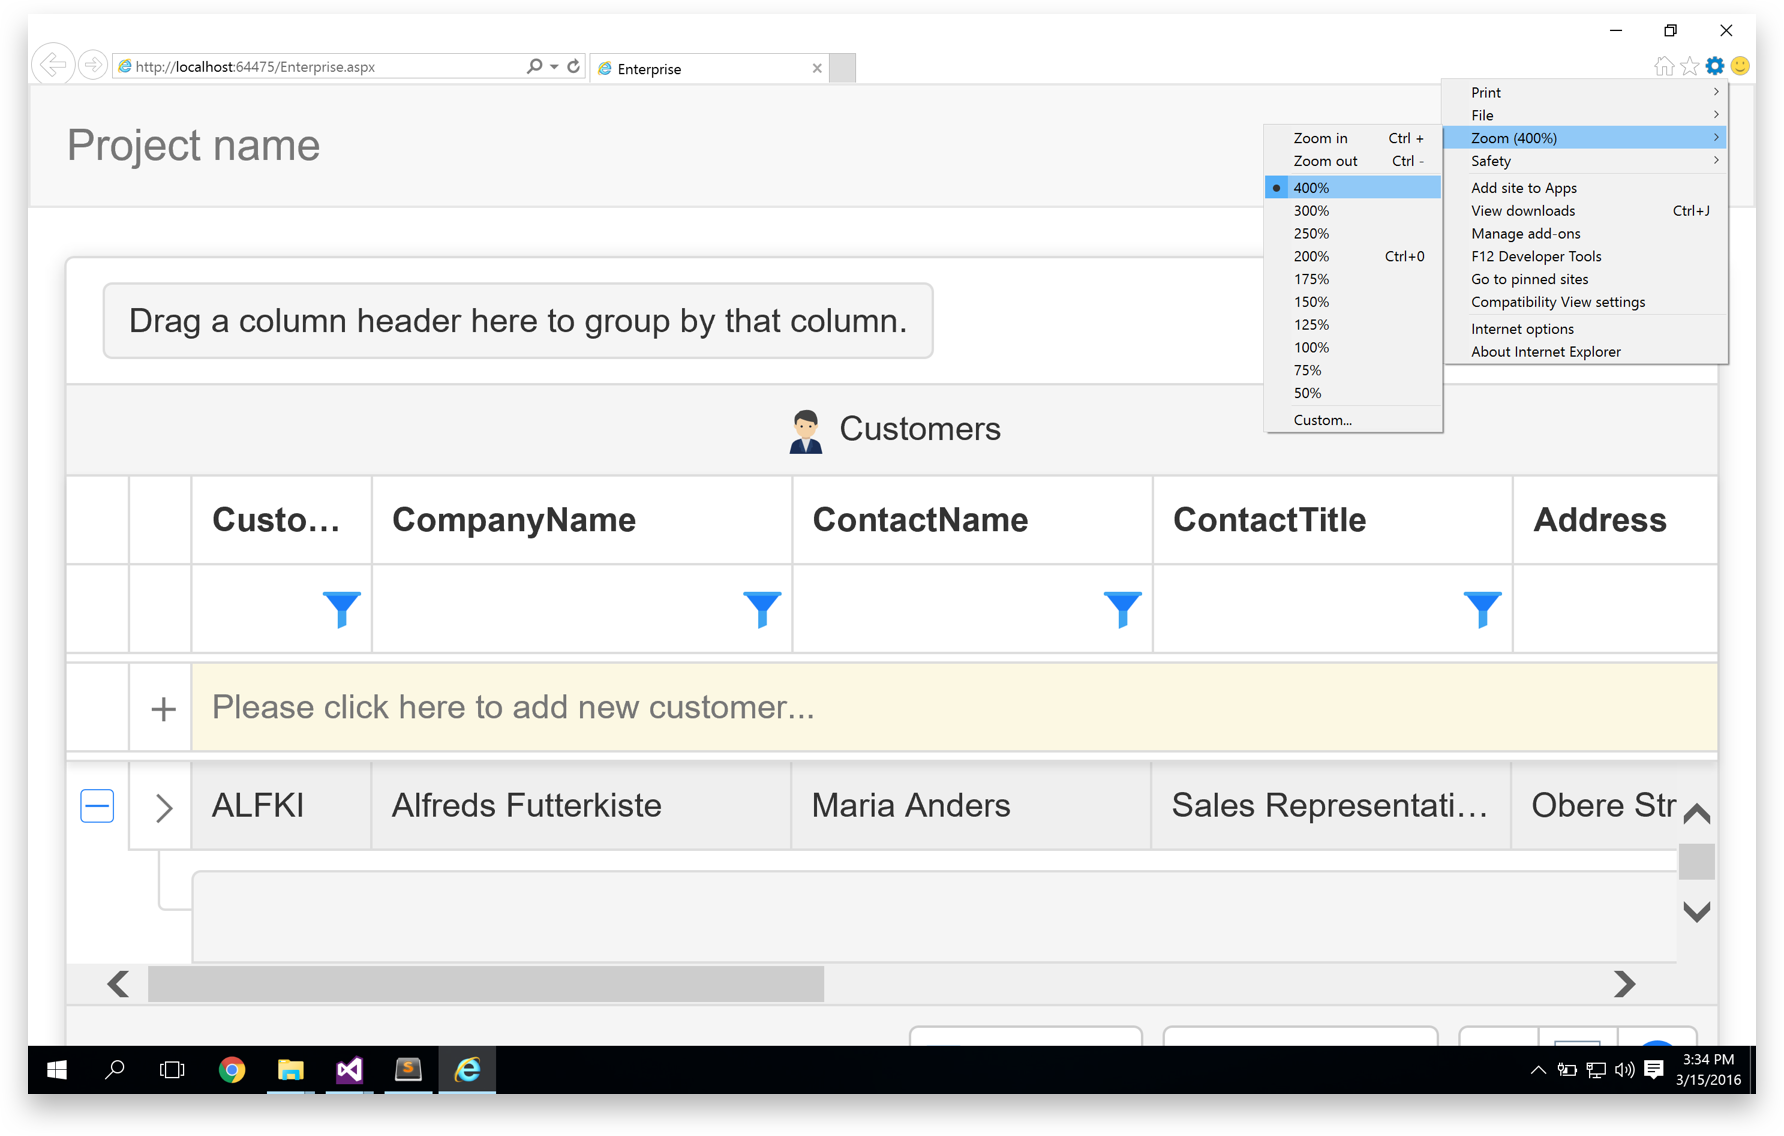
One cool thing about the SVG icons are they’re actually vector icons (SVG is a short form of Scalable Vector Graphics), which will retain its crispiness and hi-res colors when viewed in any devices with varying screens resolutions. To do this, try bumping up the zoom level to 400% or higher.
Conclusion
As you can see, adopting the Unified Theme in your project is quite simple and easy. To learn more about Unified Theming, I highly recommend you to explore the documentation about Unified Theming. You can find the link to the finished sample here.
In this post, we’ve learned how to create a Unified Theme project in the shortest and fastest manner using the project templates. In smaller projects, this approach is feasible, but not for larger projects. If you wish to focus solely on migrating your project to Unified Theming, you can follow this documentation: Applying Unified Modern Theme in WebUI Application.
You can also find local working samples once you’ve installed Premier Studio 2016 on your computer. To get started quickly with the local samples, please read my previous blog post.
Should you have any questions, feel free to initiate a live chat session with us and our team will get back to you as fast as we can.
Till next post,
Nicholas Lie


