Migrating from Xamarin.Forms to Crosslight App
Many mobile developers who are just starting out with Crosslight often asked us with this question: I have an existing Xamarin.Forms app and would like to get started with Crosslight. How can I do that? This post aims to provide the answer to that question. However, I’d have to be straightforward to you. There’s no easy way, since Xamarin.Forms isn’t compatible with Crosslight at all.
Xamarin.Forms vs. Crosslight
When should you build with Xamarin.Forms? According to Xamarin’s site:
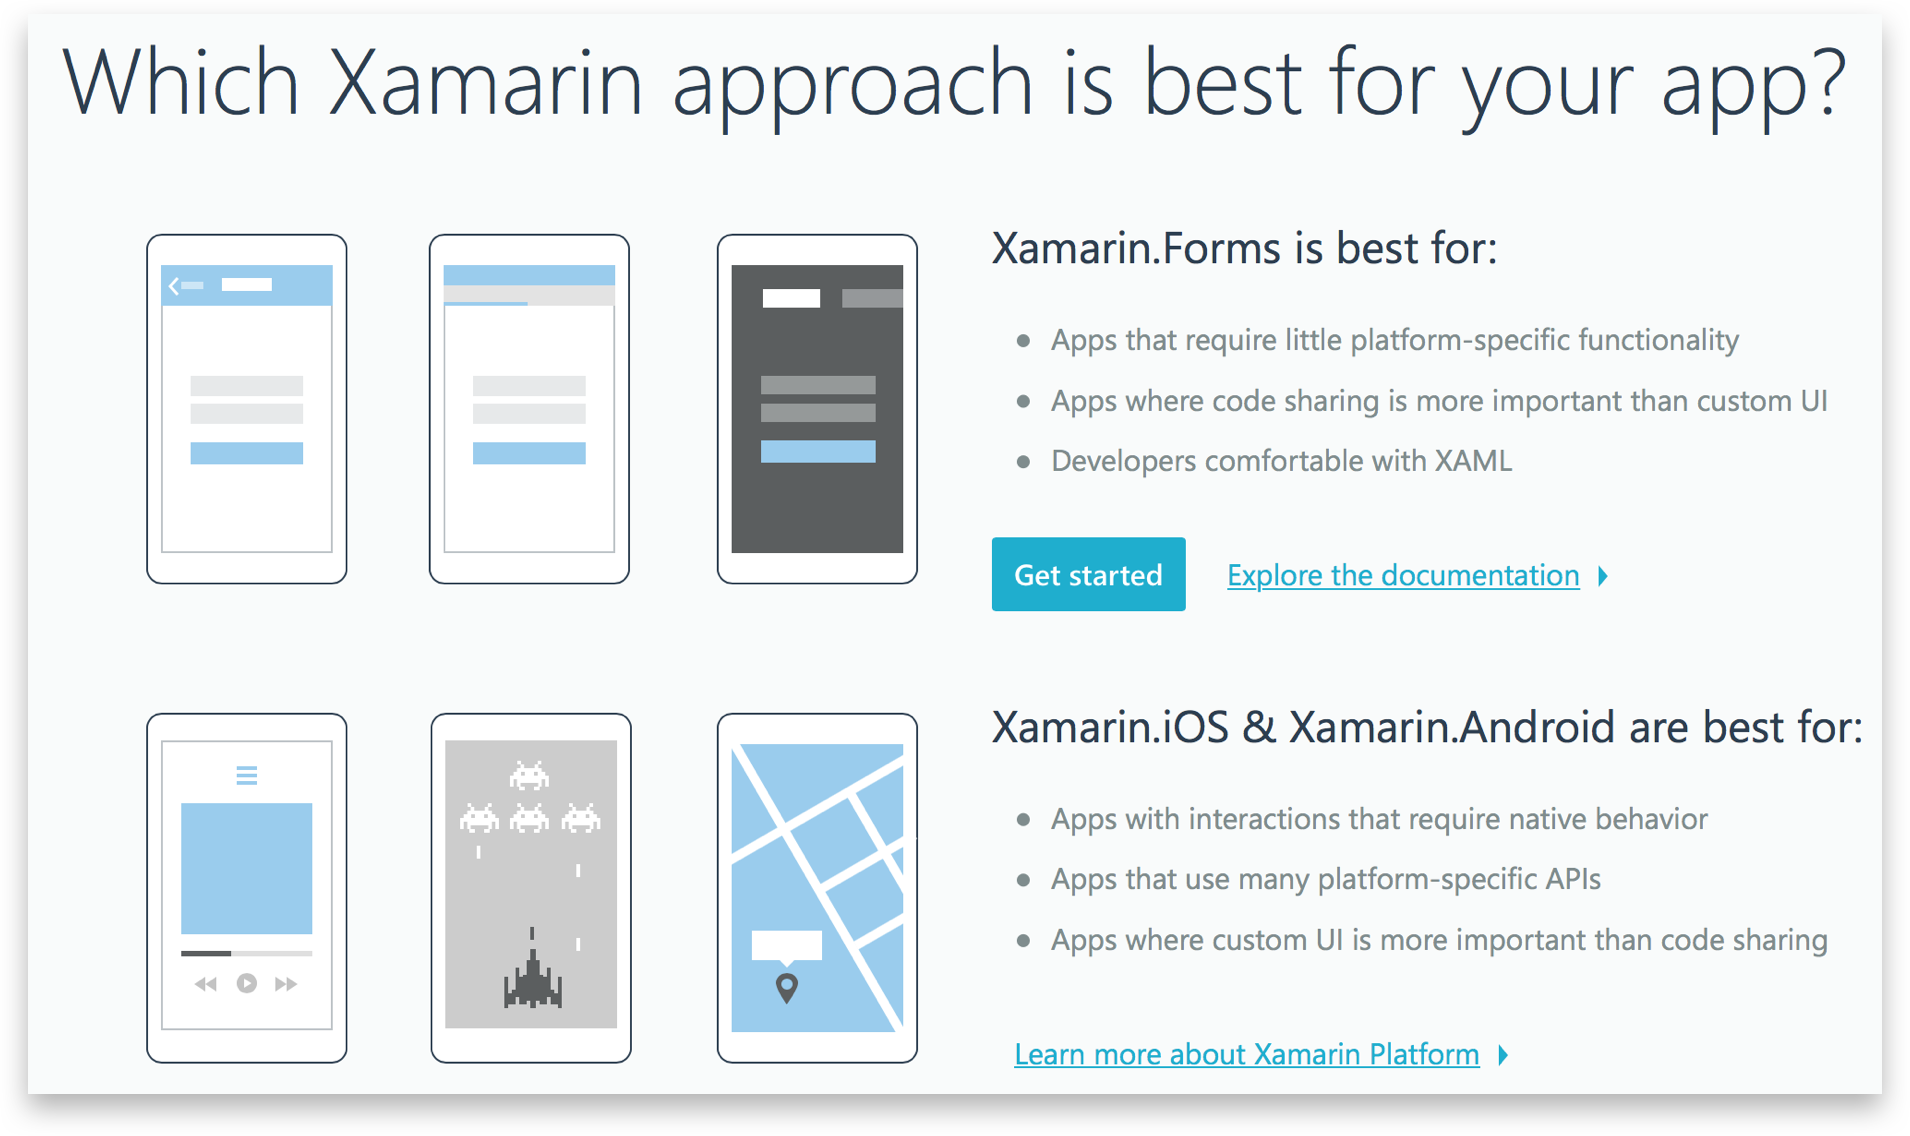
Well, in our opinion, the best time to use Xamarin.Forms is never to use it all. Why? There are two reasons: user experience and design pattern.
The User Experience
Sure, with Xamarin.Forms you can create an app that works. Even though you’re building a simple app that works, developers should at least pay attention to user experience. If the user experience is bad, prepare to receive 4-or-less-stars all over the App Store and Play Store. How bad is the user experience with Xamarin.Forms? Here’s two quick videos taken when running the XamarinFormsSample from Xamarin’s Introduction to Xamarin.Forms. One for Android:
And another for iOS:
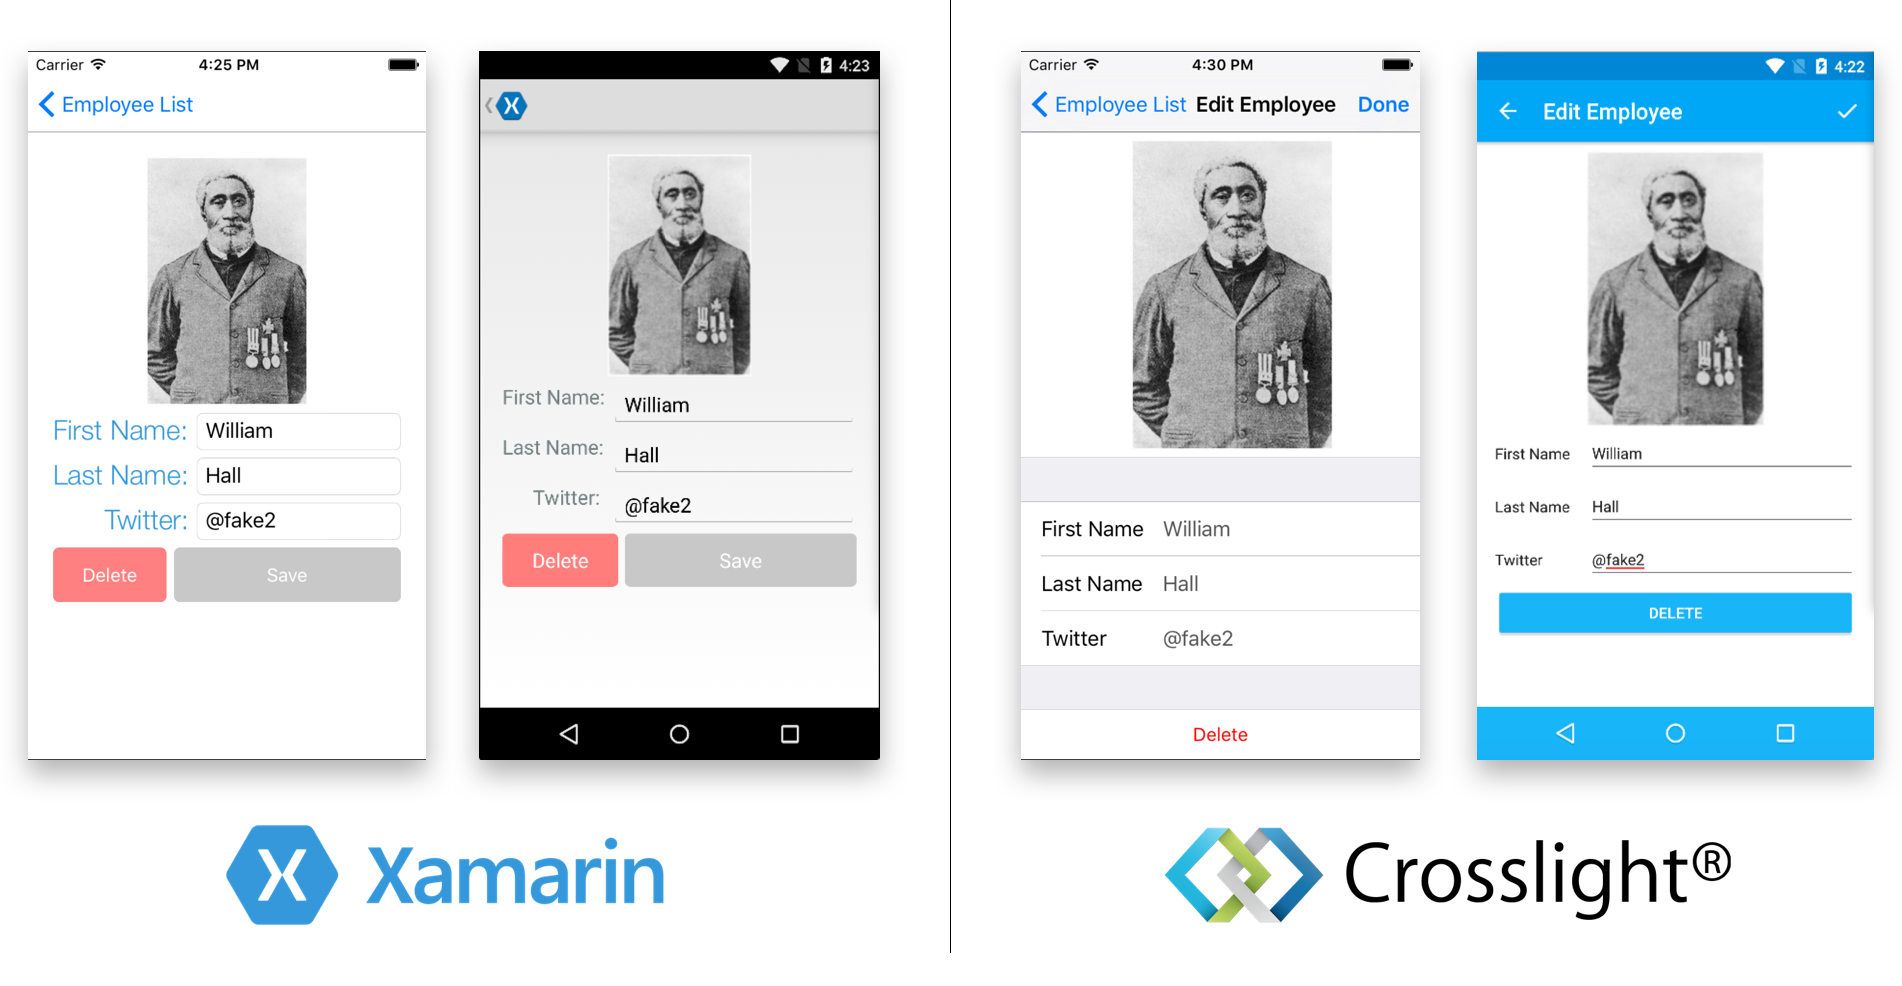
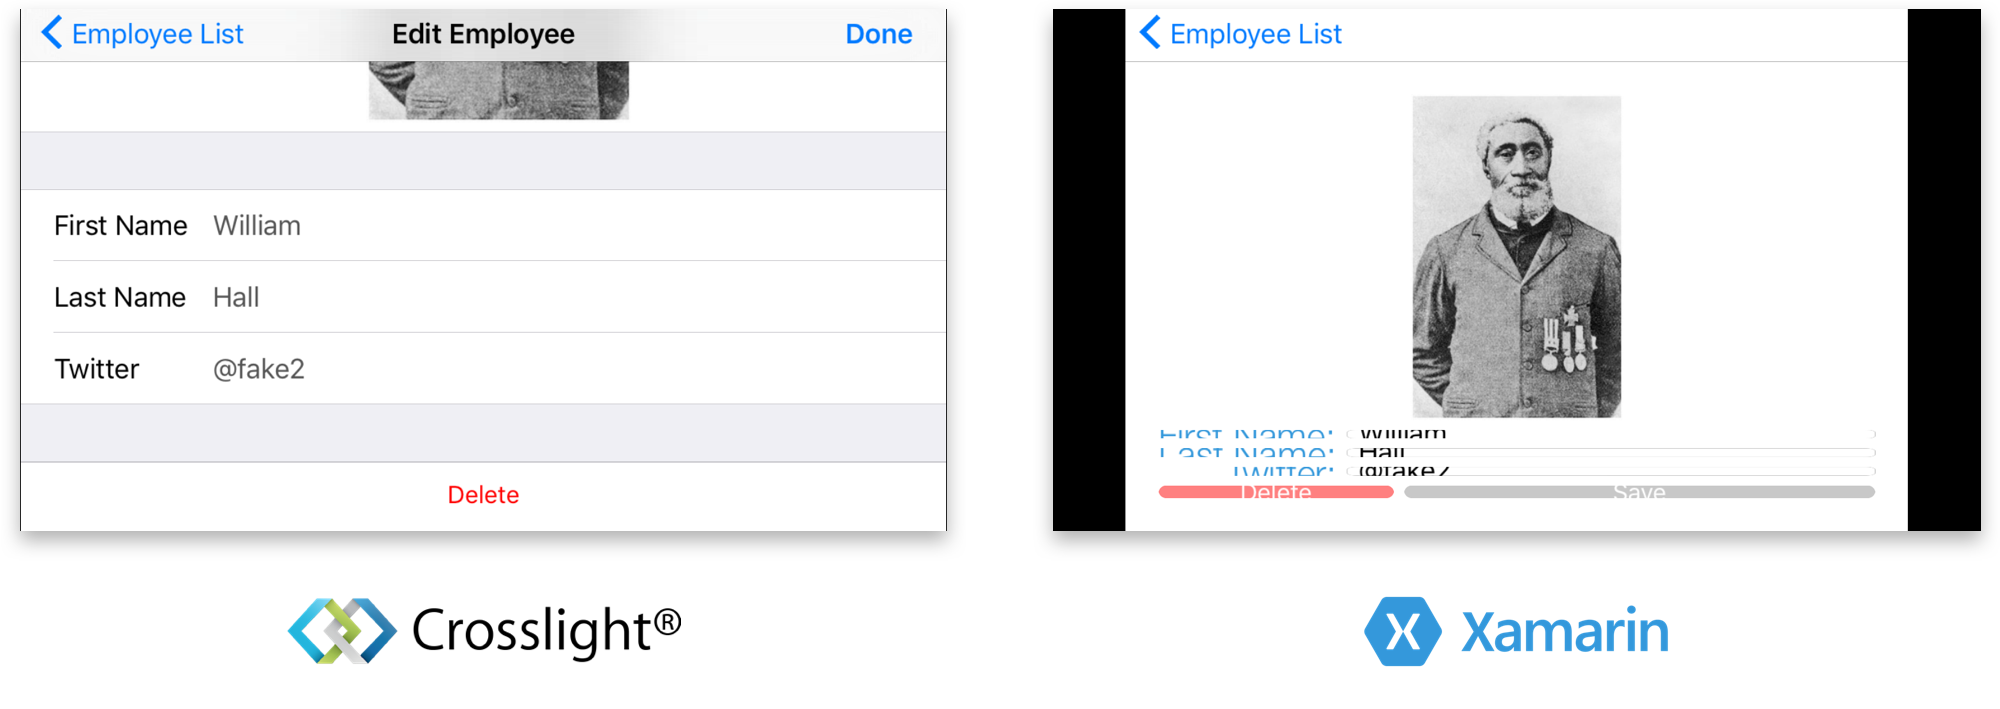
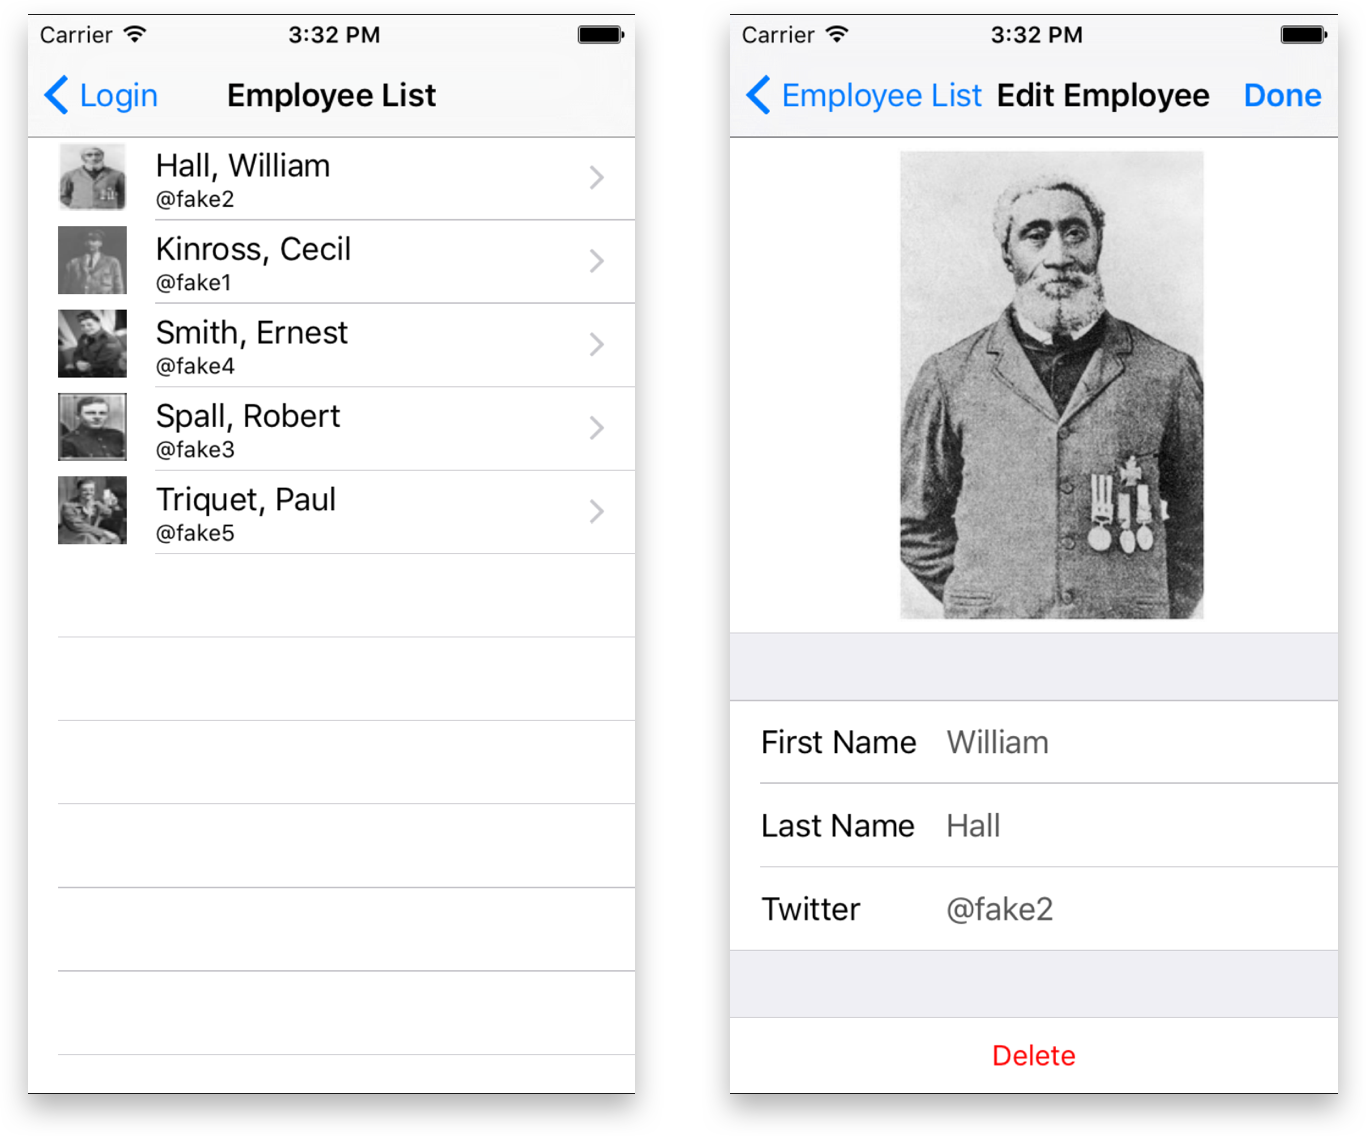
What do you think? I’m not even sure where to begin. Xamarin.Forms tries to generalize the user experience for all platforms, which is not a good idea. When the app is first launched, a blank table view is shown. And then when the + button is tapped, a login form is shown. Why not display a login form at the beginning instead? On iOS, I’m not quite sure I’ve seen an app that places the Save button side-by-side with the Delete button. Typically, they’re placed on the navigation controller as bar items. What’s worse, when I try to rotate the iOS sample, the bottom section below the image is practically unusable. In Android, when I rotate the device, I’m automatically kicked back out to the ListView screen and the list seems to be corrupted. Magic. Let’s compare them with the converted sample to Crosslight.
And here’s on the one on Android.
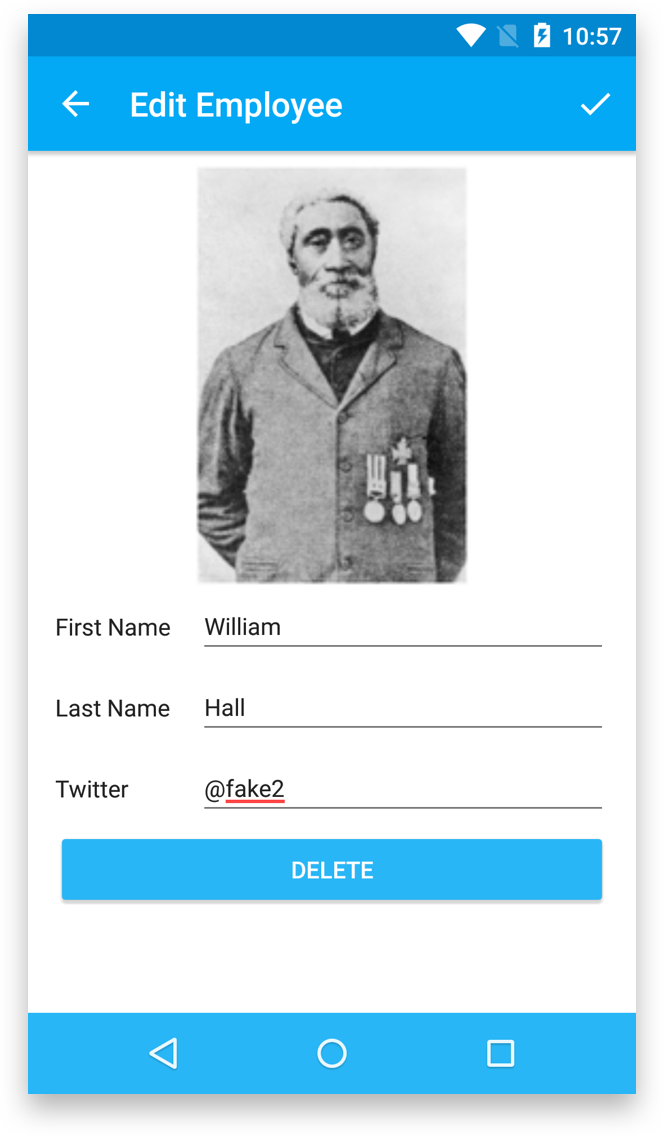
I’ll let you be the judge. Take a look with the forms created with Crosslight Form Builder.
With the Form Builder, you can easily create beautiful forms that complies with each platform’s user experience guidelines. And they’re all working correctly without any annoying user experience found in Xamarin.Forms. Buttons are correctly placed and rotation works perfectly. This is what a “minimal-working” app should look like.
The Design Pattern
Let’s take a brief look at the Xamarin.Forms code for the editor screen. Click on the image to see the large version.
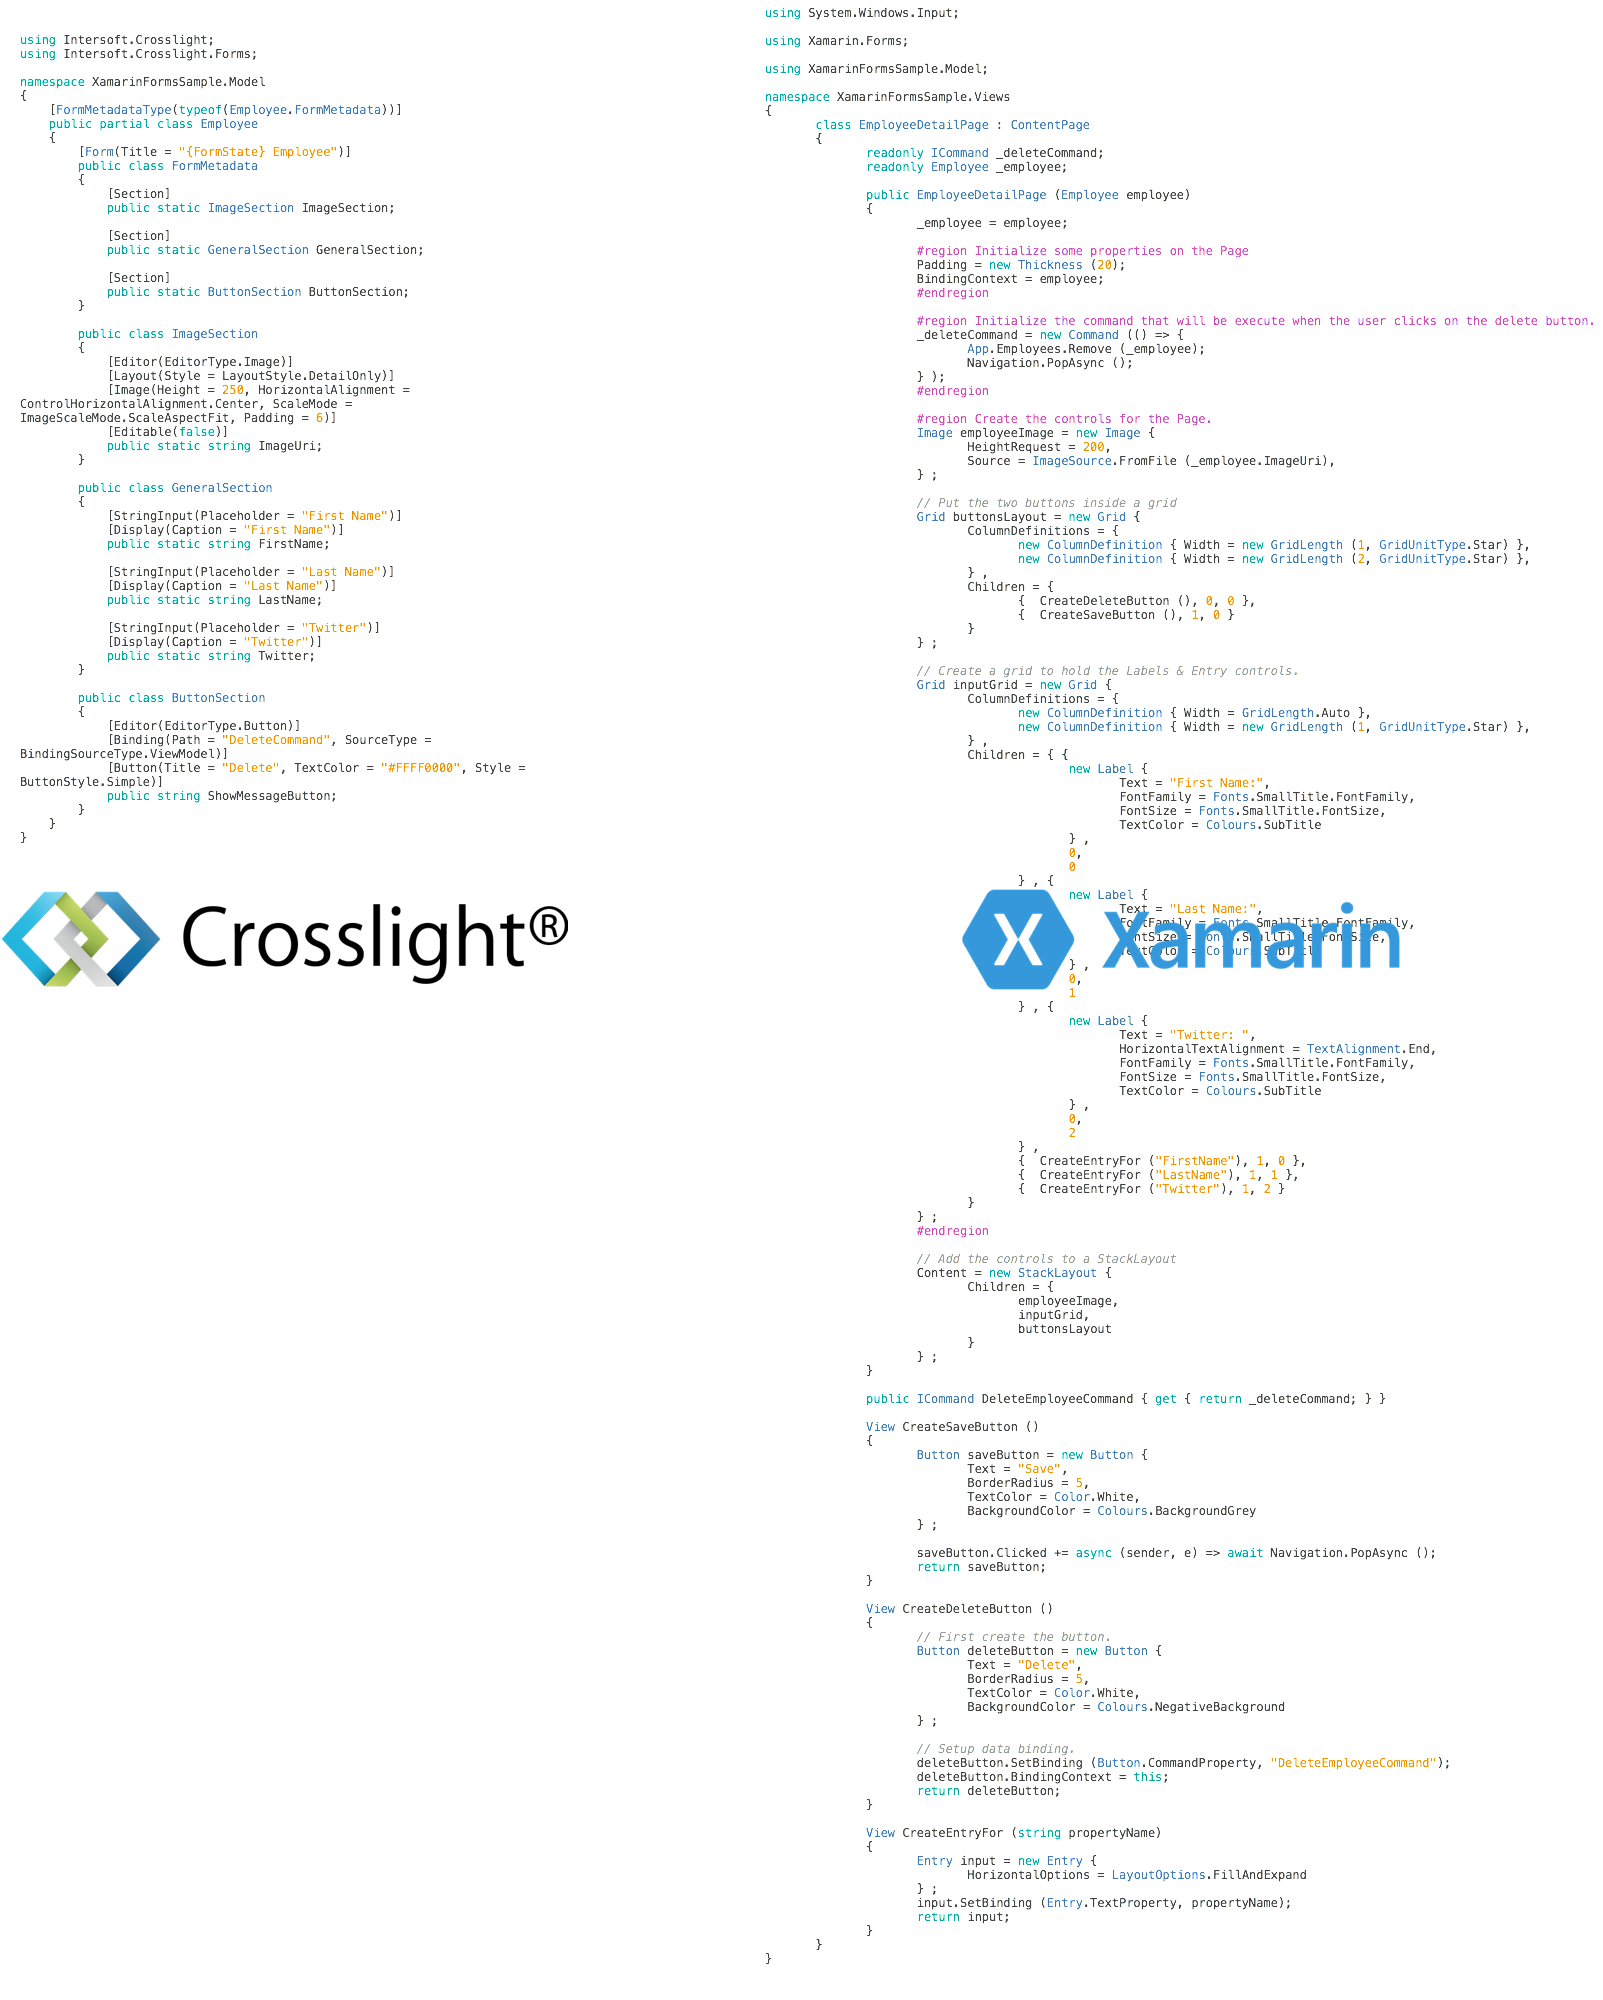
As you can see, Crosslight Form Builder showcases a better pattern where you design a form focused more on the model, rather than the View, as the View approach will not produce native-looking forms when used in cross-platform fashion. With Crosslight, developers are focused on models, making the View loosely-coupled. This will also lead in better long-term extensibility and clearer separation of concerns. Also, you’ll notice that the code to build forms are much lighter and shorter.
It’s important to note that Form Builder is only one of many features available in Crosslight. In addition to Form Builder, developers can use Crosslight’s advanced data binding features to bind native views to a shared ViewModel and enjoy 100% UI logic reuse. However, this post specifically highlights the Form Builder feature to provide a comparable approach to Xamarin Forms.
In this tutorial, I’m going to convert the existing sample XamarinFormsSample to Crosslight. In high-level overview, here’s what we’re going to accomplish:
- Add bootstrapper files for Android.
- Remove Xamarin.Forms references.
- Begin creating the views and ViewModels
- Add bootstrapper files and views for Android.
- Add bootstrapper files and views for iOS.
Sounds good? Let’s begin.
What You’ll Need
To accomplish this tutorial perfectly, you’ll need to download the initial project from Xamarin’s website. Grab it here. Extract the files and use only the XamarinFormsSample project.
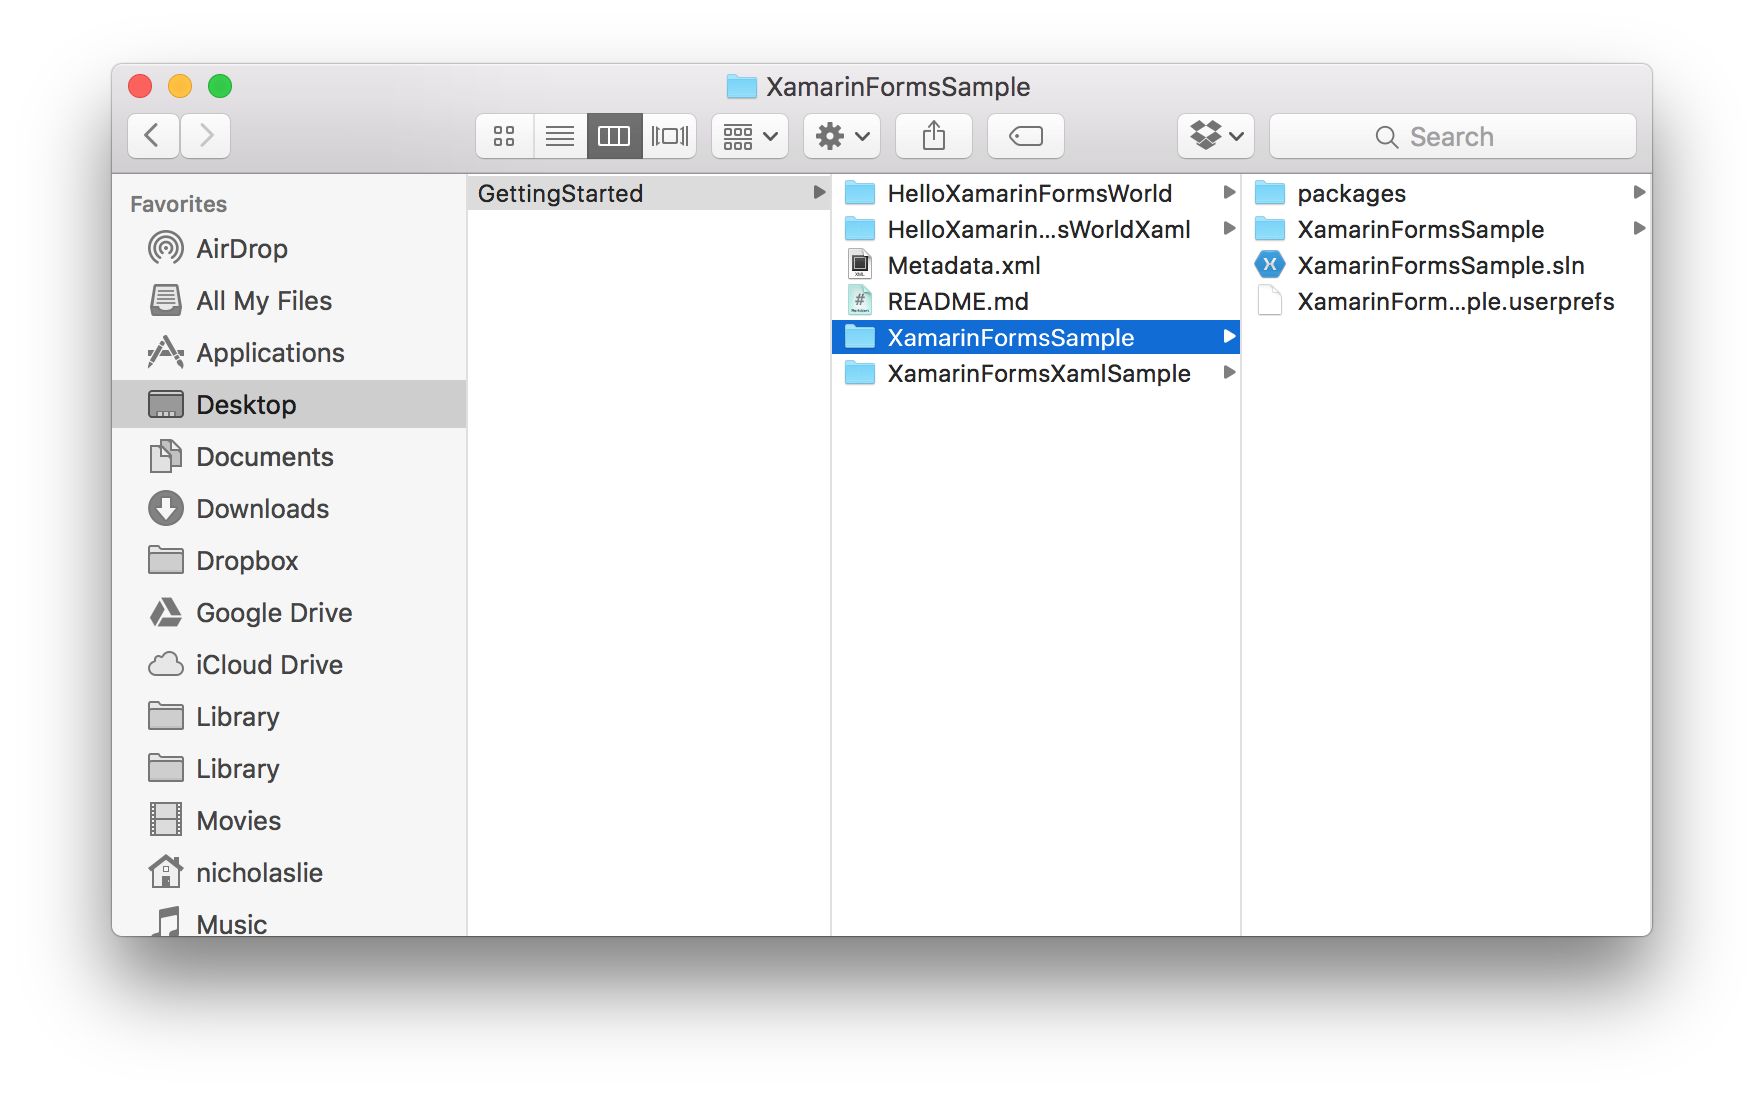
Open the .sln file and we’ll start from there. If you’re on Mac, you’ll need to have your Mobile Studio 2016 or higher installed on your Mac, since we’re going to be installing NuGet references via Xamarin Studio.
If you’re on Windows with Visual Studio, you should be able to follow this tutorial through without any hassles, since NuGet package management is built-in right into Visual Studio. You’ll also need to use at least Crosslight 5.0.5000.569 or higher. This package is available in the NuGet repository. We’ll add this package in the next step.
Install Crosslight Packages
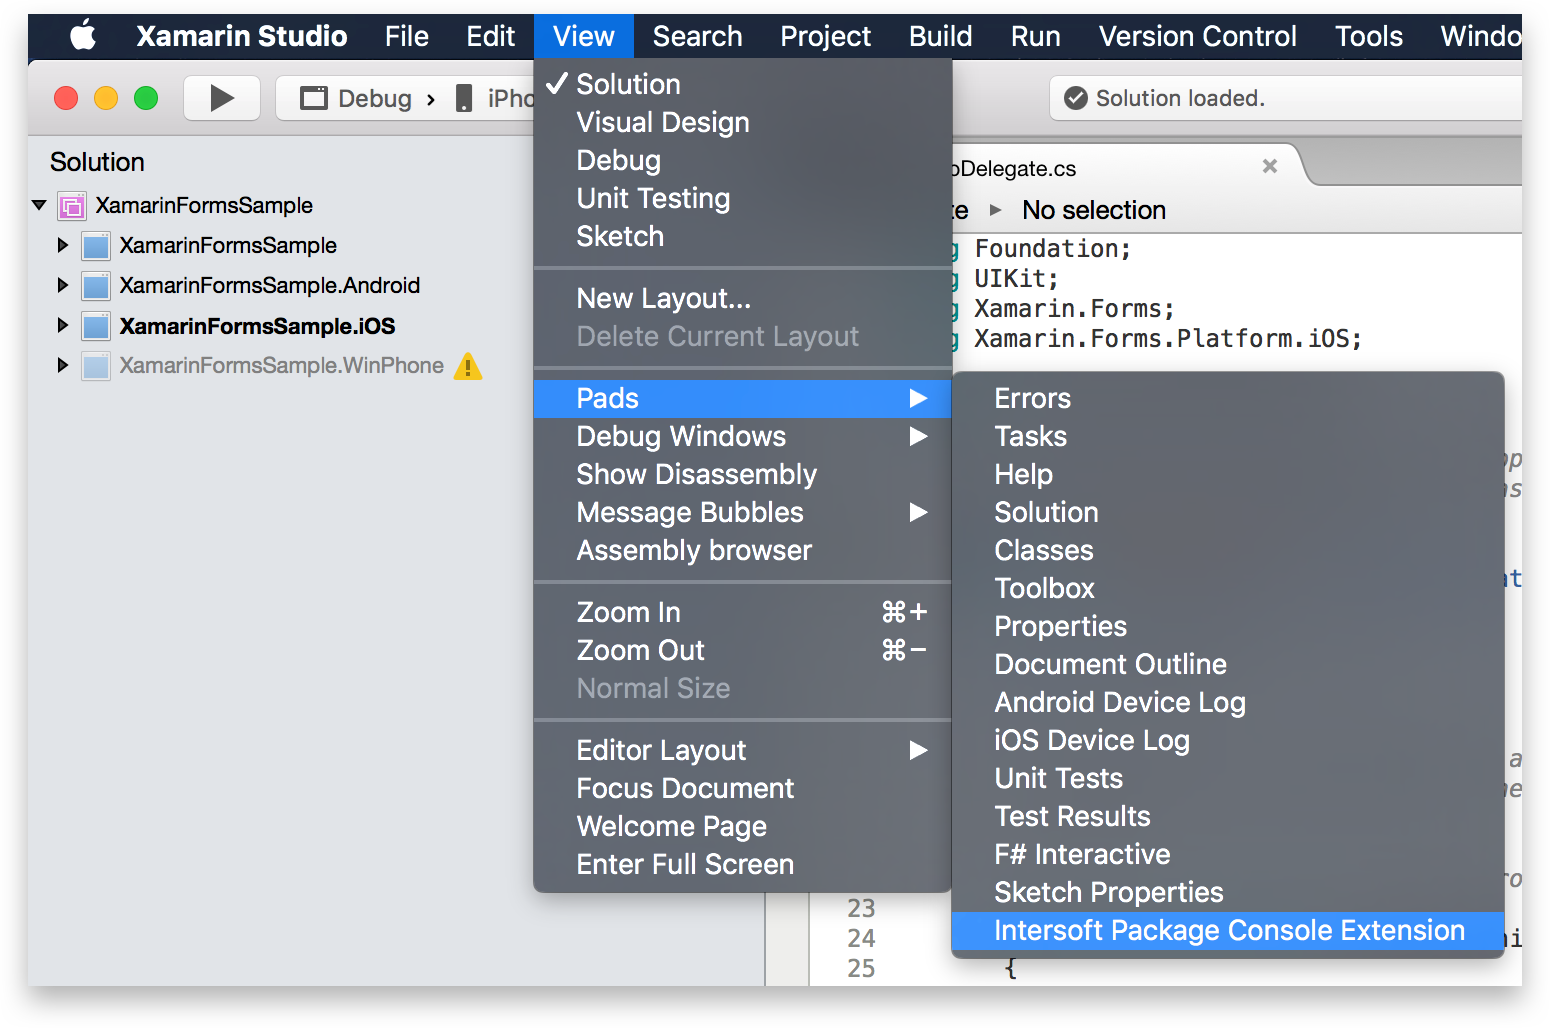
Let’s begin by installing the necessary Crosslight references to these projects. If you’re on Mac, start by opening the Intersoft Package Console Extension from Xamarin Studio.
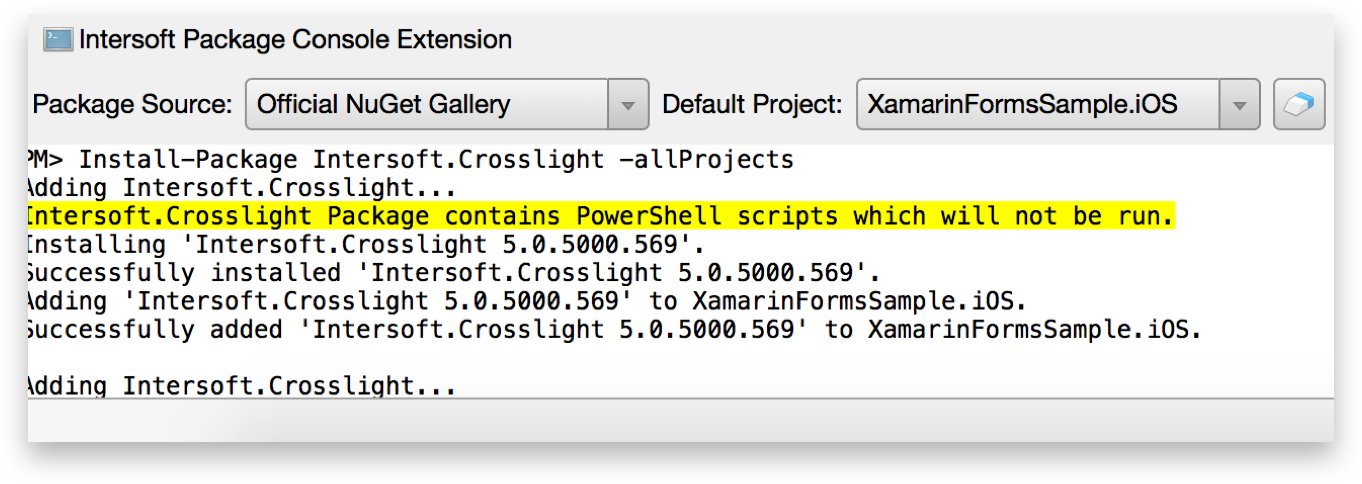
- Install Intersoft.Crosslight package to all of your projects.
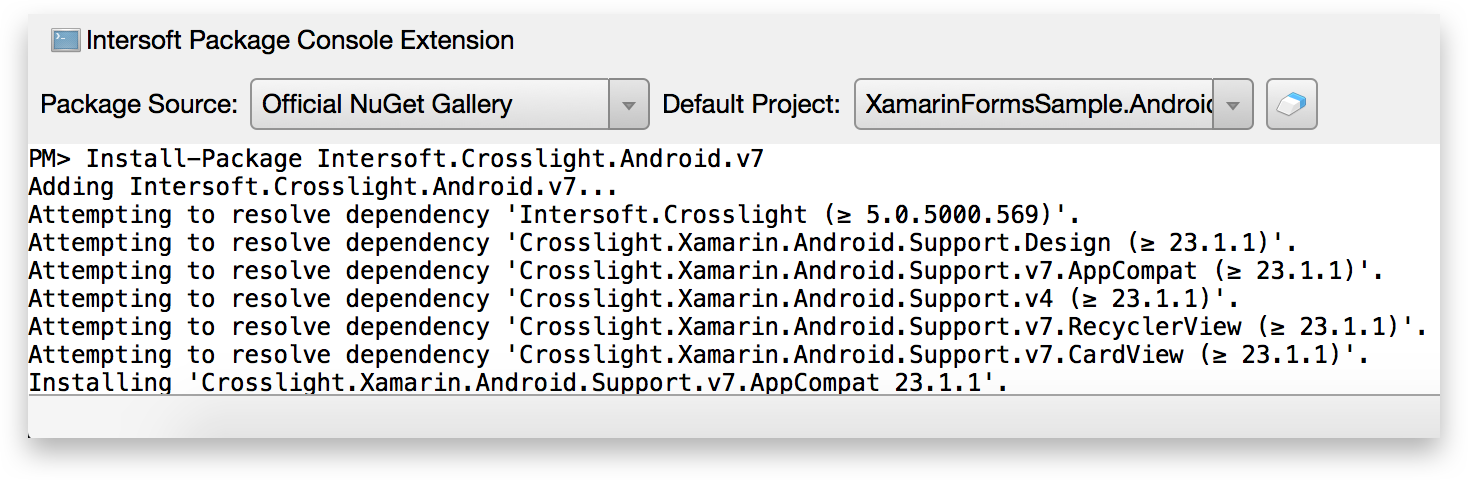
- Install Intersoft.Crosslight.Android.v7 to the Android project.
If you’re unfamiliar with installing Crosslight NuGet packages, it is highly recommended to check out the docs: Introduction to Crosslight NuGet Packages.
Remove Xamarin.Forms References
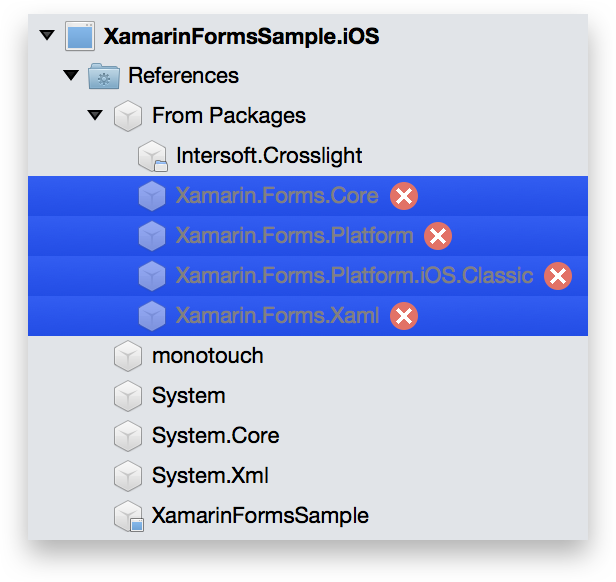
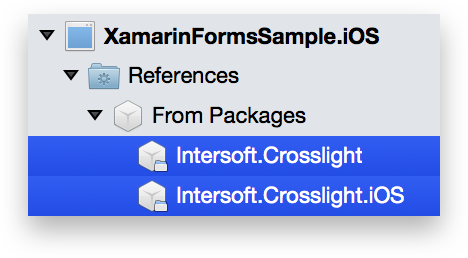
As radical as it seems, Crosslight is not designed to work with Xamarin.Forms, and therefore all Xamarin.Forms references have to be removed. Remove these highlighted references from your project.
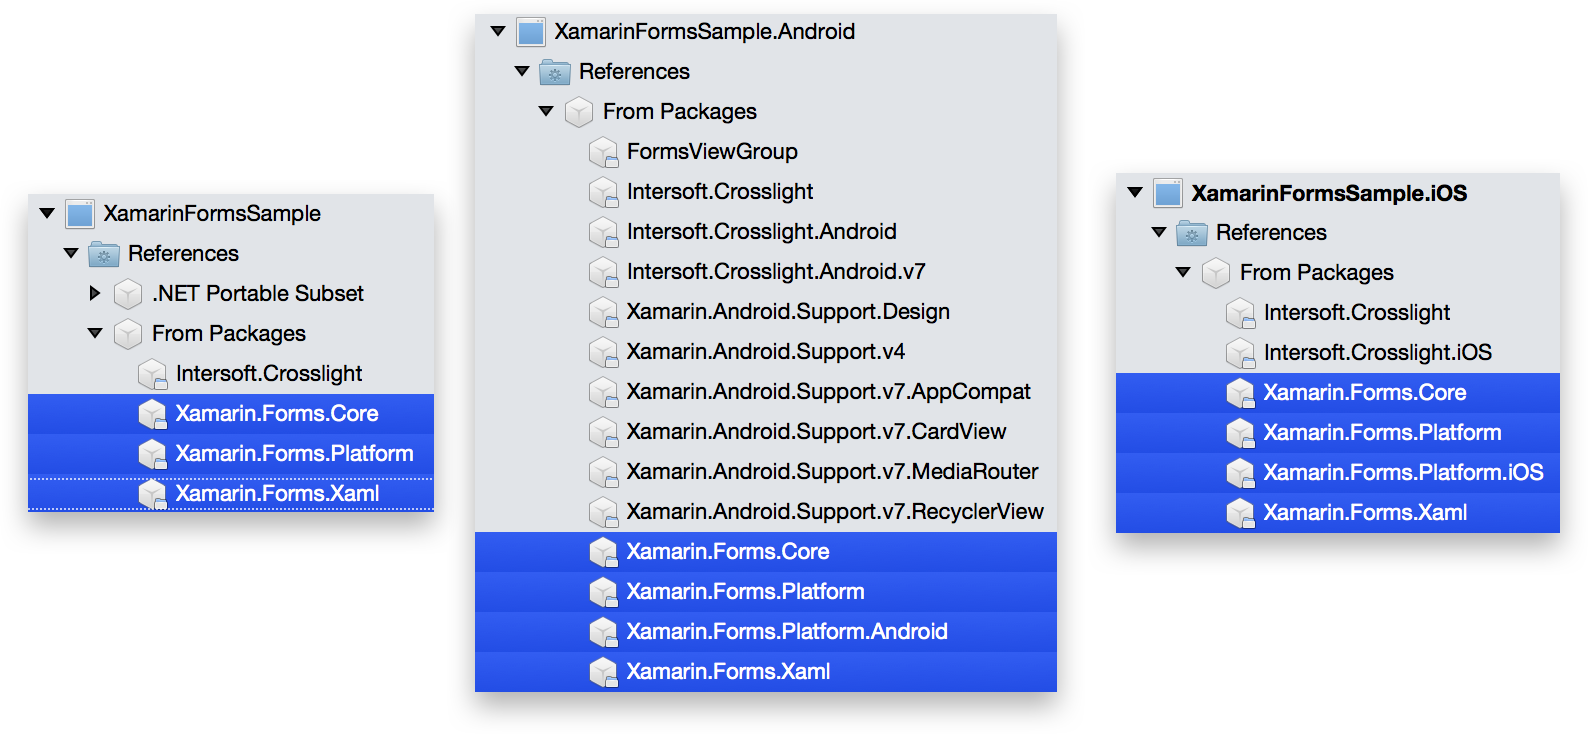
After you’ve removed these references, make sure to double check the References folder once more, because there might be additional references such as these, which you need to remove as well.
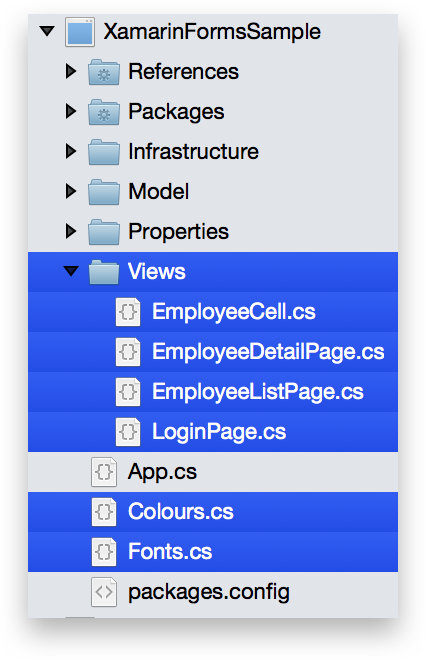
Also, remove the Views folder from the XamarinFormsSample (PCL) project entirely and including the Colours.cs and Fonts.cs.
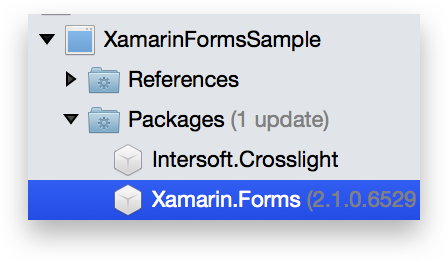
Also, you might want to remove references to Xamarin.Forms inside the packages.config that exists in each project, so you can easily update Crosslight assemblies for this project without the Xamarin.Forms references re-appearing each time.
Bootstrapping the PCL Project
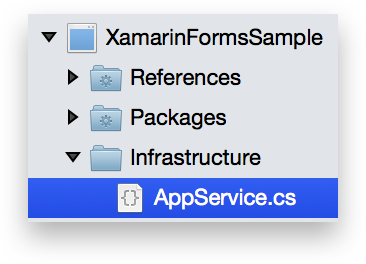
Add a new folder called Infrastructure inside the XamarinFormsSample (PCL) project and an empty class called AppService.cs.
Then replace the contents as follows.
using XamarinFormsSample.Core.ViewModels;
using Intersoft.Crosslight;
namespace XamarinFormsSample.Infrastructure
{
/// <summary>
/// Crosslight’s shared application initializer.
/// This is the perfect place to register repositories, custom services, and other dependencies via IoC.
/// </summary>
/// <seealso cref=“Intersoft.Crosslight.ApplicationServiceBase“ />
public sealed class CrosslightAppAppService : ApplicationServiceBase
{
#region Constructors
/// <summary>
/// Initializes a new instance of the <see cref=“CrosslightAppAppService“ /> class.
/// </summary>
/// <param name=“context“>
/// The application context that implements <see cref=“T:Intersoft.Crosslight.IApplicationContext“ />
/// </param>
public CrosslightAppAppService(IApplicationContext context)
: base(context)
{
}
#endregion
#region Methods
/// <summary>
/// Called when the application is starting.
/// </summary>
/// <param name=“parameter“>The startup parameters.</param>
protected override void OnStart(StartParameter parameter)
{
base.OnStart(parameter);
//Specify the first ViewModel to use when launching the application.
this.SetRootViewModel<LoginViewModel>();
}
#endregion
}
}
This is the application service for the Core project, which is the perfect place to register custom services and additional dependencies via IoC. In this project, we won’t add anything except for just simple constructor that takes in one IApplicationContext parameter. This is the default constructor for this class. Also, in the overridden OnStart method, we’ve defined the root ViewModel as LoginViewModel, which we will create in just a moment.
Next, add another empty class inside the Models folder and give it a name of ModelBase.cs.

Replace the content as follows.
using System;
using System.Collections;
using System.Collections.Generic;
using System.ComponentModel;
using System.Linq;
using Intersoft.Crosslight;
namespace XamarinFormsSample.Models
{
/// <summary>
/// A handy model class that conforms to Crosslight lifecycle.
/// Most of the time you will only need to subclass this class when introducing a new domain model.
/// Includes validation features as well.
/// </summary>
/// <seealso cref=“System.ComponentModel.INotifyPropertyChanged“ />
/// <seealso cref=“System.ComponentModel.INotifyDataErrorInfo“ />
/// <seealso cref=“Intersoft.Crosslight.IDataValidation“ />
public class ModelBase : INotifyPropertyChanged, INotifyDataErrorInfo, IDataValidation
{
#region Fields
private readonly List<ValidationResult> _validationResultList = new List<ValidationResult>();
#endregion
#region Properties
/// <summary>
/// Gets a value that indicates whether the entity has validation errors.
/// </summary>
public virtual bool HasErrors
{
get { return _validationResultList.Count(o => !o.IsSuccess) > 0; }
}
#endregion
#region Methods
/// <summary>
/// Clears all errors.
/// </summary>
public void ClearAllErrors()
{
List<string> properties = new List<string>();
foreach (var result in this._validationResultList)
{
foreach (var member in result.MemberNames)
{
if (!properties.Contains(member))
properties.Add(member);
}
}
_validationResultList.Clear();
this.OnErrorsChanged(““);
foreach (string property in properties)
{
this.OnPropertyChanged(property);
}
}
/// <summary>
/// Clears the error.
/// </summary>
/// <param name=“propertyName“>Name of the property.</param>
public void ClearError(string propertyName)
{
var emptyValidationResult = new List<ValidationResult>();
foreach (var result in _validationResultList)
{
if (result.MemberNames.Contains(propertyName))
{
((IList) result.MemberNames).Remove(propertyName);
if (!result.MemberNames.Any())
emptyValidationResult.Add(result);
}
}
foreach (var result in emptyValidationResult)
{
_validationResultList.Remove(result);
}
this.OnErrorsChanged(propertyName);
}
/// <summary>
/// Gets all errors.
/// </summary>
/// <returns></returns>
public IEnumerable<ValidationResult> GetAllErrors()
{
return _validationResultList.Where(o => !o.IsSuccess).ToList();
}
/// <summary>
/// Gets the validation errors for a specified property or for the entire entity.
/// </summary>
/// <param name=“propertyName“>
/// The name of the property to retrieve validation errors for; or null or
/// <see cref=“F:System.String.Empty“ />, to retrieve entity-level errors.
/// </param>
/// <returns>
/// The validation errors for the property or entity.
/// </returns>
public IEnumerable GetErrors(string propertyName)
{
var validationResult = new List<ValidationResult>();
foreach (var result in _validationResultList)
{
if ((string.IsNullOrEmpty(propertyName) || result.MemberNames.Contains(propertyName)) && !result.IsSuccess)
validationResult.Add(result);
}
return validationResult;
}
/// <summary>
/// Called when [errors changed].
/// </summary>
/// <param name=“propertyName“>Name of the property.</param>
protected virtual void OnErrorsChanged(string propertyName)
{
this.OnErrorsChanged(new DataErrorsChangedEventArgs(propertyName));
}
/// <summary>
/// Raises the <see cref=“E:ErrorsChanged“ /> event.
/// </summary>
/// <param name=“e“>The <see cref=“DataErrorsChangedEventArgs“ /> instance containing the event data.</param>
private void OnErrorsChanged(DataErrorsChangedEventArgs e)
{
var handler = this.ErrorsChanged;
if (handler != null)
handler(this, e);
}
/// <summary>
/// Called when [property changed].
/// </summary>
/// <param name=“propertyName“>Name of the property.</param>
protected virtual void OnPropertyChanged(string propertyName)
{
this.OnPropertyChanged(new PropertyChangedEventArgs(propertyName));
}
/// <summary>
/// Raises the <see cref=“E:PropertyChanged“ /> event.
/// </summary>
/// <param name=“e“>The <see cref=“PropertyChangedEventArgs“ /> instance containing the event data.</param>
private void OnPropertyChanged(PropertyChangedEventArgs e)
{
var propertyChanged = this.PropertyChanged;
if (propertyChanged != null)
propertyChanged(this, e);
}
/// <summary>
/// Raises the property changed.
/// </summary>
/// <param name=“propertyName“>Name of the property.</param>
public void RaisePropertyChanged(string propertyName)
{
this.OnPropertyChanged(propertyName);
}
/// <summary>
/// Sets the error.
/// </summary>
/// <param name=“errorMessage“>The error message.</param>
/// <param name=“propertyName“>Name of the property.</param>
public void SetError(string errorMessage, string propertyName)
{
_validationResultList.Add(new ValidationResult(errorMessage, propertyName));
this.OnErrorsChanged(propertyName);
this.OnPropertyChanged(propertyName);
}
/// <summary>
/// Validate this instance.
/// </summary>
public virtual void Validate()
{
}
#endregion
#region INotifyDataErrorInfo Members
/// <summary>
/// Occurs when the validation errors have changed for a property or for the entire entity.
/// </summary>
public event EventHandler<DataErrorsChangedEventArgs> ErrorsChanged;
#endregion
#region INotifyPropertyChanged Members
/// <summary>
/// Occurs when a property value changes.
/// </summary>
public event PropertyChangedEventHandler PropertyChanged;
#endregion
}
}
This is the base class used for domain models used with Crosslight projects that supports INotifyPropertyChanged for data binding and also data validation. It is highly recommended that the models used in the project subclasses this ModelBase class. Let’s modify the existing models now and do that. Open up Employee.cs and replace the contents as follows.
using System;
using XamarinFormsSample.Models;
namespace XamarinFormsSample.Model
{
/// <summary>
/// This is a domain object that holds information about a given employee.
/// </summary>
public partial class Employee : ModelBase
{
#region Constructors
public Employee()
{
ImageUri = “VC“;
}
#endregion
#region Fields
string _firstName;
string _imageUri;
string _lastName;
string _twitter;
#endregion
#region Properties
public string DisplayName
{
get { return string.Format(“{0}, {1}“, _lastName, _firstName); }
}
public string FirstName
{
get { return _firstName; }
set
{
if (value.Equals(_firstName, StringComparison.Ordinal))
return;
_firstName = value;
this.OnPropertyChanged(“DisplayName“);
}
}
public string ImageUri
{
get { return _imageUri; }
set
{
if (value.Equals(_imageUri, StringComparison.Ordinal))
return;
_imageUri = value;
this.OnPropertyChanged(“ImageUri“);
}
}
public string LastName
{
get { return _lastName; }
set
{
if (value.Equals(_lastName, StringComparison.Ordinal))
return;
_lastName = value;
this.OnPropertyChanged(“DisplayName“);
}
}
public string Twitter
{
get { return _twitter; }
set
{
if (value.Equals(_twitter, StringComparison.Ordinal))
return;
_twitter = value;
this.OnPropertyChanged(“Twitter“);
}
}
#endregion
}
}
In this code, note the partial modifier for this class. This is needed for the Crosslight Form Builder metadata, which we’ll create much later in the tutorial. Then modify LoginInfo.cs as well.
using System;
using System.ComponentModel;
using System.Runtime.CompilerServices;
using XamarinFormsSample.Models;
namespace XamarinFormsSample.Model
{
/// <summary>
/// This class is used to capture login credentials and to perform very simple authentication.
/// </summary>
public partial class LoginInfo : ModelBase
{
string _password = string.Empty;
string _username = string.Empty;
public string UserName
{
get { return _username; }
set
{
if (_username.Equals(value, StringComparison.Ordinal))
{
return;
}
_username = value ?? string.Empty;
this.OnPropertyChanged(“UserName“);
}
}
public string Password
{
get { return _password; }
set
{
if (_password.Equals(value, StringComparison.Ordinal))
{
return;
}
_password = value ?? string.Empty;
this.OnPropertyChanged(“Password“);
}
}
public override void Validate()
{
this.ClearAllErrors();
if (string.IsNullOrEmpty(this.UserName))
this.SetError(“Please enter any username.“, “UserName“);
if (string.IsNullOrEmpty(this.Password))
this.SetError(“Please enter any password“, “Password“);
}
}
}
The Validate method shown in the above snippet code is one of the examples how you can perform validation in Crosslight Form Builder. Here, we set the error message when user did not enter any username or password in the form upon login. Although, there is a more advanced version of form validation with the Crosslight Form Builder, that is to use the EntityMetadataAttribute. However, it will be covered in a separate blog post.
Creating the Login Screen
If you notice from the original sample, user can’t perform any operation unless they’ve performed login. Let’s modify the sample a bit to show the login screen at the initial state. So we’ll prepare the login screen first, then try to create the login screen on the Android platform. We’ll also bootstrap the Android project along the way.
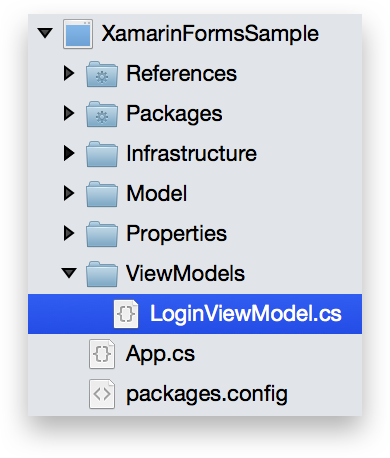
Create a new folder in the XamarinFormsSample (PCL) project and give it a name of ViewModels. Then create a new Crosslight View Model in the folder, called LoginViewModel.
Replace the entire contents as follows.
using Intersoft.Crosslight;
using Intersoft.Crosslight.Input;
using Intersoft.Crosslight.ViewModels;
using XamarinFormsSample.Core.ViewModels;
using XamarinFormsSample.Model;
namespace XamarinFormsSample.Core.ViewModels
{
public class LoginViewModel : EditorViewModelBase<LoginInfo>
{
#region Constructors
public LoginViewModel()
{
this.Item = new LoginInfo();
this.LoginCommand = new DelegateCommand(ExecuteLogin);
}
#endregion
#region Fields
private LoginInfo _loginInfo;
#endregion
#region Properties
public DelegateCommand LoginCommand { get; set; }
public LoginInfo LoginInfo
{
get { return _loginInfo; }
set
{
if (_loginInfo != value)
{
_loginInfo = value;
OnPropertyChanged(“LoginInfo“);
}
}
}
#endregion
#region Methods
private void ExecuteLogin(object parameter)
{
}
#endregion
}
}
In the constructor of this ViewModel, we’ve just simply instantiated a new LoginInfo object model, a new DelegateCommand LoginCommand and the Title for the ViewModel. We’ll leave the ExecuteLogin method as empty for now, all we want to accomplish now is displaying the Login screen perfectly. We’ll modify this method later on. Save this file and rebuild try to rebuild the XamarinFormsSample (PCL) project.
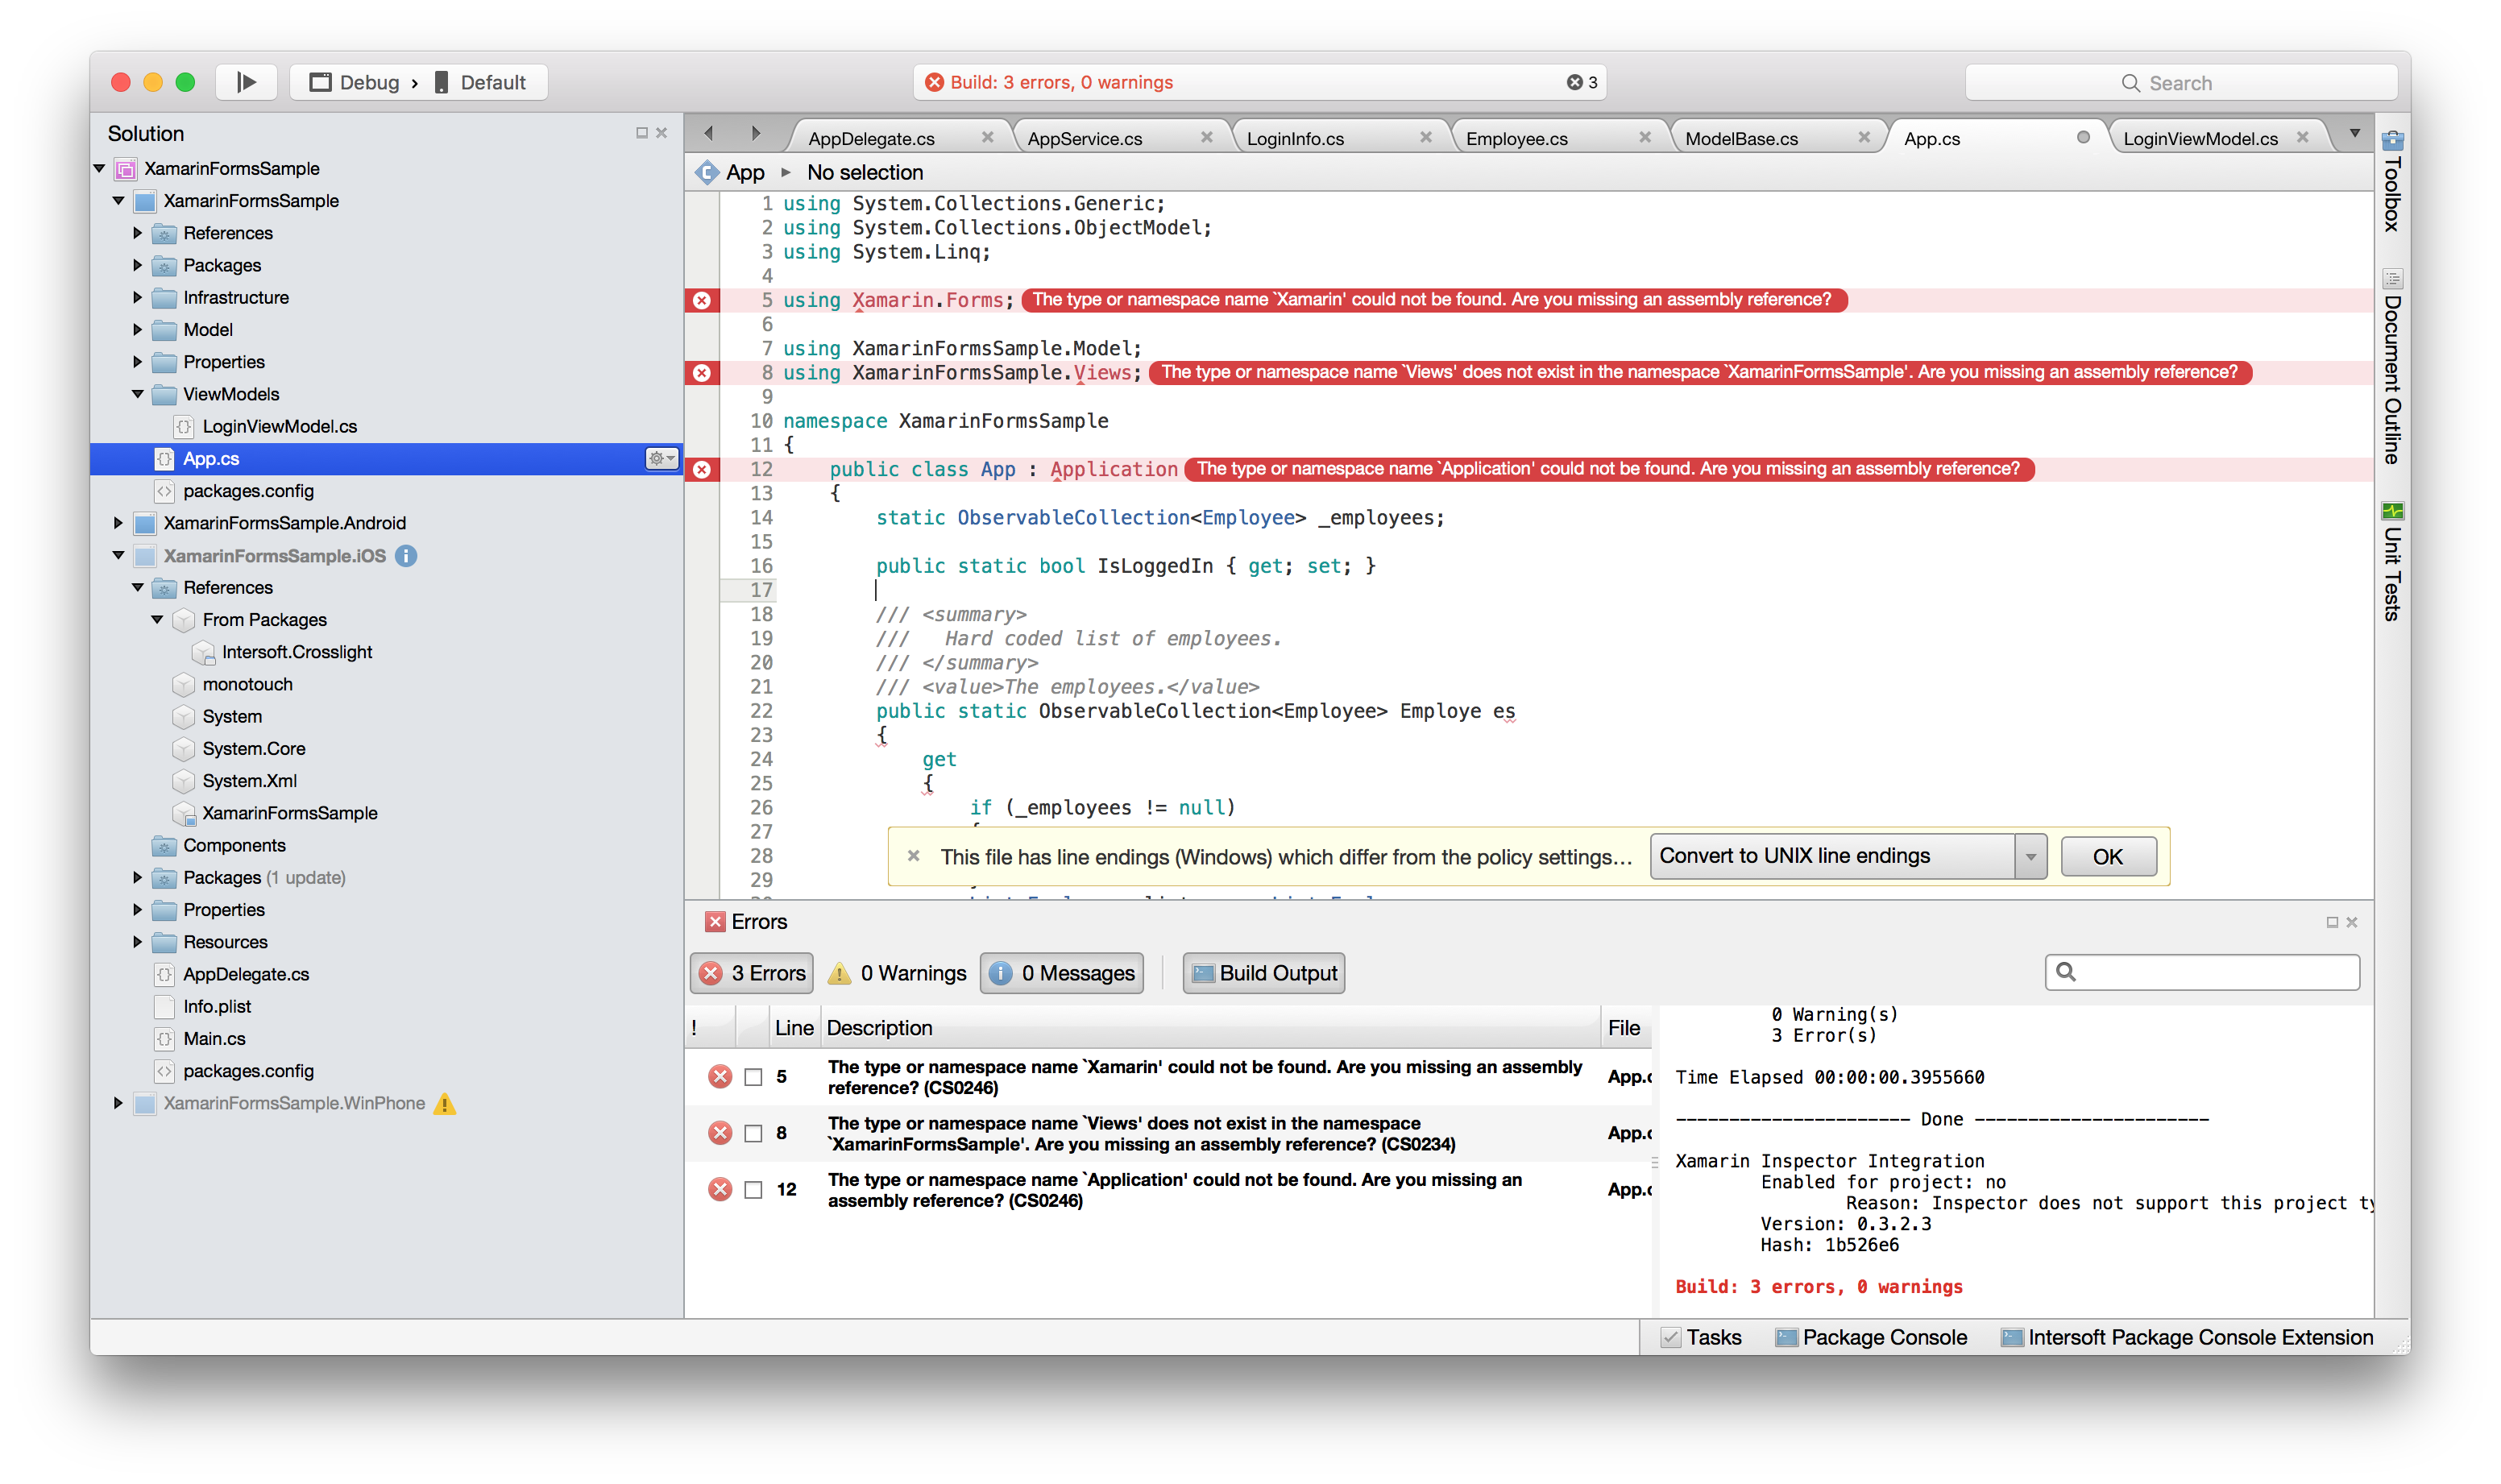
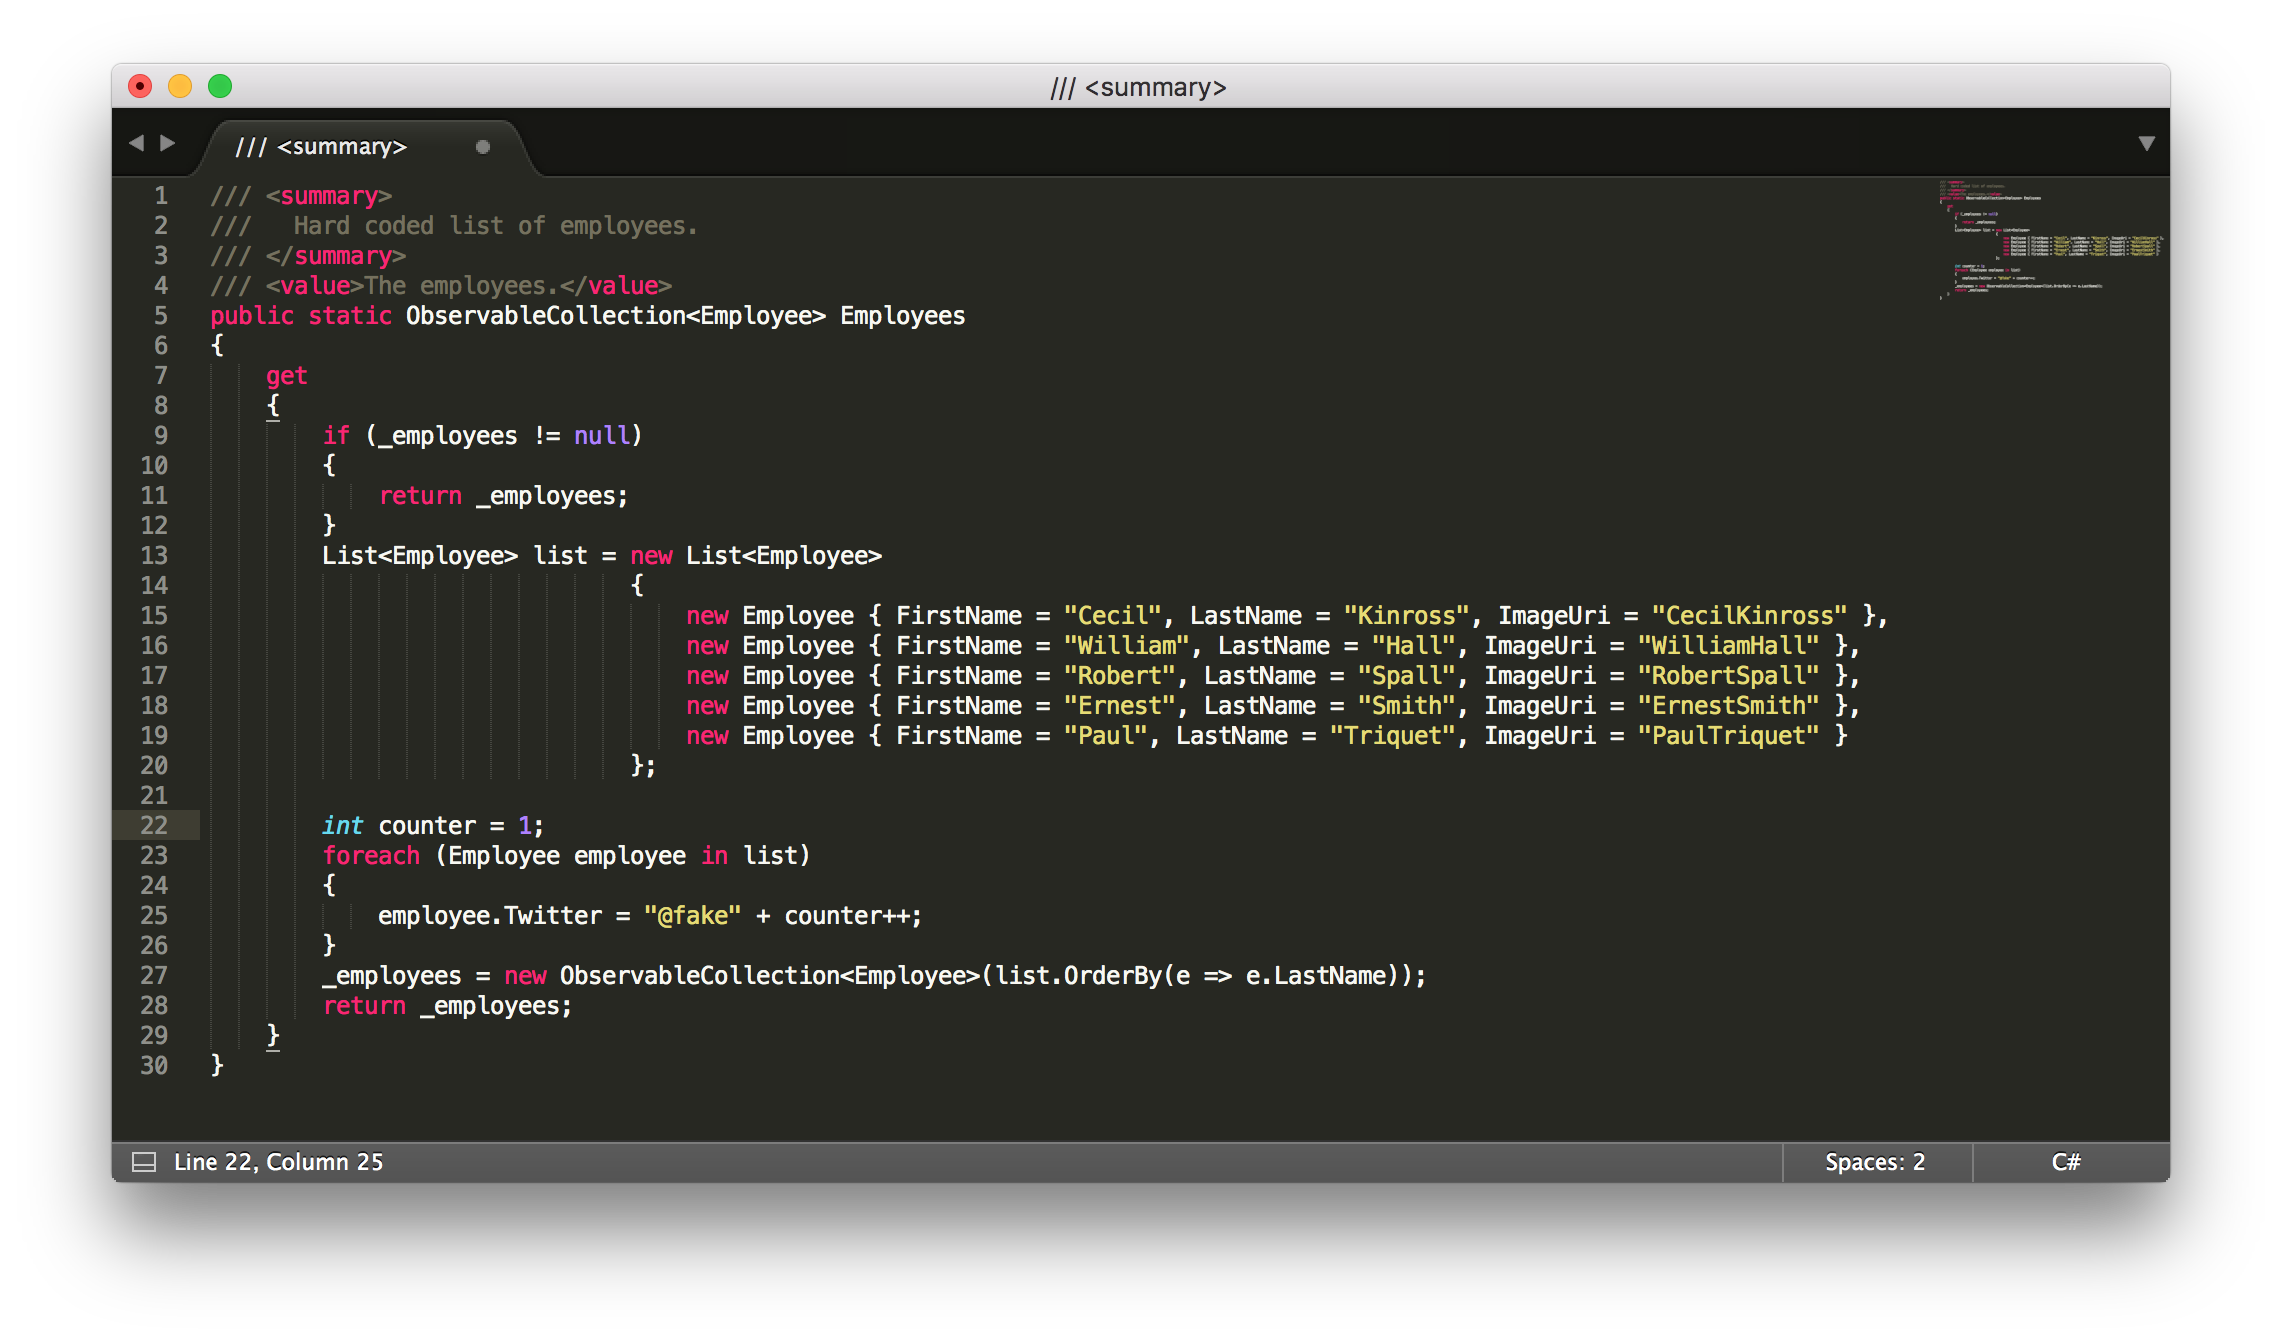
You’ll get the error as shown in the shot above. This is because we’ve removed all references to Xamarin.Forms. We can completely remove this file, however, you might want to keep the Employees property in this file somewhere, perhaps in a separate notepad file for now. We’re going to need this for the list of employees later after we’ve successfully created the login module.
Delete App.cs when you’re done. Rebuild the XamarinFormsSample (PCL) project one more time and you should be able to build it now.

Great! Let’s create the Android login view for this ViewModel.
Bootstrapping the Android Project
Before we can use this project, we need to “upgrade” this project to use new project standards. Let’s go through each step carefully, one step at a time.
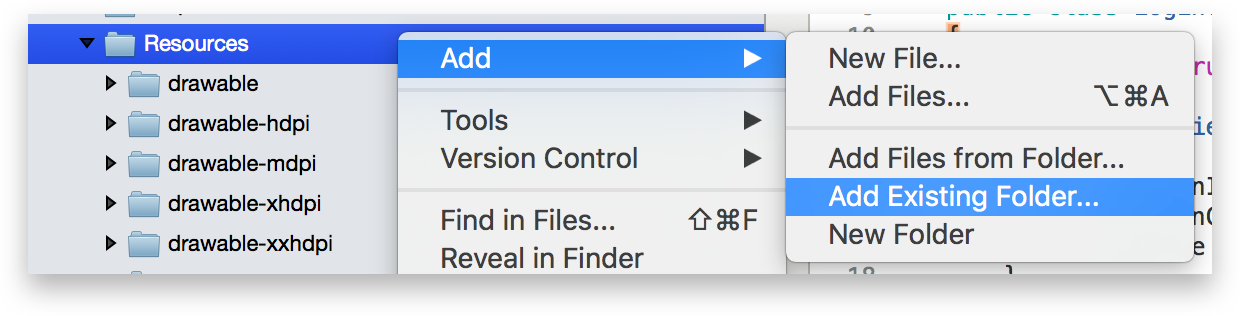
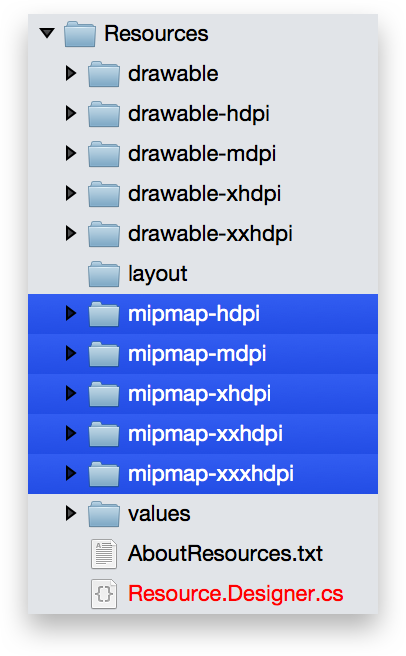
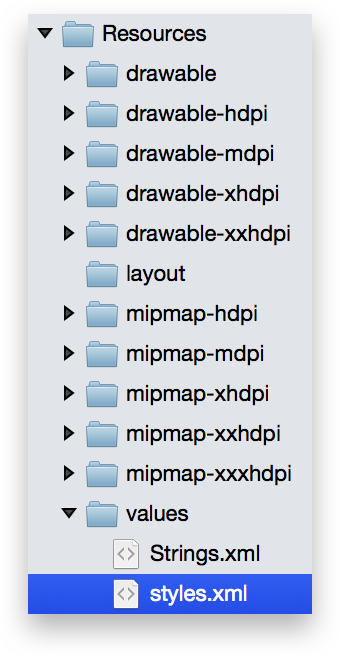
Download this mipmap.zip file and extract it. These files will be used as the launcher icons for our Android project. Import them into the Resources folder by using Add Existing Folder menu. What these mipmap icons do is provide a better high-res icons for the app launchers. For example, if your device is on the hdpi-display scale, then it will use the xhdpi icons for the icon launchers so that it will look crisp.
Select each mipmap folder so that your project looks as follows.
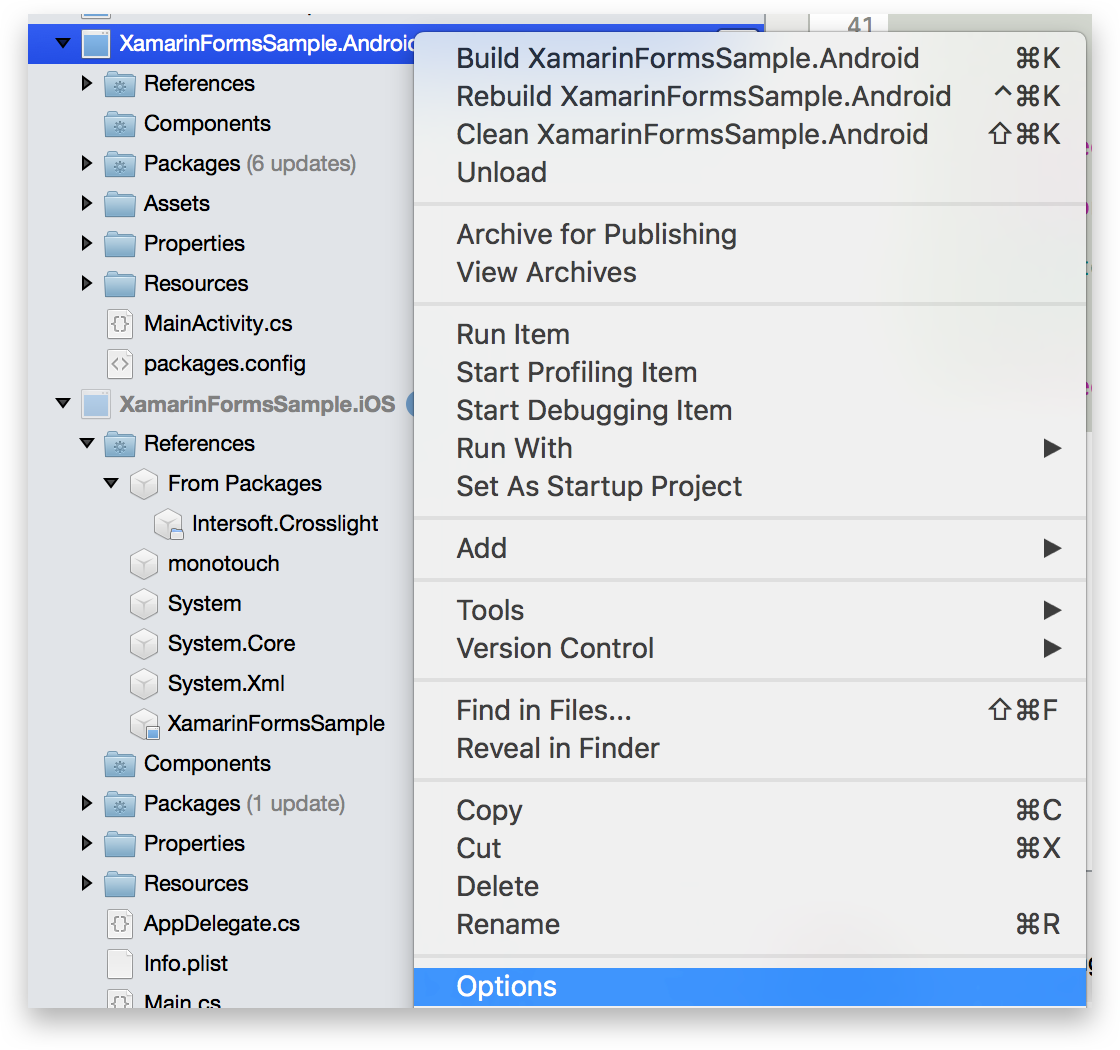
Start by opening the Android project Options. To do this, right-click on the Android project and choose Options.
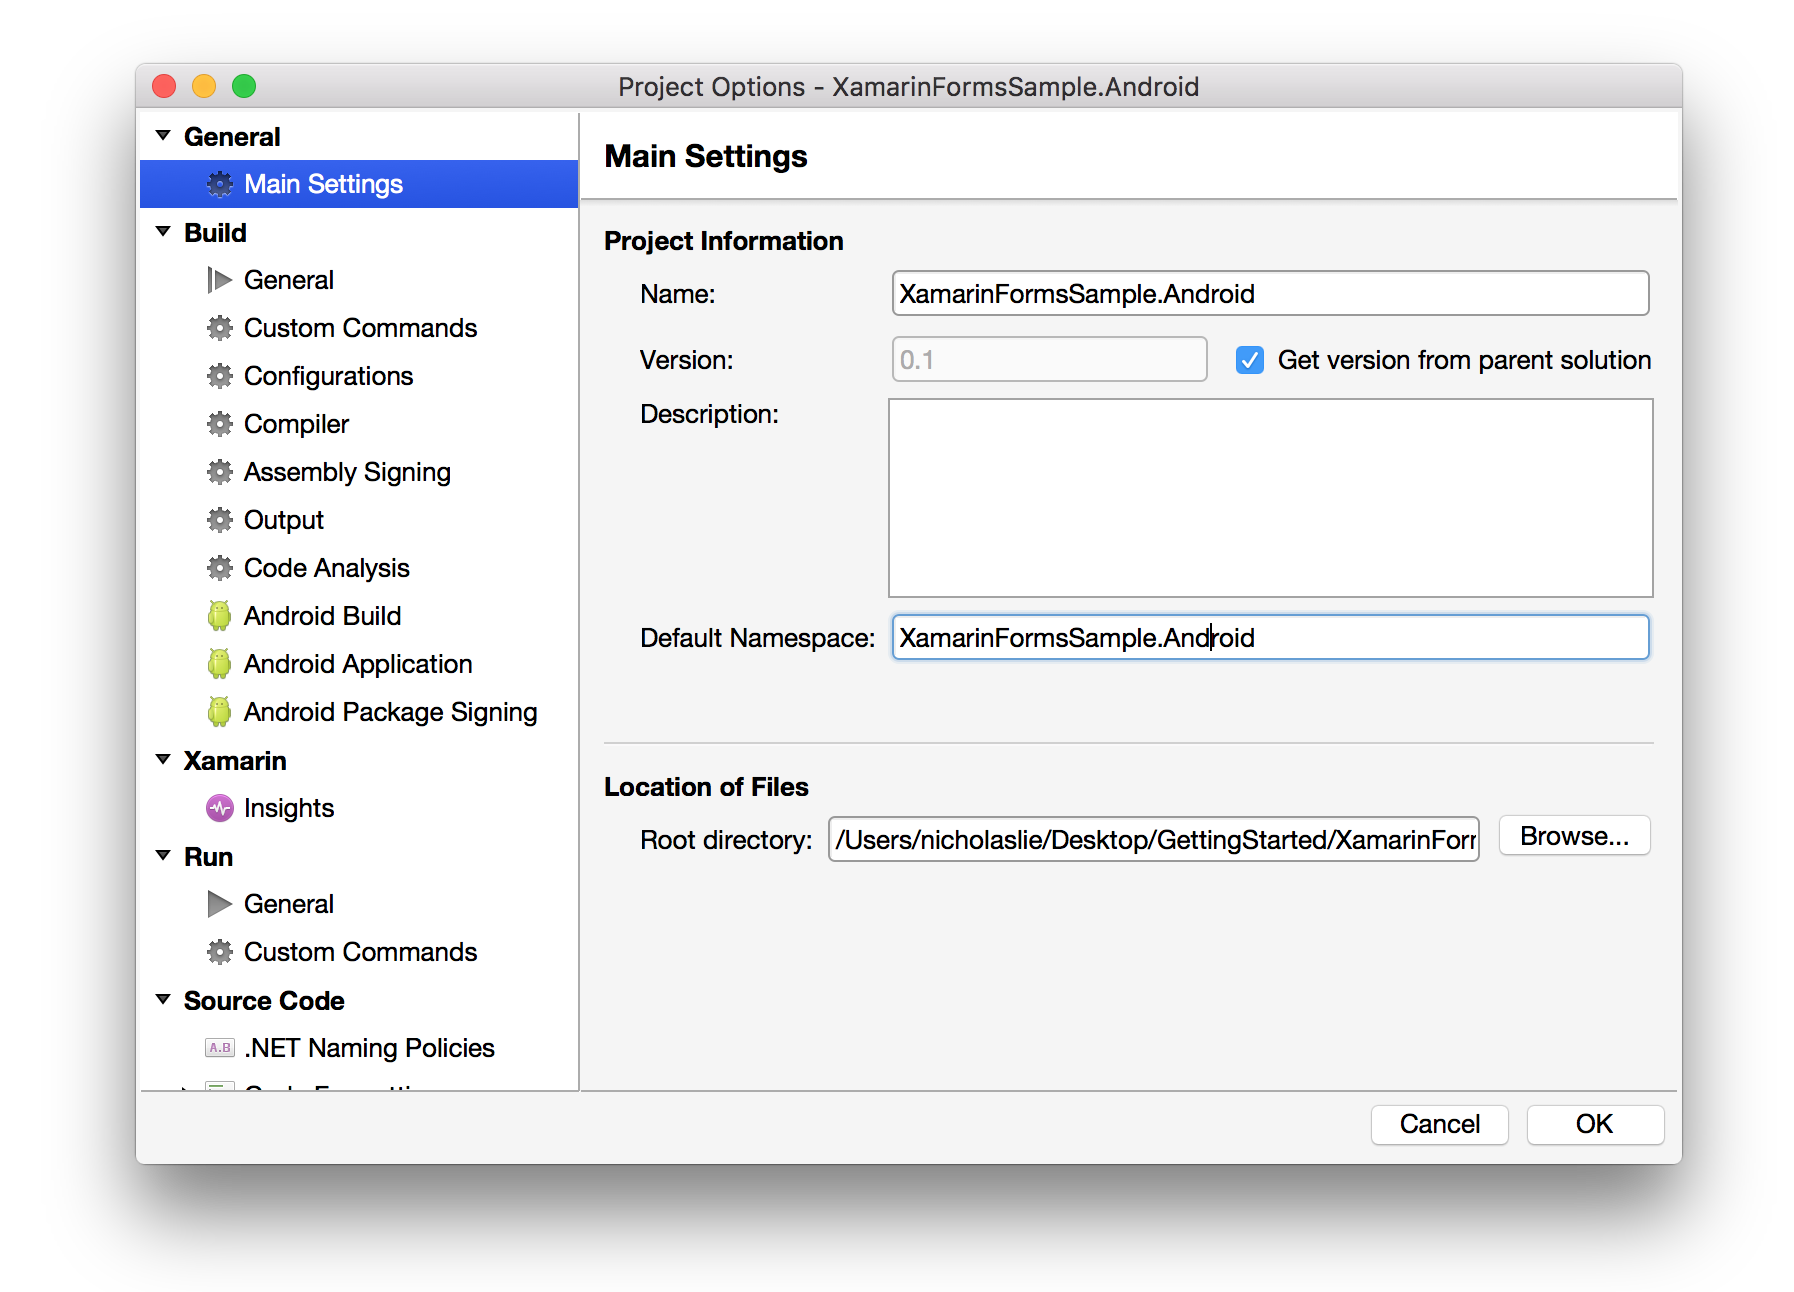
In the dialog that appears, choose Main Settings and change the Default Namespace to XamarinFormsSample.Android.
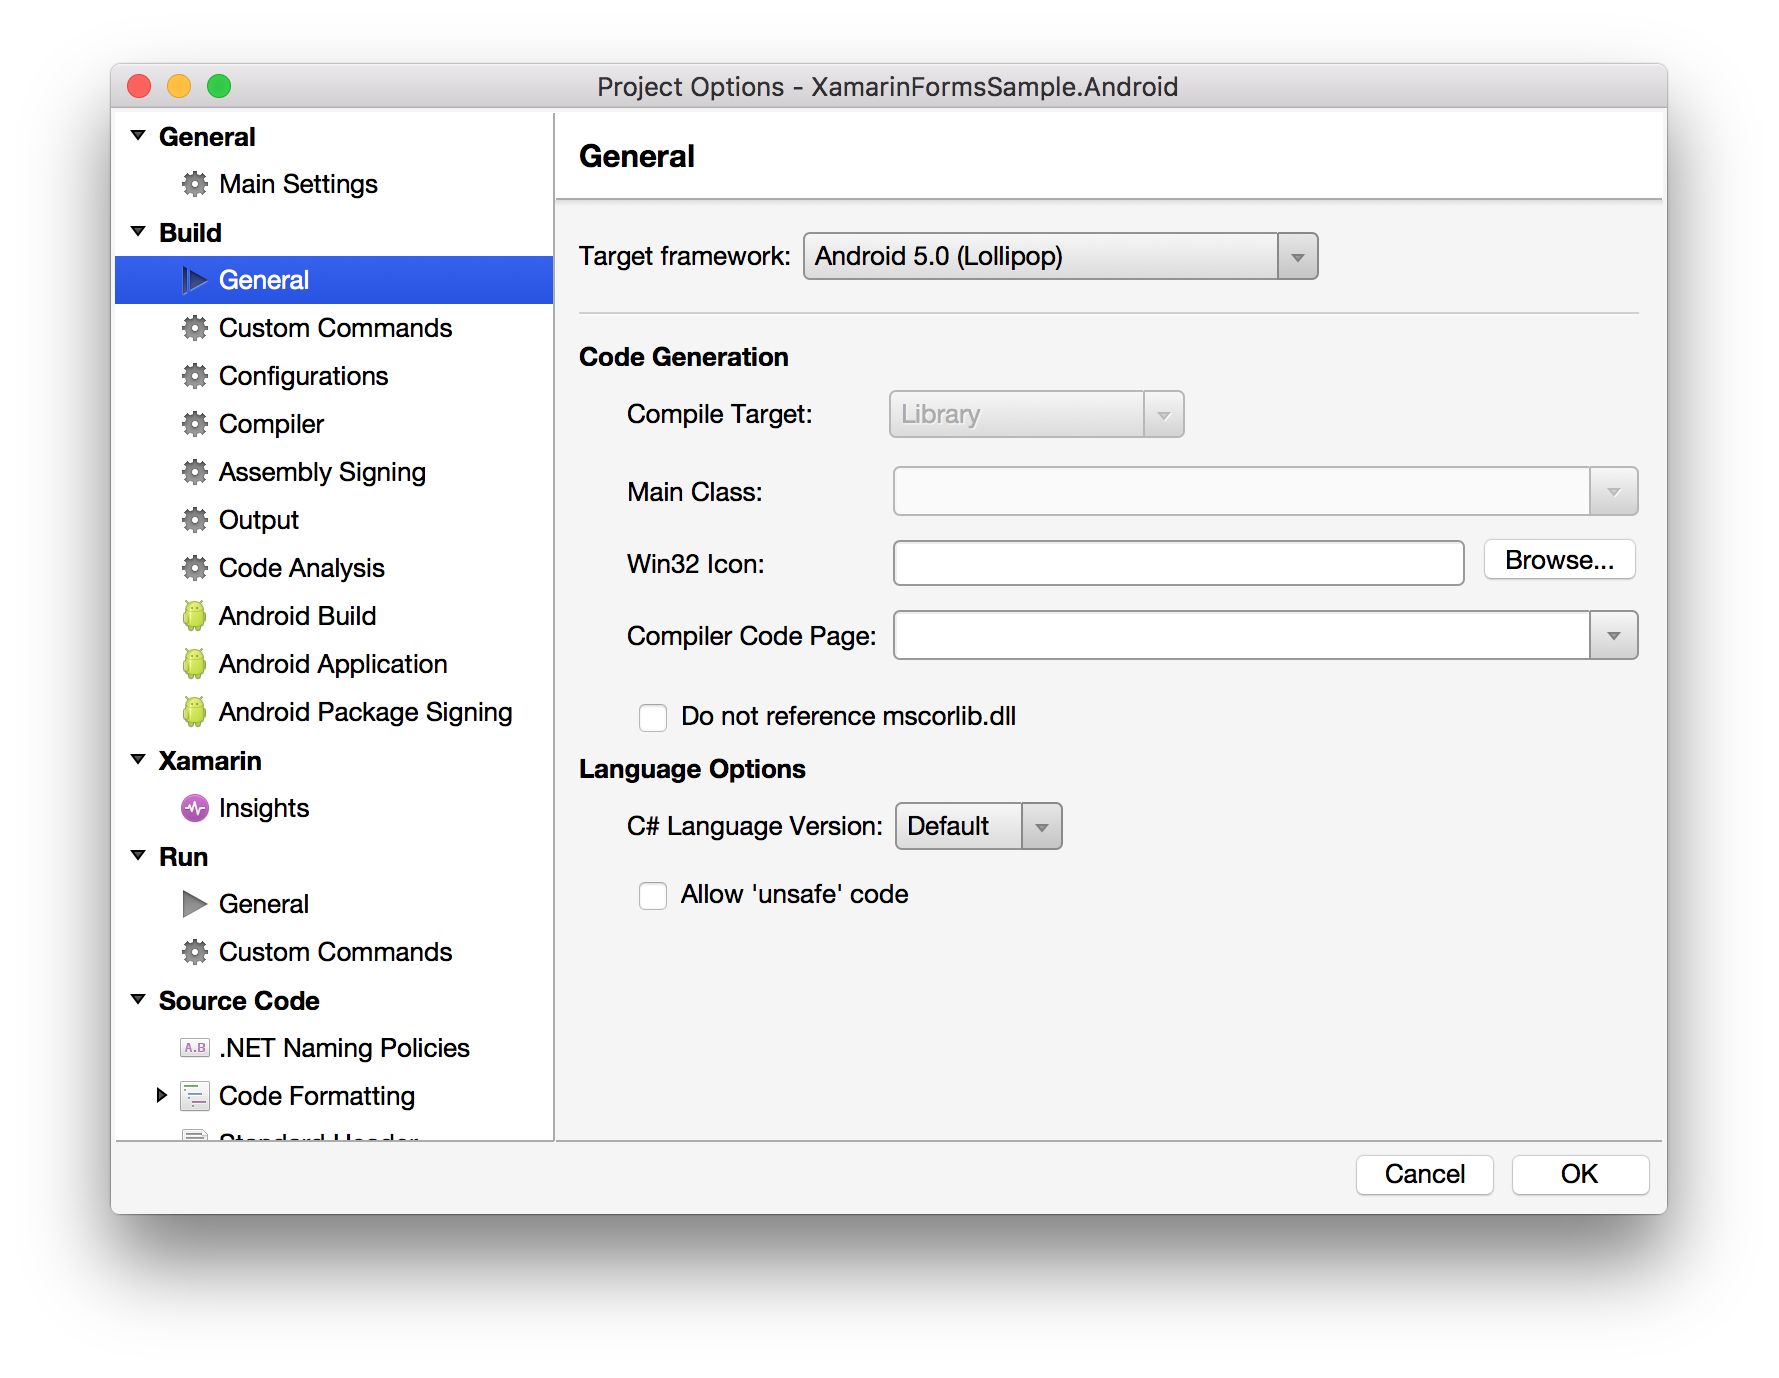
Then choose General, ensure that the Target Framework has been set to Android 5.0 (Lollipop).
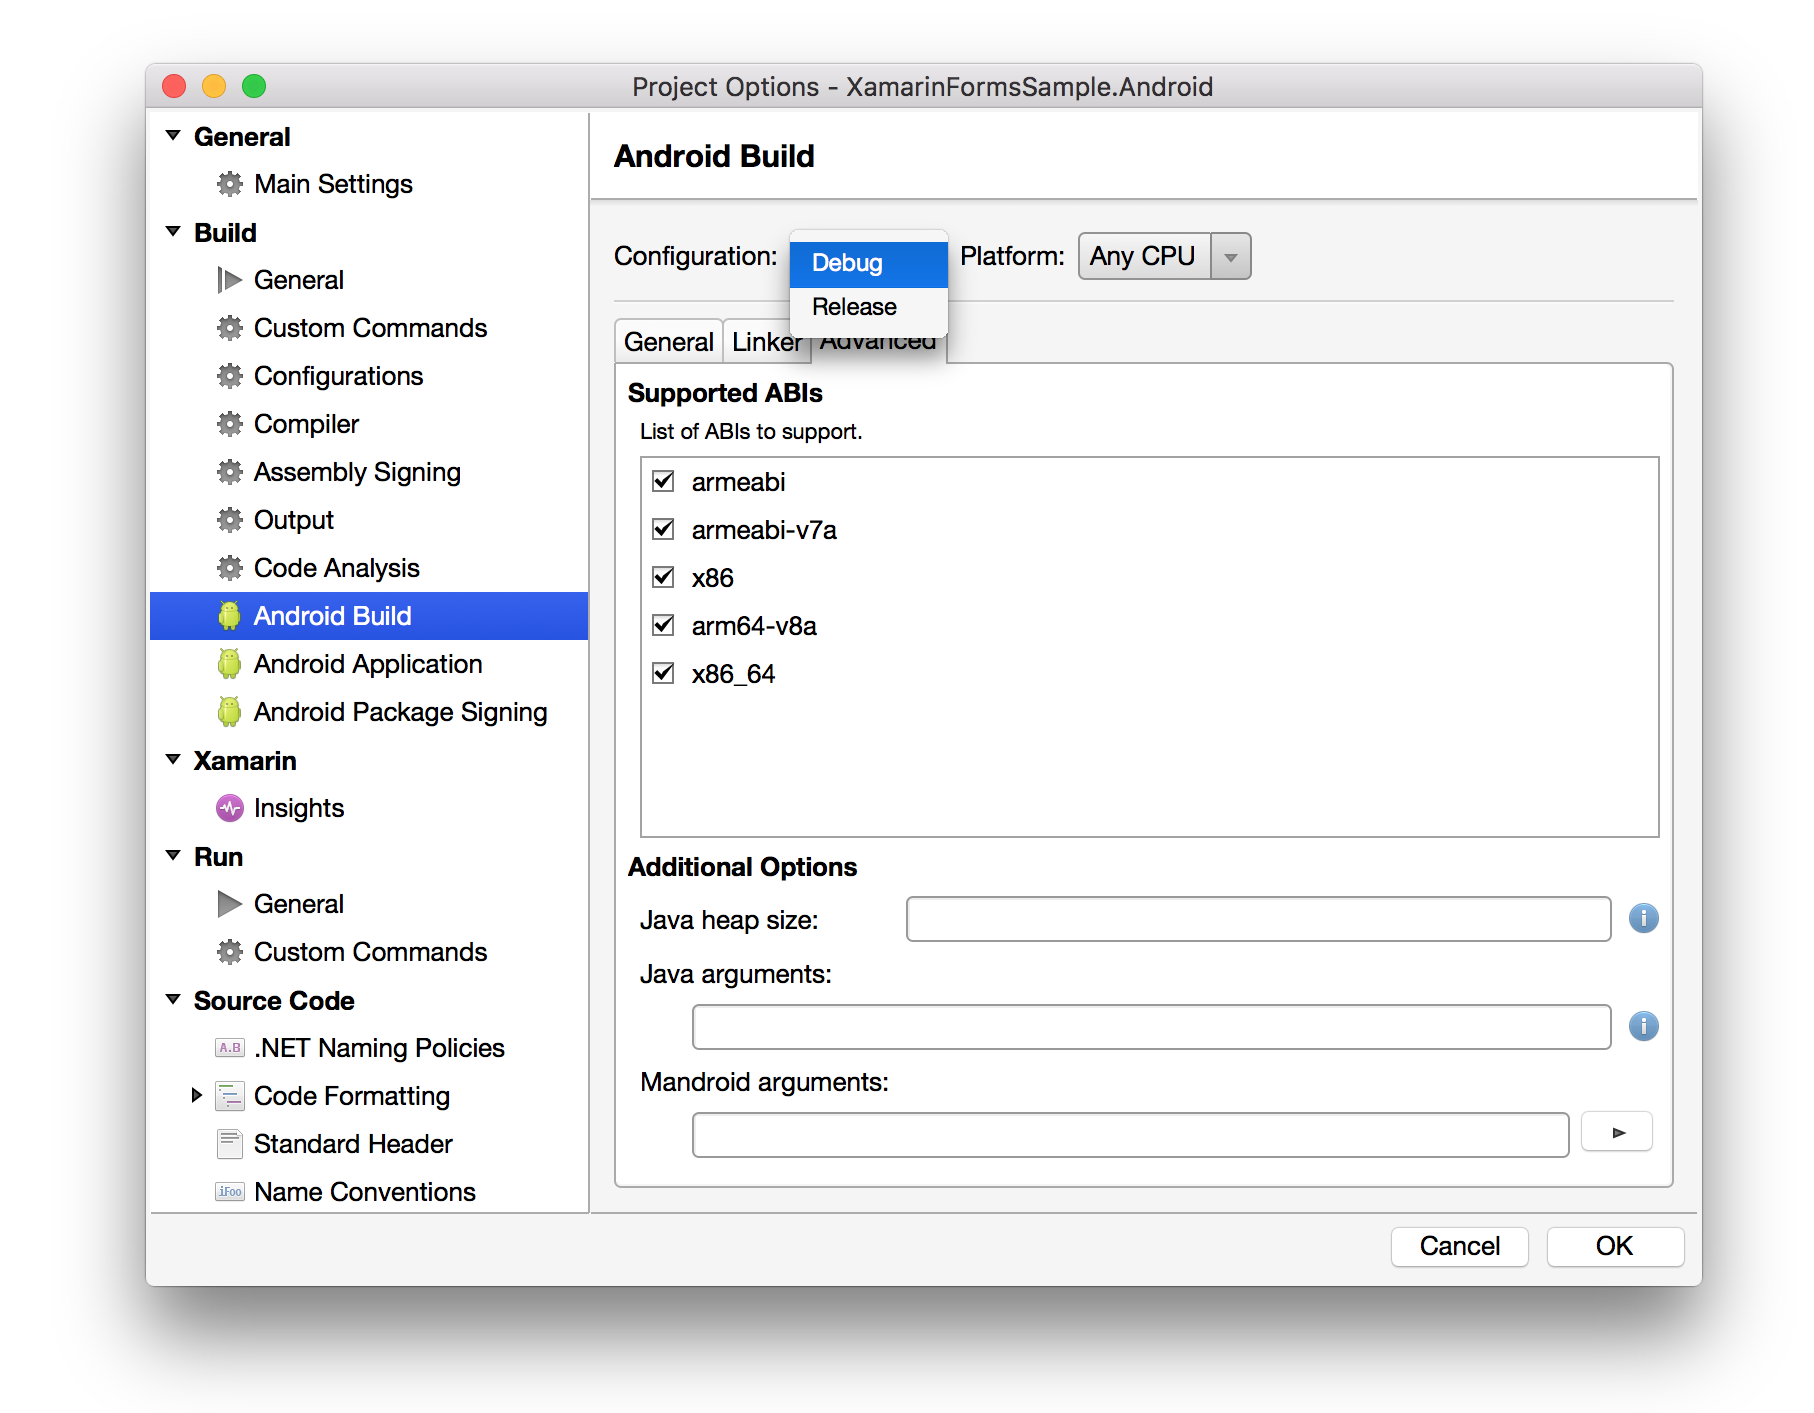
Next, in the Android Build menu, the Advanced tab, ensure that the all Supported ABIs are ticked for both Debug and Release configurations.
In the next menu, change the Application icon to @mipmap/Icon. This corresponds to the mipmap folders that we’ve just imported.
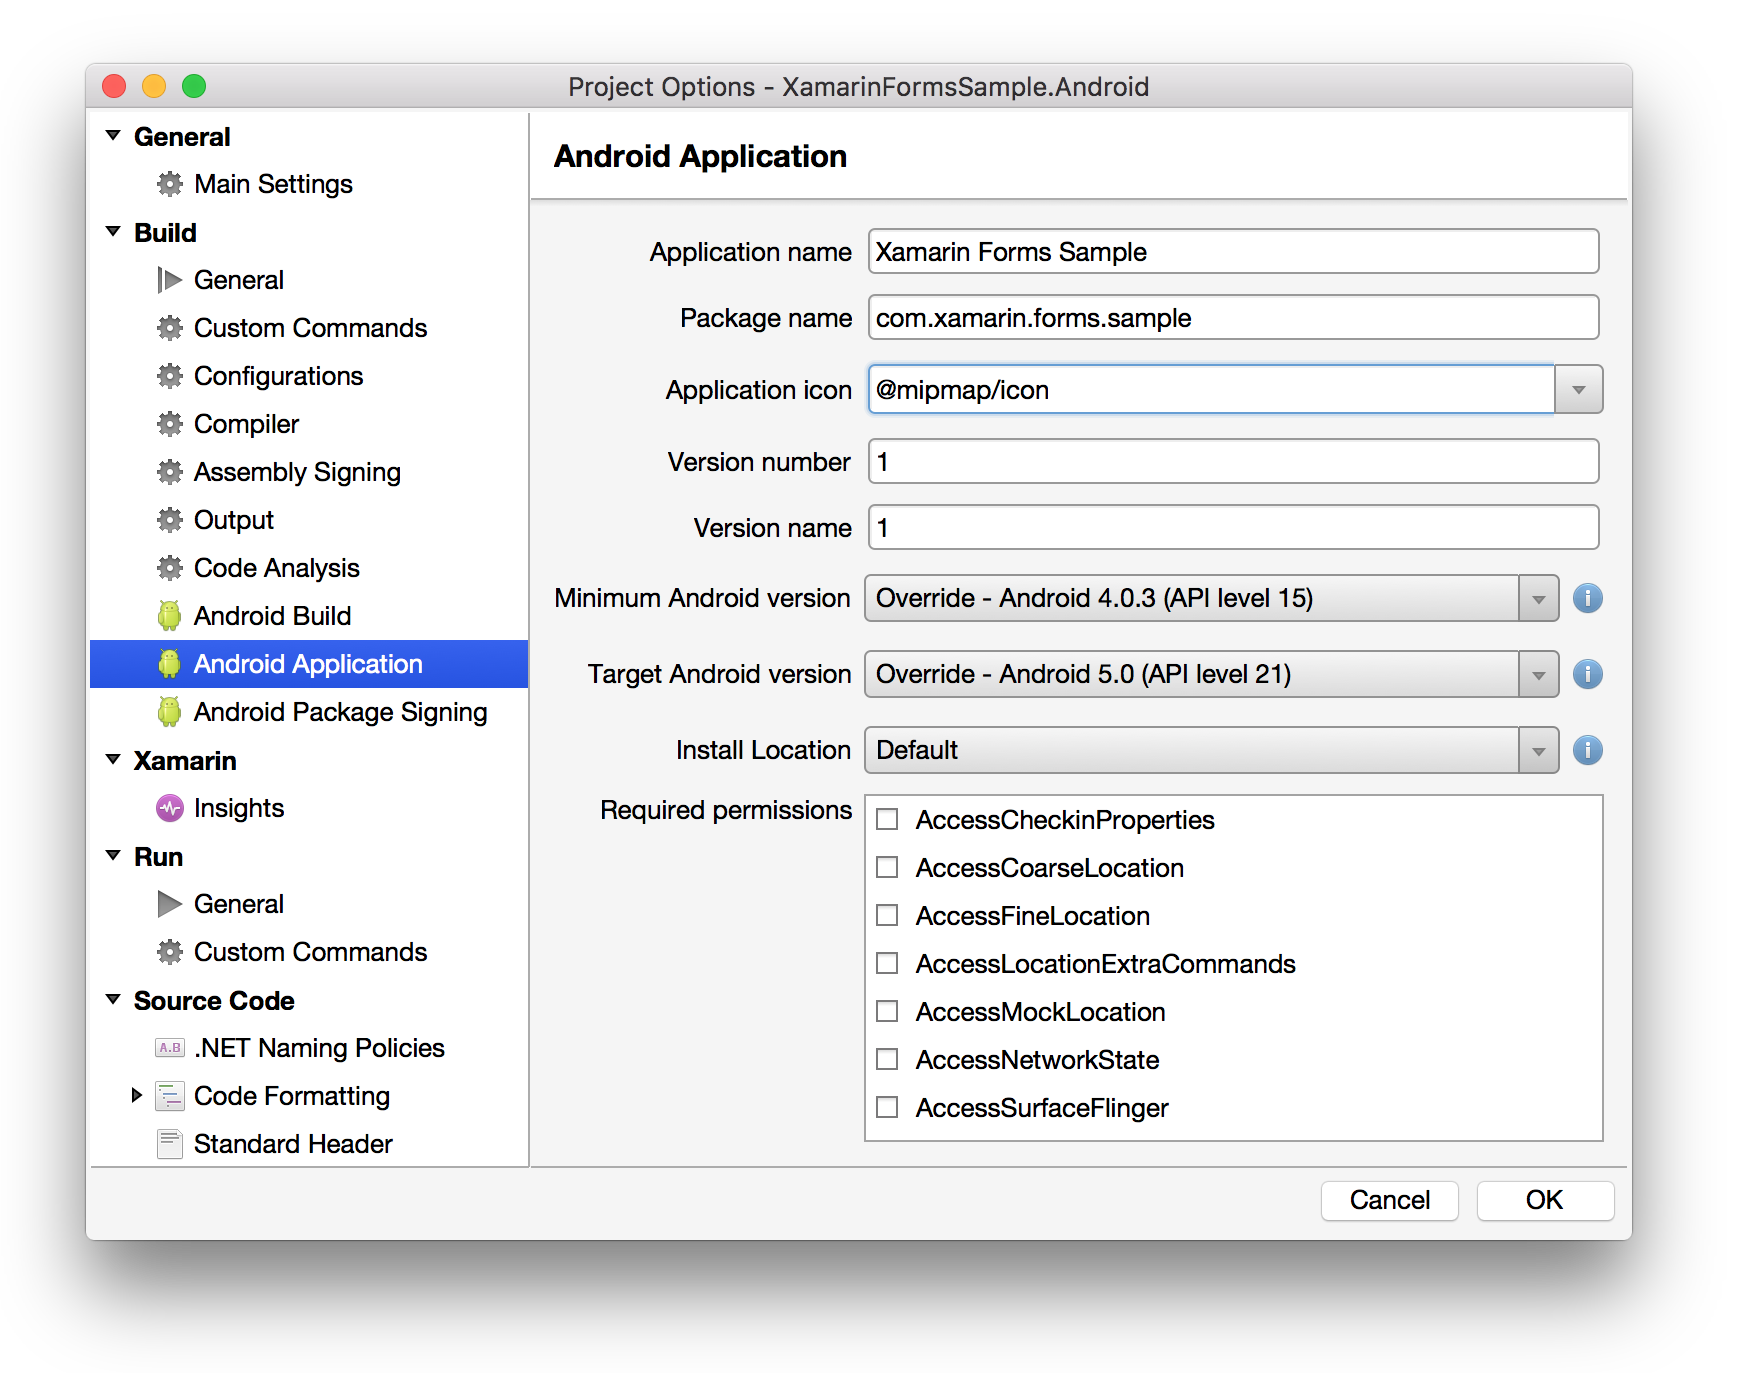
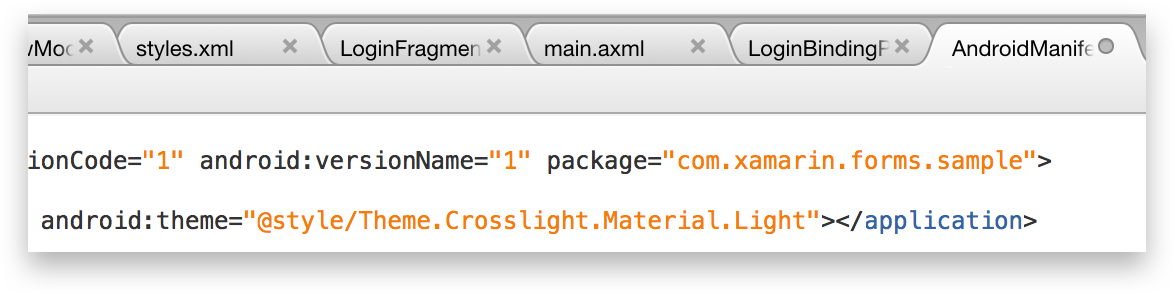
You can also ensure that the Target Android version is set to Android 5.0 or higher. Next, open up AndroidManifest.xml located inside Properties folder. Change the current theme to @style/Theme.Crosslight.Material.Light.
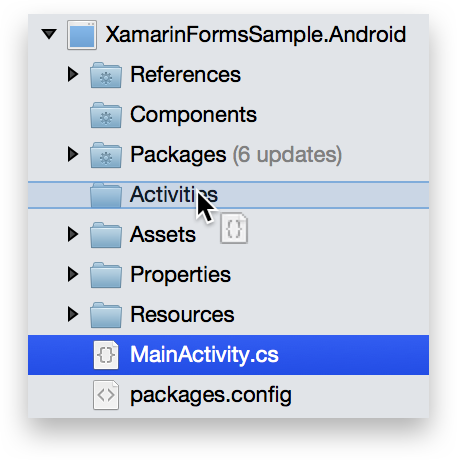
Next, create a new Activities folder inside the Android project and move the MainActivity.cs there.
Rename this file as LaunchActivity.cs and replace the contents as follows.
using Android.App;
using Intersoft.Crosslight.Android;
namespace XamarinFormsSample.Android
{
/// <summary>
/// The splash screen Activity. To change the launcher icon for the Android app, simply change the Icon property.
/// </summary>
/// <seealso cref=“Intersoft.Crosslight.Android.StartActivity“ />
[Activity(Label = “XamarinFormSample.Android“, MainLauncher = true, NoHistory = true, Icon = “@mipmap/icon“, Theme = “@style/Theme.Splash“)]
public class LaunchActivity : StartActivity
{
}
}
This is just the splash screen that will be launched when the Android app is run. Since we’ve used a new Theme here, let’s add the styles to our Resources folder. Add a new styles.xml file inside the Resources/values folder.
Add the following entry to the styles.xml file.
<?xml version=“1.0“ encoding=“utf–8“ ?>
<resources>
<style name=“Theme.Splash“ parent=“android:Theme“>
<item name=“android:windowBackground“>@drawable/light_splash</item>
<item name=“android:windowNoTitle“>true</item>
</style>
</resources>
And also add the following light_splash.png drawable to your Resources/drawable folder.

Next, add a new folder in the root directory of the Android project, called Infrastructure. Then add a new empty class called AppInitializer.
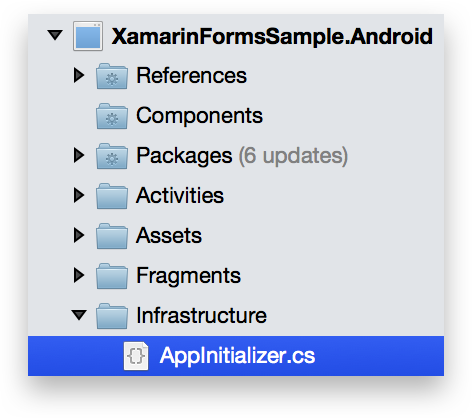
Replace the contents of the AppInitializer.cs as follows.
using XamarinFormsSample.Infrastructure;
using Intersoft.Crosslight;
namespace XamarinFormsSample.Android.Infrastructure
{
/// <summary>
/// Android Application Initializer class.
/// </summary>
/// <seealso cref=“Intersoft.Crosslight.IApplicationInitializer“ />
public sealed class AppInitializer : IApplicationInitializer
{
#region Implementation of IApplicationInitializer
/// <summary>
/// Gets the application service based on the current context.
/// </summary>
/// <param name=“context“>The context of the application.</param>
/// <returns>
/// The application service.
/// </returns>
public IApplicationService GetApplicationService(IApplicationContext context)
{
return new CrosslightAppAppService(context);
}
/// <summary>
/// Initializes and prepares the application for launch.
/// </summary>
/// <param name=“appHost“>The application host.</param>
public void InitializeApplication(IApplicationHost appHost)
{
}
/// <summary>
/// Initializes the components required for the application to run properly.
/// </summary>
/// <param name=“appHost“>The application host.</param>
public void InitializeComponents(IApplicationHost appHost)
{
}
/// <summary>
/// Initializes the services for the application to start properly.
/// </summary>
/// <param name=“appHost“>The application host.</param>
public void InitializeServices(IApplicationHost appHost)
{
}
#endregion
}
}
This file is the application initializer for Android, useful for registering custom Android services, views, and Form Builder components. We’ll leave this class as it is for now.
To create the login view for Android, we’re going to take advantage of the Crosslight Form which will help us create the login screen very quickly. Begin by creating a new folder inside the XamarinFormsSample (PCL) project called Forms. Then create a new empty class called LoginInfo.FormMetadata.cs inside the newly created folder. Use the following code.
using Intersoft.Crosslight;
using Intersoft.Crosslight.Forms;
namespace XamarinFormsSample.Model
{
[FormMetadataType(typeof(LoginInfo.FormMetadata))]
public partial class LoginInfo
{
[Form(Title = “Login“)]
public class FormMetadata
{
[Section]
public static LoginSection LoginSection;
}
public class LoginSection
{
[Layout(Style = LayoutStyle.DetailOnly)]
[StringInput(Placeholder = “Username“)]
public static string UserName;
[Layout(Style = LayoutStyle.DetailOnly)]
[StringInput(Placeholder = “Password“)]
[Display(Caption = “Password“)]
public static string Password;
[Editor(EditorType.Button)]
[Display(Caption = “Login“)]
[Binding(Path = “LoginCommand“, SourceType = BindingSourceType.ViewModel)]
[Button(Title = “Login“, TextColor = “#FF285AFF“, Style = ButtonStyle.Simple)]
public string LoginButton;
}
}
}
This is the FormMetadata that will be used for our login screen. This class is decorated with the FormMetadataTypeAttribute class which will indicate that this class will be used for the Form Builder definition. Also note that this class is a partial class from the LoginInfo model found inside the XamarinFormsSample/Models folder. Here, we only have a single LoginSection which consists of the following UI elements:
- Text box for the UserName
- Text box for the Password
- Button for the Login button.
It is recommended to match the property name with the model to ensure Form Builder automatic validation. The login button is also bound to the LoginCommand in the LoginViewModel.
Add a new Crosslight Android Material Activity inside the Activities folder.
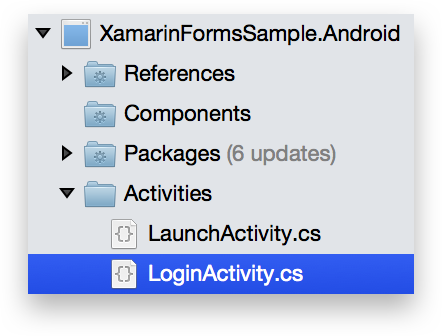
Give it a name of LoginActivity.

Replace the contents of LoginActivity.cs as follows.
using Android.App;
using Intersoft.Crosslight.Android.v7;
using XamarinFormsSample.Core.ViewModels;
using System;
using Android.Runtime;
namespace XamarinFormsSample.Android.Activities
{
/// <summary>
/// The main activity that acts as the host for LoginFragment.
/// </summary>
[Activity]
public class LoginActivity : AppCompatActivity<LoginViewModel>
{
#region Constructors
public LoginActivity()
{
}
public LoginActivity(IntPtr javaReference, JniHandleOwnership transfer)
: base(javaReference, transfer)
{
}
#endregion
}
}
This Activity will act as a container for the LoginFragment, which is the real view that’s being rendered for the login screen. Create a new folder called Fragments at the root of the Android project.
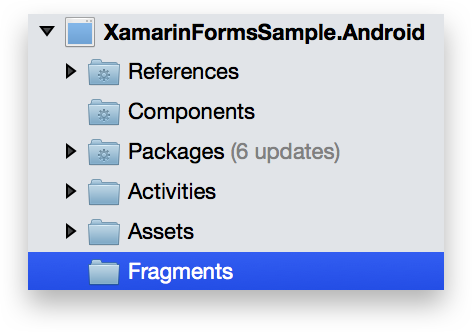
Create a new Crosslight Android Material Form Fragment in this folder, called LoginFragment.

Paste the following code into LoginFragment.
using System;
using Android.Runtime;
using XamarinFormsSample.Core.BindingProviders;
using XamarinFormsSample.Core.ViewModels;
using Intersoft.Crosslight;
using Intersoft.Crosslight.Android.v7;
namespace XamarinFormsSample.Android.Fragments
{
/// <summary>
/// The main Fragment contained inside LoginActivity.
/// </summary>
public class LoginFragment : FormFragment<LoginViewModel>
{
#region Methods
/// <summary>
/// Initializes this instance.
/// </summary>
protected override void Initialize()
{
base.Initialize();
this.IconId = Resource.Drawable.ic_toolbar;
}
#endregion
}
}
This project contains nothing except for the icon that will be used in the toolbar. When trying to run the project, you’ll get an error that ic_toolbar cannot be found. This can be easily resolved by copying the following image to the Resources/drawable folder.
![]()
The above is white and transparent, which makes it might be hard to see, but this icon will fit to almost Material Toolbar color you throw at it, except for white color, of course. You can replace this icon later with your own app branding, if you’d like.
If you build and run the project now, you should get the following screen.
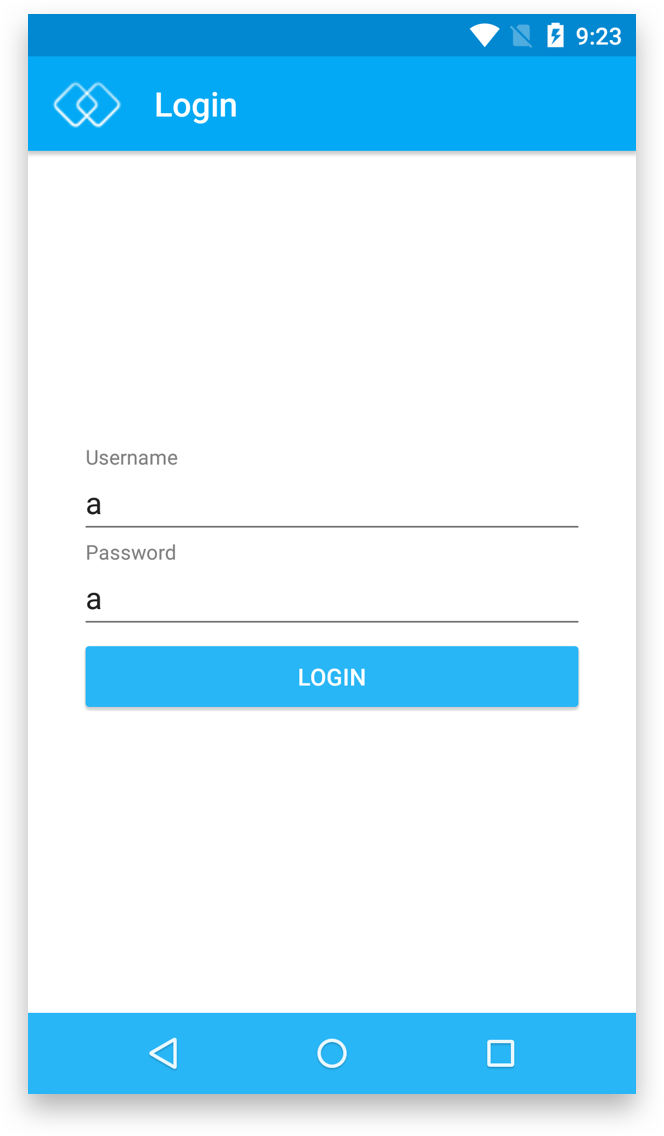
When you click on the Login button, nothing will happen for now, since we’ve omitted the logic for ExecuteLogin in the LoginViewModel.
Preparing the Employee List Screen
Now that we’ve successfully displayed the login screen, we’re going to further modify this sample to navigate to the list of employees screen after we’ve clicked on the Login button. Start by modifying the LoginViewModel located inside the XamarinFormsSample (PCL) project. Use the following code.
private void ExecuteLogin(object parameter)
{
this.Validate();
if (!this.HasErrors)
this.NavigationService.Navigate<EmployeeListViewModel>();
else
this.MessagePresenter.Show(this.ErrorMessage);
}
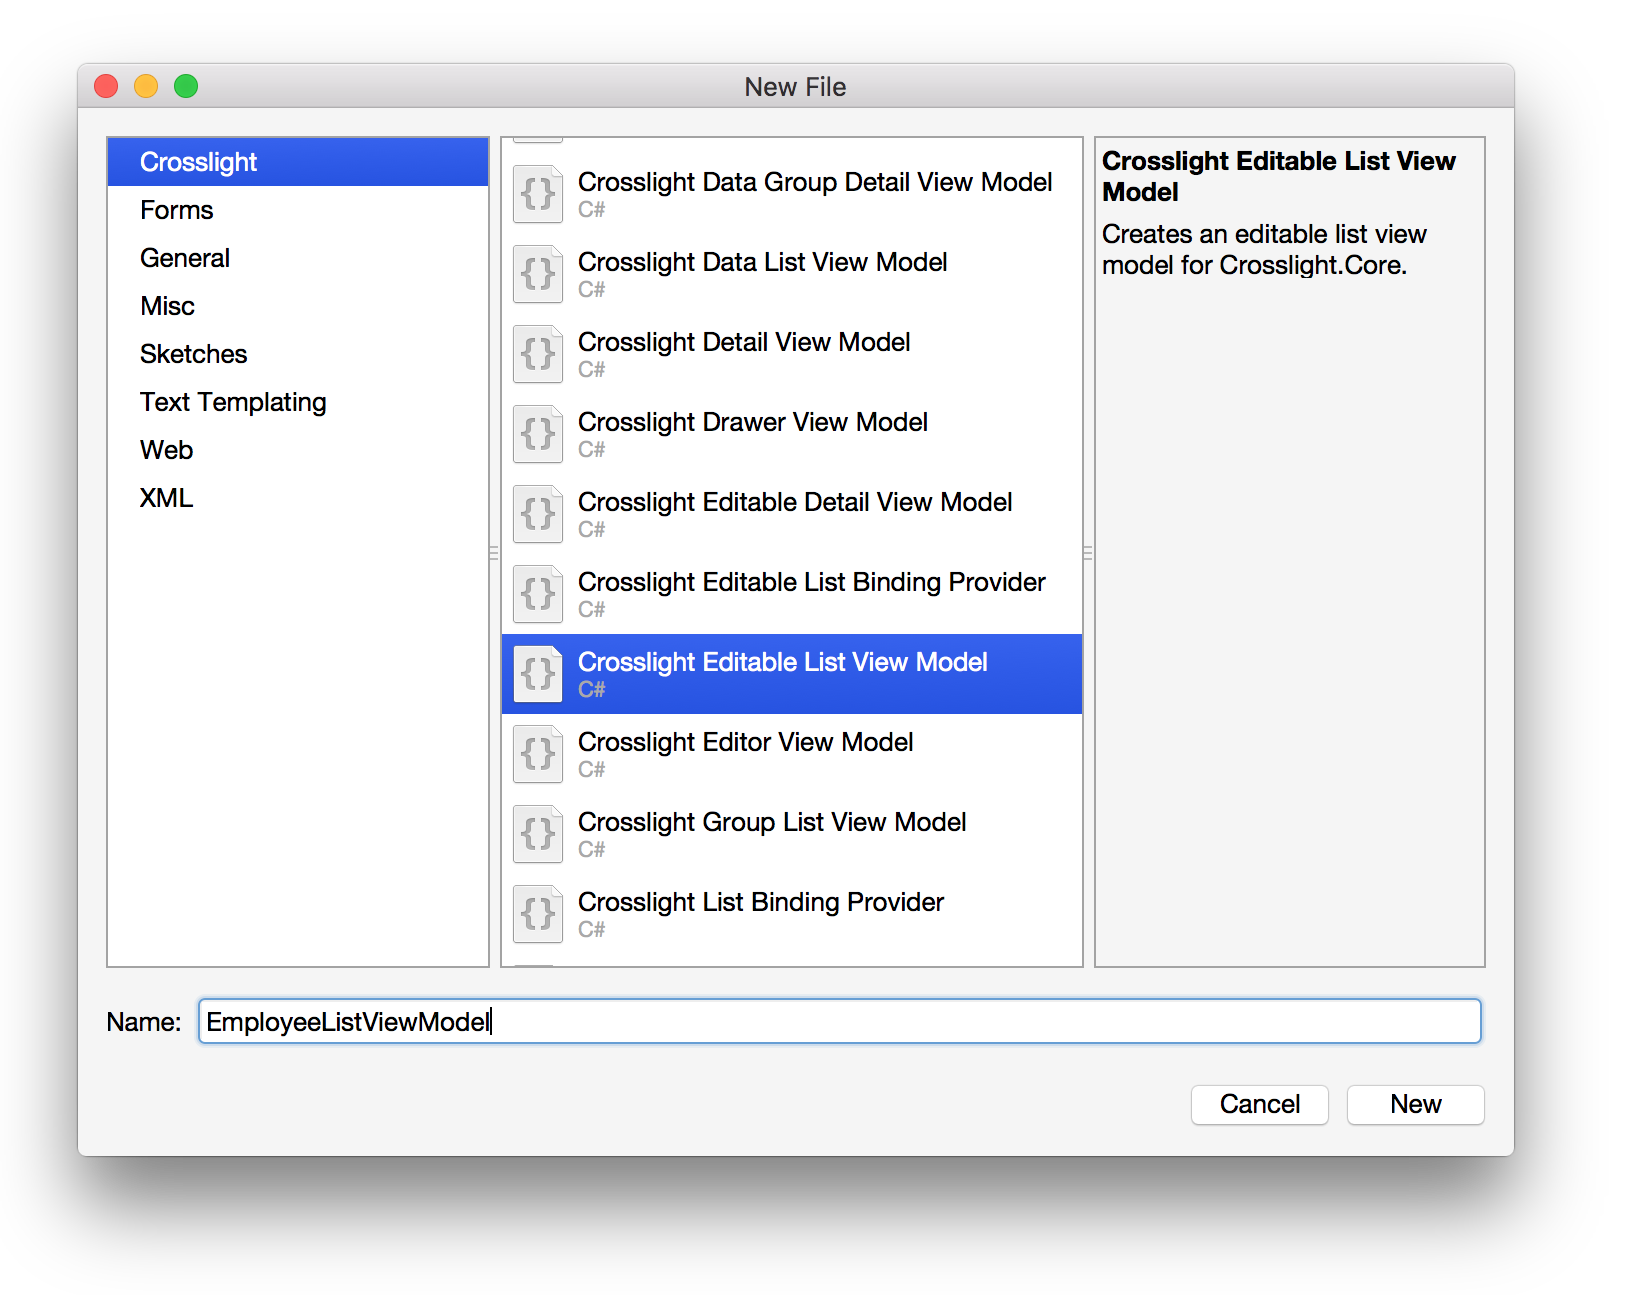
Here, we simply invoke the Validate method that is built-in to the EditorViewModelBase. If there’s any errors, then it will be displayed using the built-in message presenter that comes with the ViewModelBase. If the user has indeed entered any values, then the app will navigate to the employee list screen. Create a new Editable List View Model under the XamarinFormsSample/ViewModels folder. Give it a name of EmployeeListViewModel.
Use the following code:
using System.Collections.Generic;
using System.Collections.ObjectModel;
using System.Linq;
using Intersoft.Crosslight;
using Intersoft.Crosslight.ViewModels;
using XamarinFormsSample.Model;
namespace XamarinFormsSample.Core.ViewModels
{
public class EmployeeListViewModel : EditableListViewModelBase<Employee>
{
#region Constructors
public EmployeeListViewModel()
{
this.SourceItems = this.Employees;
this.Title = “Employee List“;
}
#endregion
#region Fields
private ObservableCollection<Employee> _employees;
#endregion
#region Properties
public ObservableCollection<Employee> Employees
{
get
{
if (_employees != null)
return _employees;
List<Employee> list = new List<Employee>
{
new Employee
{
FirstName = “Cecil“,
LastName = “Kinross“,
ImageUri = “CecilKinross“
},
new Employee
{
FirstName = “William“,
LastName = “Hall“,
ImageUri = “WilliamHall“
},
new Employee
{
FirstName = “Robert“,
LastName = “Spall“,
ImageUri = “RobertSpall“
},
new Employee
{
FirstName = “Ernest“,
LastName = “Smith“,
ImageUri = “ErnestSmith“
},
new Employee
{
FirstName = “Paul“,
LastName = “Triquet“,
ImageUri = “PaulTriquet“
}
};
int counter = 1;
foreach (Employee employee in list)
{
employee.Twitter = “@fake“ + counter++;
}
_employees = new ObservableCollection<Employee>(list.OrderBy(e => e.LastName));
return _employees;
}
}
#endregion
}
}
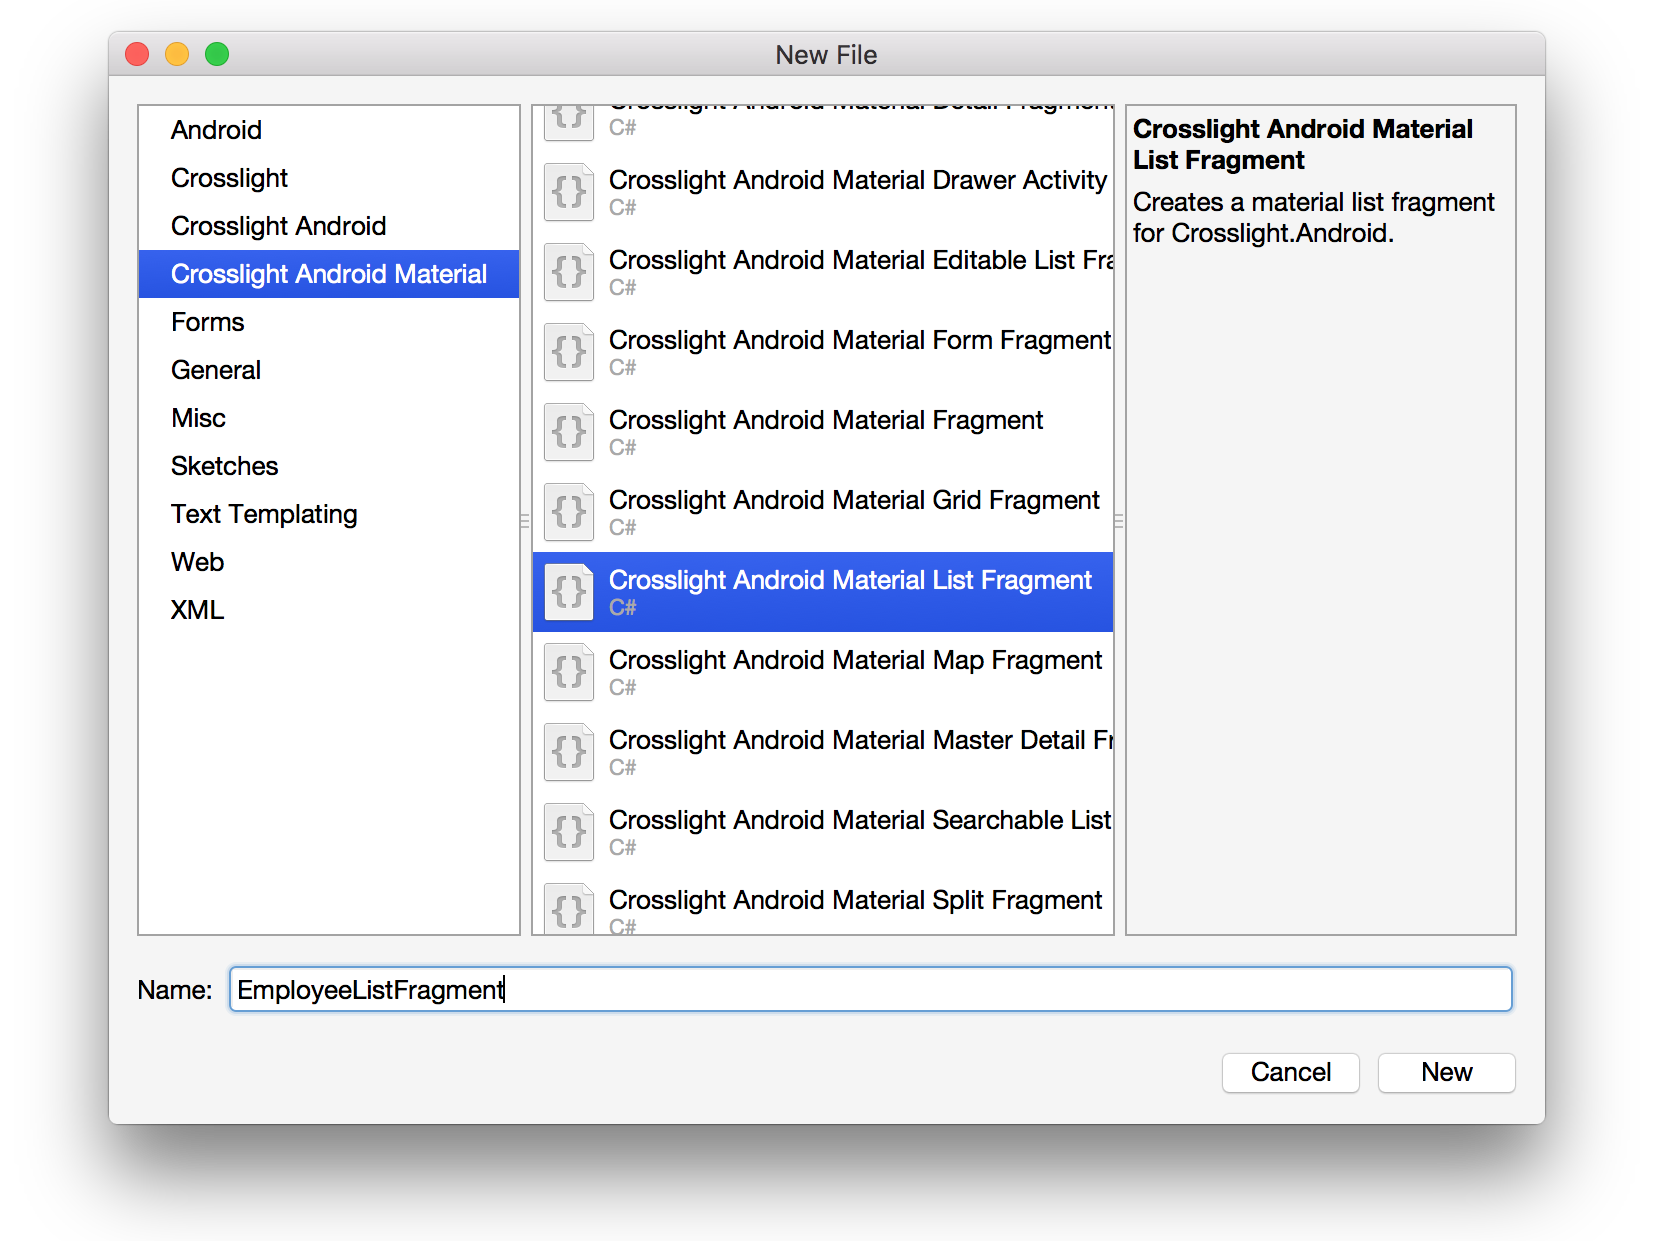
Remember the Employees property code we’ve copied from the deleted App.cs? Now it’s the time to use the code. In this ViewModel, we simply populate the list of employees to the SourceItems property of the EmployeeListViewModel and set the initial Title for the EmployeeListViewModel. Next, let’s prepare the EmployeeListFragment. Create a new Crosslight Android Material List Fragment inside XamarinFormsSample.Android/Fragments folder and give it a name of EmployeeListFragment.
Use the following code.
using Android.Runtime;
using Intersoft.Crosslight;
using Intersoft.Crosslight.Android;
using Intersoft.Crosslight.Android.v7;
using Intersoft.Crosslight.Android.v7.ComponentModels;
using System;
using Android.Graphics;
using Android.Graphics.Drawables;
using XamarinFormsSample.Core.BindingProviders;
using XamarinFormsSample.Core.ViewModels;
namespace XamarinFormsSample.Android.Fragments
{
[ImportBinding(typeof(EmployeeListBindingProvider))]
public class EmployeeListFragment : RecyclerViewFragment<EmployeeListViewModel>
{
#region Constructors
public EmployeeListFragment()
{
}
public EmployeeListFragment(IntPtr javaReference, JniHandleOwnership transfer)
: base(javaReference, transfer)
{
}
#endregion
#region Properties
/// <summary>
/// Gets the layout identifier of list item.
/// </summary>
/// <value>
/// The list item layout identifier.
/// </value>
protected override int ItemLayoutId
{
get { return Resource.Layout.item_layout; }
}
#endregion
#region Methods
protected override void Initialize()
{
//To learn more how to configure this template,
//see http://developer.intersoftsolutions.com/display/crosslight/Using+Material+Recycler+View+Fragment
base.Initialize();
this.ImageLoaderSettings.AnimateOnLoad = true;
this.Appearance.Background = new ColorDrawable(Color.WhiteSmoke);
//Recycler View configuration
this.InteractionMode = ListViewInteraction.Navigation;
this.SourceSharedElementIds.Add(Resource.Id.Icon);
}
#endregion
}
}
The list view is pretty simple, it only contains 2 default constructors needed for Fragment initialization, then we provide the item layout to be used by providing the item_layout as ID (which we’ll create in just a moment), then in the Initialize method, we initialized several settings, such as ImageLoaderSettings to animate when it loads, then set the Fragment background to the Color.WhiteSmoke color. Then we configure the InteractionMode of the Fragment to navigate upon item click. Lastly, we specified the shared element transition to transition from the ImageView with id of Icon to the FormFragment (which we’ll create after the Employee List screen).
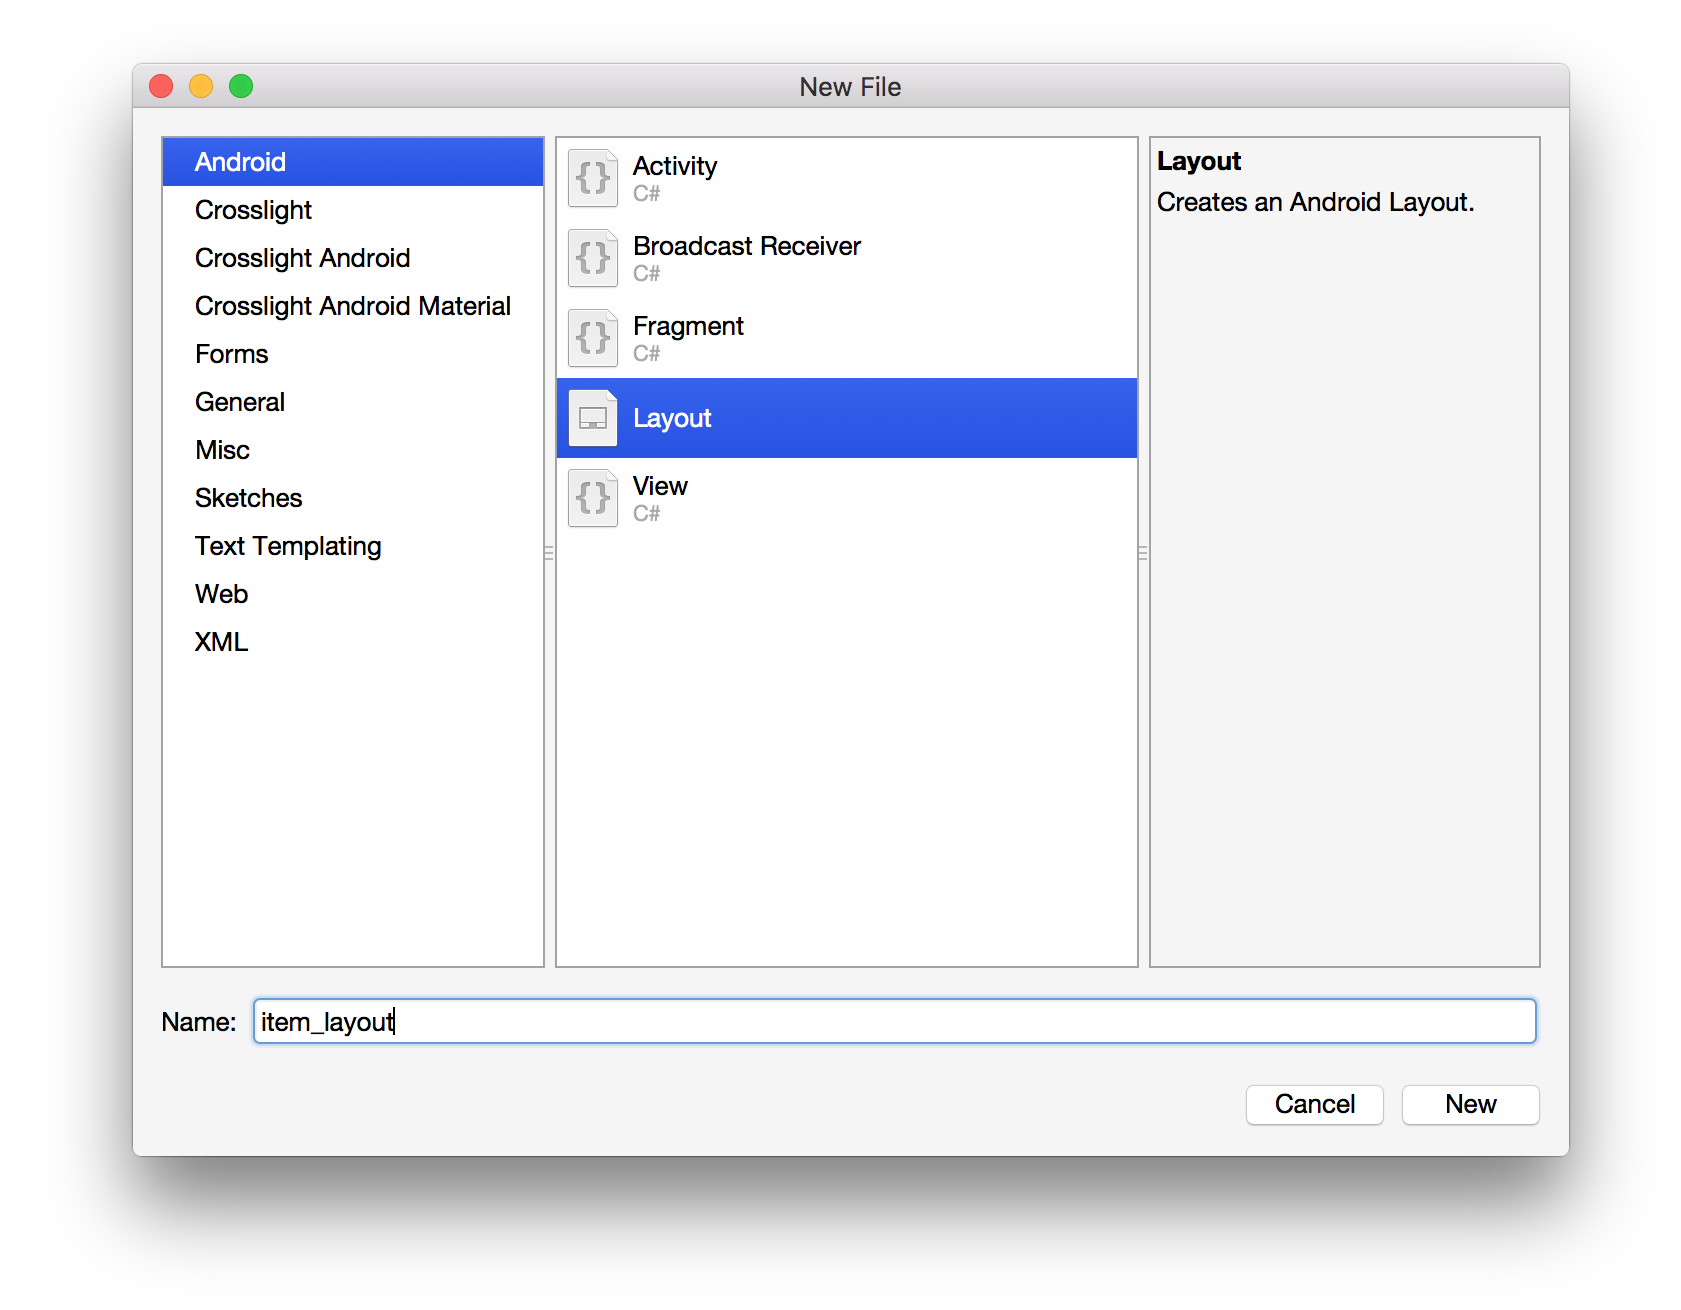
Create a new Android layout file inside XamarinFormsSample.Android/Resources/layout folder and give it a name of item_layout.
Paste the following code inside the new layout file.
<?xml version=“1.0“ encoding=“utf–8“?>
<intersoft.crosslight.android.v7.CardView xmlns:app=“http://schemas.android.com/apk/res–auto“
xmlns:android=“http://schemas.android.com/apk/res/android“
android:layout_width=“match_parent“
android:layout_height=“wrap_content“
android:foreground=“?android:attr/selectableItemBackground“
android:layout_marginLeft=“8dp“
android:layout_marginRight=“8dp“
android:layout_marginBottom=“8dp“
app:cardElevation=“2dp“>
<RelativeLayout
android:layout_width=“match_parent“
android:layout_height=“80dp“>
<ImageView
android:layout_width=“72dp“
android:layout_height=“72dp“
android:id=“@+id/Icon“
android:layout_margin=“4dp“
android:gravity=“center_vertical“
android:layout_centerVertical=“true“ />
<LinearLayout
android:layout_width=“match_parent“
android:layout_height=“wrap_content“
android:layout_toRightOf=“@id/Icon“
android:gravity=“center_vertical“
android:layout_centerVertical=“true“
android:orientation=“vertical“>
<TextView
android:textAppearance=“?android:attr/textAppearanceMedium“
android:id=“@+id/TextLabel“
android:layout_width=“match_parent“
android:layout_height=“wrap_content“
android:ellipsize=“end“
android:singleLine=“true“ />
<TextView
android:textAppearance=“?android:attr/textAppearanceSmall“
android:id=“@+id/Text2“
android:layout_width=“match_parent“
android:layout_height=“wrap_content“
android:singleLine=“true“ />
</LinearLayout>
</RelativeLayout>
</intersoft.crosslight.android.v7.CardView>
Here, we’re going to use the new CardView to be the item layout for our employee list screen. To wrap up this view, we’re going to create the EmployeeListBindingProvider that will bind the data from the EmployeeListViewModel to the EmployeeListFragment. Create a new folder inside the XamarinFormsSample (PCL) project called BindingProviders and place it inside the newly created folder.
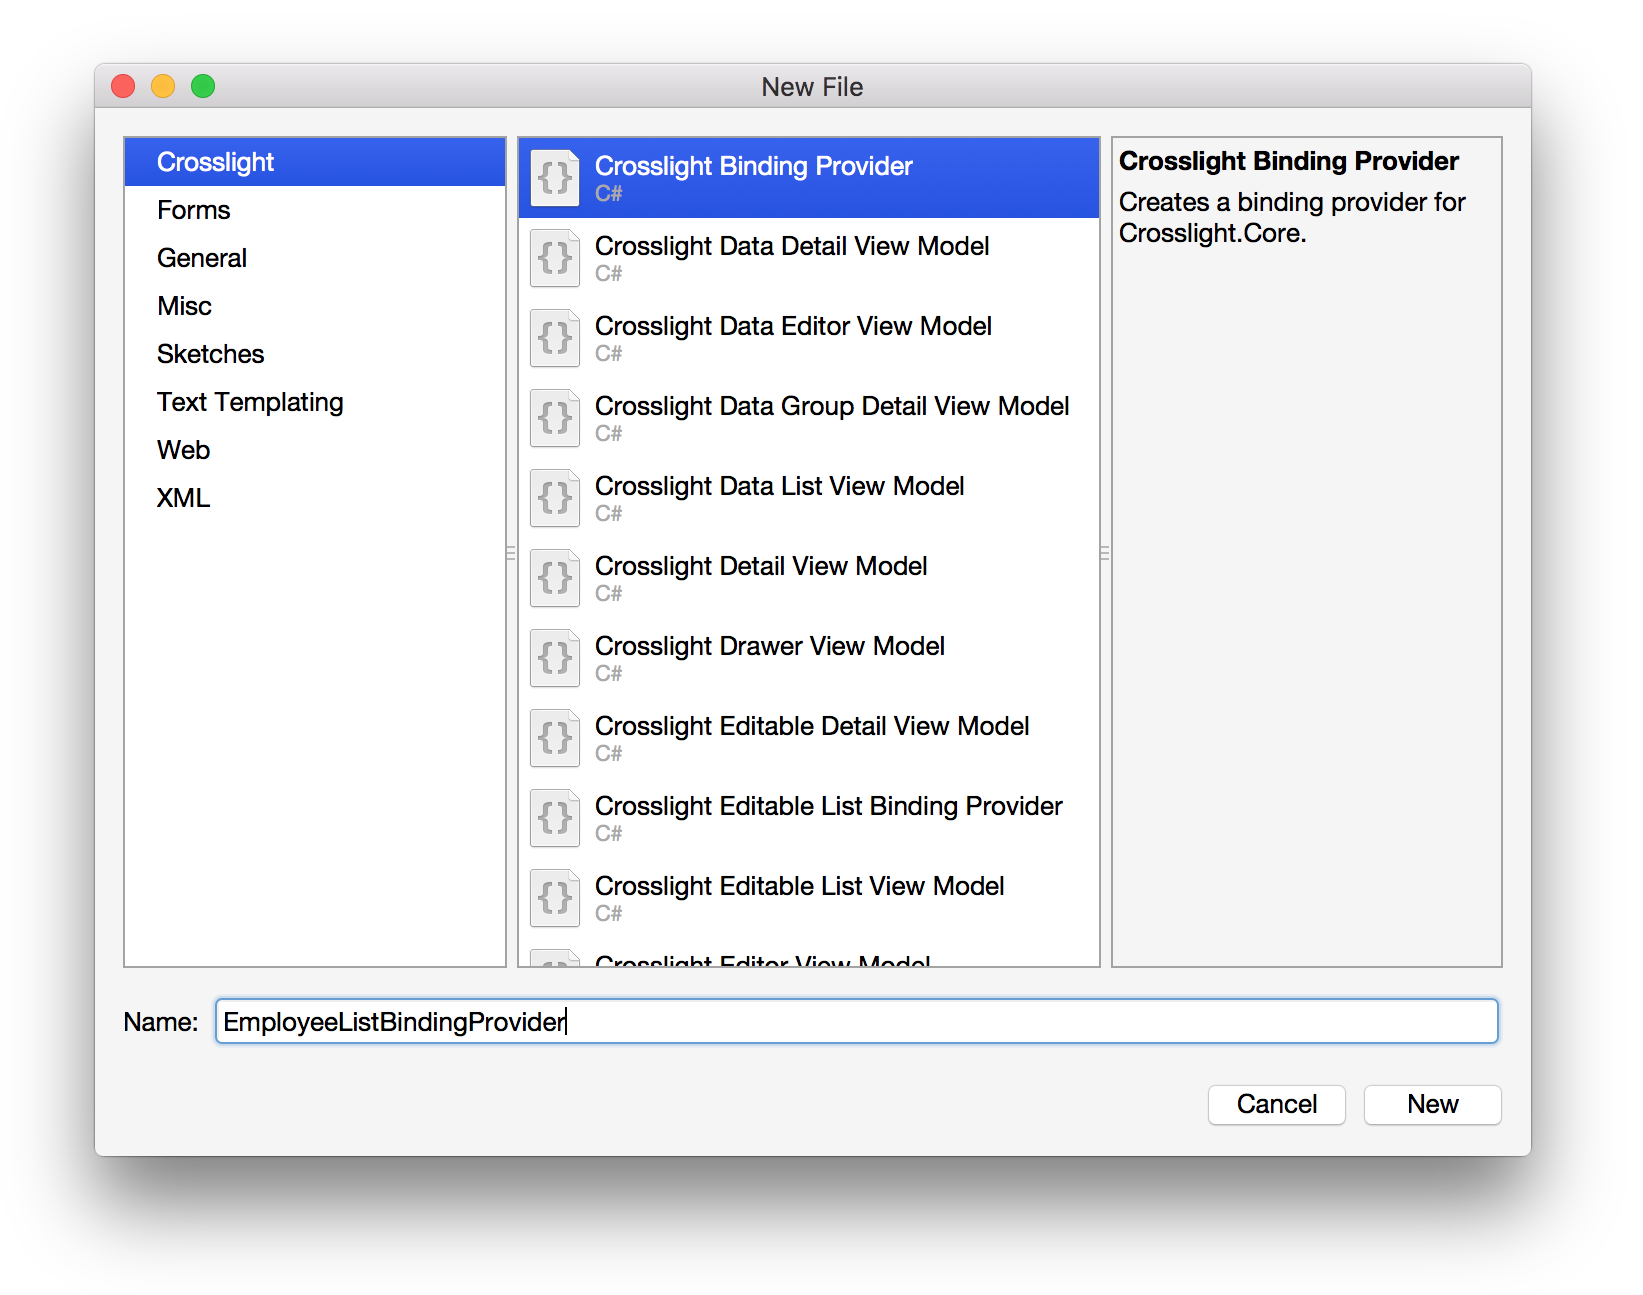
Use the following code.
using Intersoft.Crosslight;
using XamarinFormsSample.Core.ViewModels;
namespace XamarinFormsSample.Core.BindingProviders
{
public class EmployeeListBindingProvider : BindingProvider
{
#region Constructors
public EmployeeListBindingProvider()
{
ItemBindingDescription itemBinding = new ItemBindingDescription
{
DisplayMemberPath = “DisplayName“,
DetailMemberPath = “Twitter“,
ImageMemberPath = “ImageUri“
};
this.AddBinding(“TableView“, BindableProperties.ItemsSourceProperty, “Items“);
this.AddBinding(“TableView“, BindableProperties.ItemTemplateBindingProperty, itemBinding, true);
this.AddBinding(“TableView“, BindableProperties.SelectedItemProperty, “SelectedItem“, BindingMode.TwoWay);
// this.AddBinding(“TableView“, BindableProperties.DetailNavigationTargetProperty, new NavigationTarget(typeof(EmployeeEditorViewModel), NavigationMode.Push), true);
}
#endregion
}
}
In the EmployeeListBindingProvider, we did several things:
- Bound the ItemsSource for the RecyclerView with the Items property from the ViewModel.
- Bound the ItemTemplateBinding for the RecyclerView to display the specified ItemBindingDescription.
- Bound the SelectedItem of the RecyclerView to the SelectedItem property in the ViewModel.
- Bound the DetailNavigationTarget of the RecyclerView to use which ViewModel when navigation is performed, and what mode of the navigation is used. (which is commented for now, for the sake compilation purposes).
Let’s build and run this project to see how it looks like.
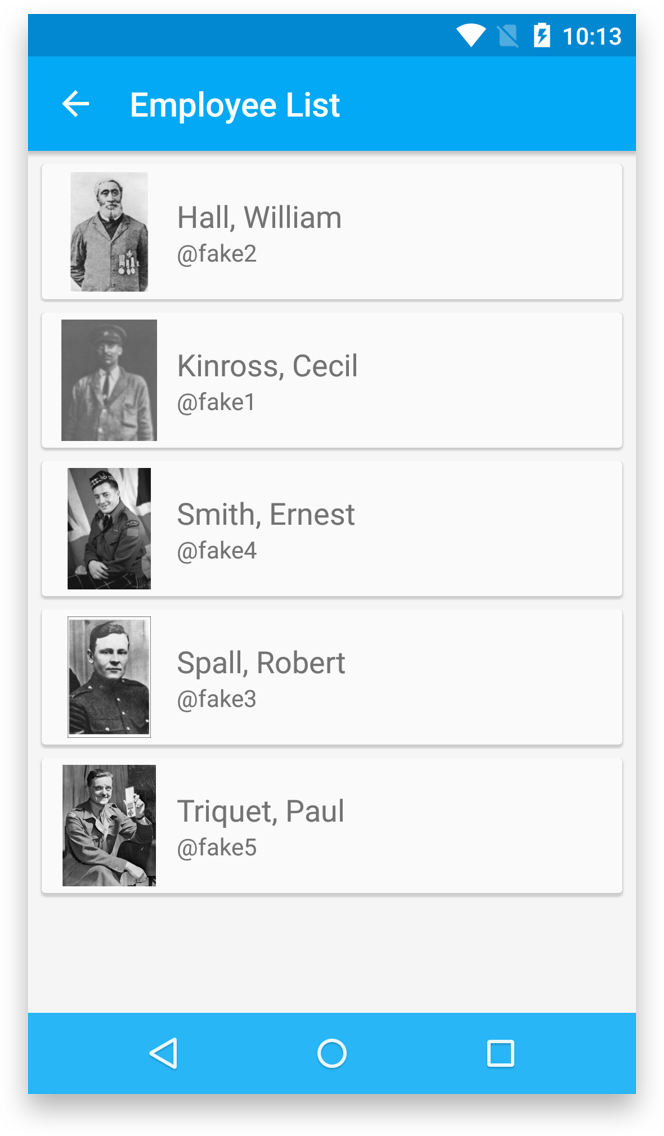
Phew. We’re almost there. For Android, we only have 1 screen left, which is the editor view. Let’s proceed.
Preparing the Employee Editor Screen
In this section, we’re going to use the Crosslight Form Builder capabilities to display our form. Begin by creating a new folder inside the XamarinFormsSample (PCL) and call it Forms. Inside the folder, create a new empty class and name it Employee.FormMetadata.cs.

Replace the contents of the file with the following code.
using Intersoft.Crosslight;
using Intersoft.Crosslight.Forms;
namespace XamarinFormsSample.Model
{
[FormMetadataType(typeof(Employee.FormMetadata))]
public partial class Employee
{
[Form(Title = “{FormState} Employee“)]
public class FormMetadata
{
[Section]
public static ImageSection ImageSection;
[Section]
public static GeneralSection GeneralSection;
[Section]
public static ButtonSection ButtonSection;
}
public class ImageSection
{
[Editor(EditorType.Image)]
[Layout(Style = LayoutStyle.DetailOnly)]
[Image(Height = 250, HorizontalAlignment = ControlHorizontalAlignment.Center, ScaleMode = ImageScaleMode.ScaleAspectFit, Padding = 6)]
[Editable(false)]
public static string ImageUri;
}
public class GeneralSection
{
[StringInput(Placeholder = “First Name“)]
[Display(Caption = “First Name“)]
public static string FirstName;
[StringInput(Placeholder = “Last Name“)]
[Display(Caption = “Last Name“)]
public static string LastName;
[StringInput(Placeholder = “Twitter“)]
[Display(Caption = “Twitter“)]
public static string Twitter;
}
public class ButtonSection
{
[Editor(EditorType.Button)]
[Binding(Path = “DeleteCommand“, SourceType = BindingSourceType.ViewModel)]
[Button(Title = “Delete“, TextColor = “#FFFF0000“, Style = ButtonStyle.Simple)]
public string ShowMessageButton;
}
}
}
Let’s take this code from the top. We’ve created a partial class from the Employee model. Form Builder is all about attributes, whether it’s in the class level or property level. In the class definition, the FormAttribute is used to indicate that this is a Crosslight Form Builder metadata, and which class used as the real form metadata.
In this example, the inner FormMetadata class is used. Then, we have 3 sections, which will be inner classes as well, the three sections are: ImageSection, GeneralSection and ButtonSection. Then in each section, we define each properties that will be rendered for the form. It is highly recommended to use the same name as the original properties contained in the Model, or else, you would have to specify the BindingAttribute that will be used for the property, as shown in the last property in the ButtonSection.
Now that we’ve prepared the Form Metadata, let’s proceed by creating the FormFragment. Create a new Crosslight Android Material Form Fragment inside the Fragments folder and call it EmployeeFormFragment.
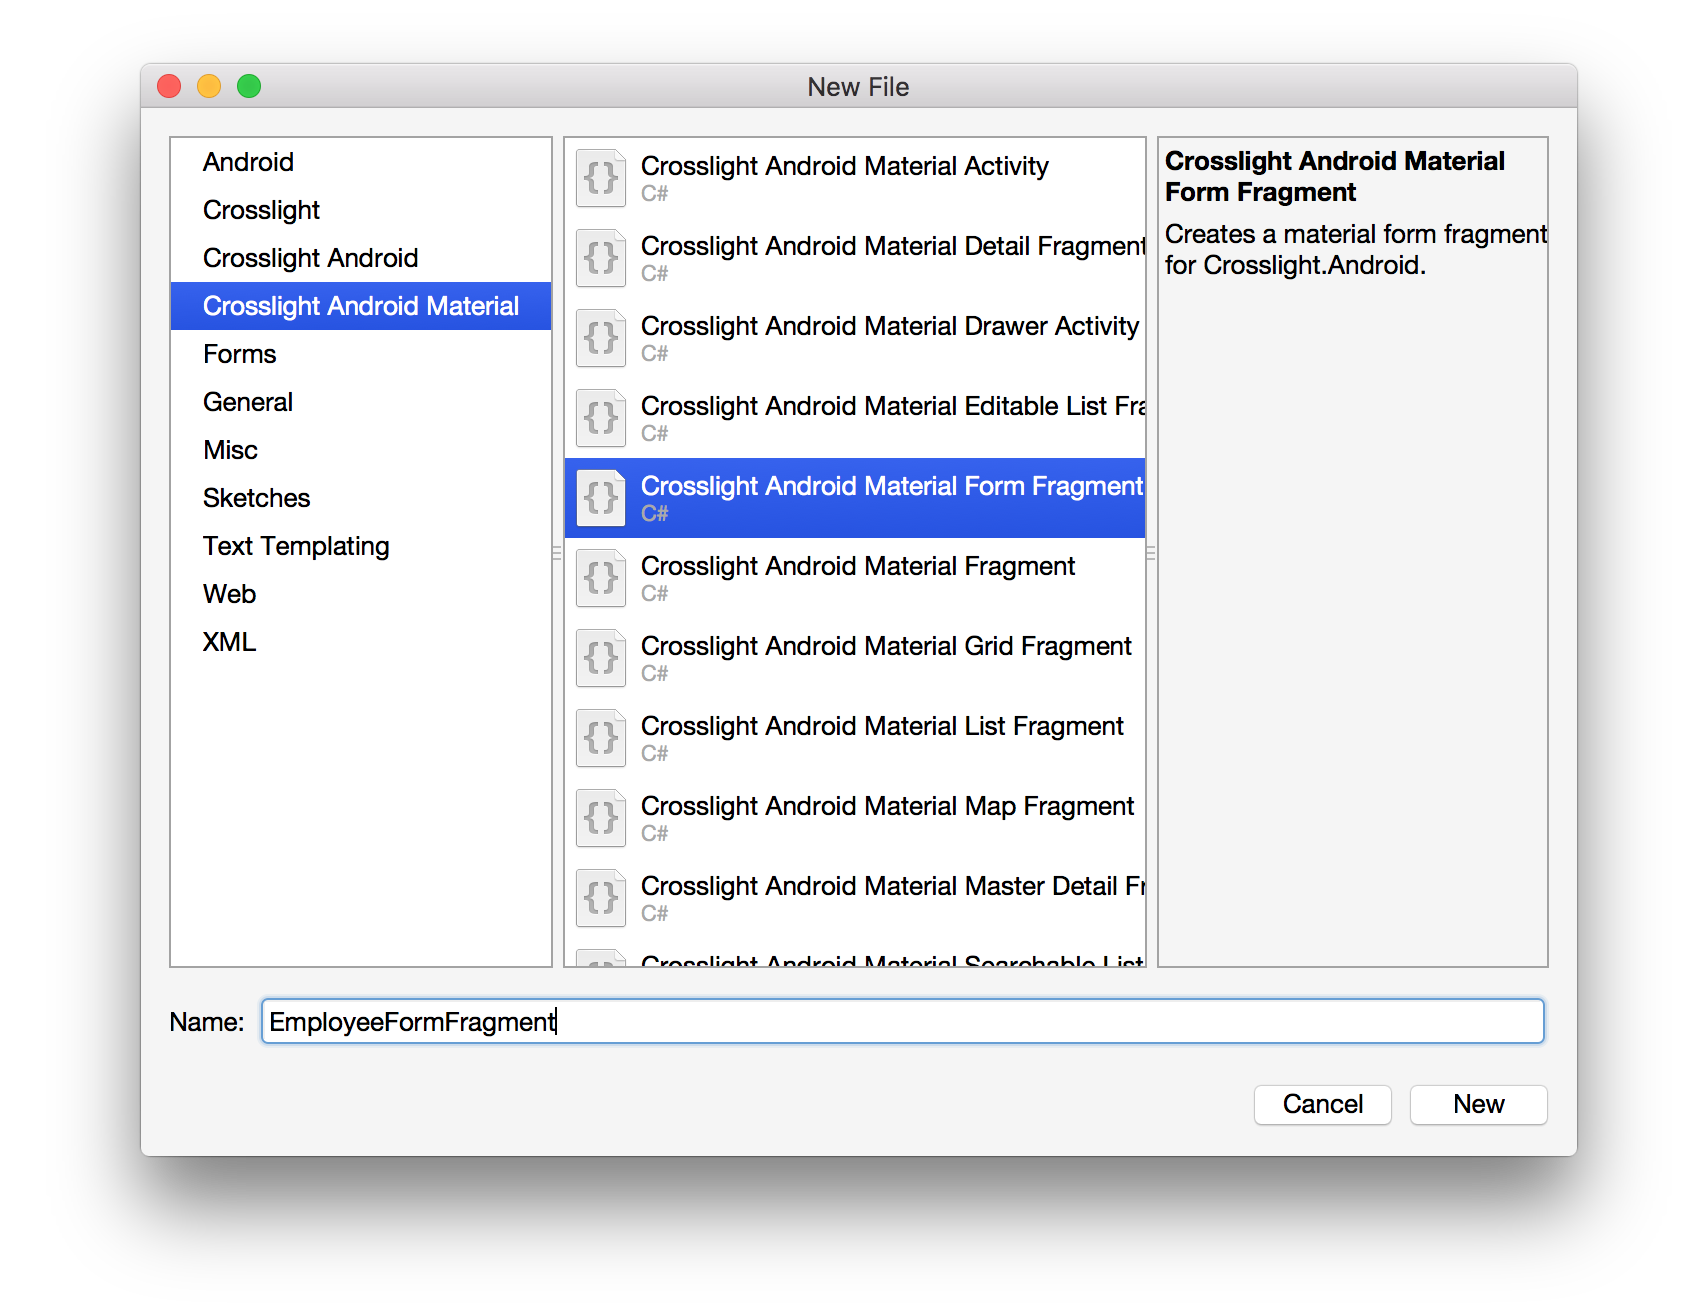
Replace the contents of the file with the following code.
using System;
using Android.Runtime;
using Intersoft.Crosslight;
using Intersoft.Crosslight.Android.v7;
using XamarinFormsSample.Core.ViewModels;
namespace XamarinFormsSample.Android.Fragments
{
public class EmployeeFormFragment : FormFragment<EmployeeEditorViewModel>
{
#region Constructors
public EmployeeFormFragment()
{
}
public EmployeeFormFragment(IntPtr javaReference, JniHandleOwnership transfer)
: base(javaReference, transfer)
{
}
#endregion
#region Overrides of FormFragment<EmployeeEditorViewModel>
protected override void Initialize()
{
base.Initialize();
this.SharedImageIndex = 0;
this.AddBarItem(new BarItem(“SaveButton“, CommandItemType.Done));
}
#endregion
}
}
As you can see, the EmployeeFormFragment contains nothing except for the 2 default constructors, and very minimal definition for the overridden Initialize method. Here, we specified the SharedImageIndex which will be needed for shared element transition and also added a BarItem with the ID SaveButton. Next, we’ll prepare the ViewModel for this Form Builder. Create a new Crosslight Editor View Model inside the XamarinFormsSample/ViewModels folder and call it EmployeeEditorViewModel.
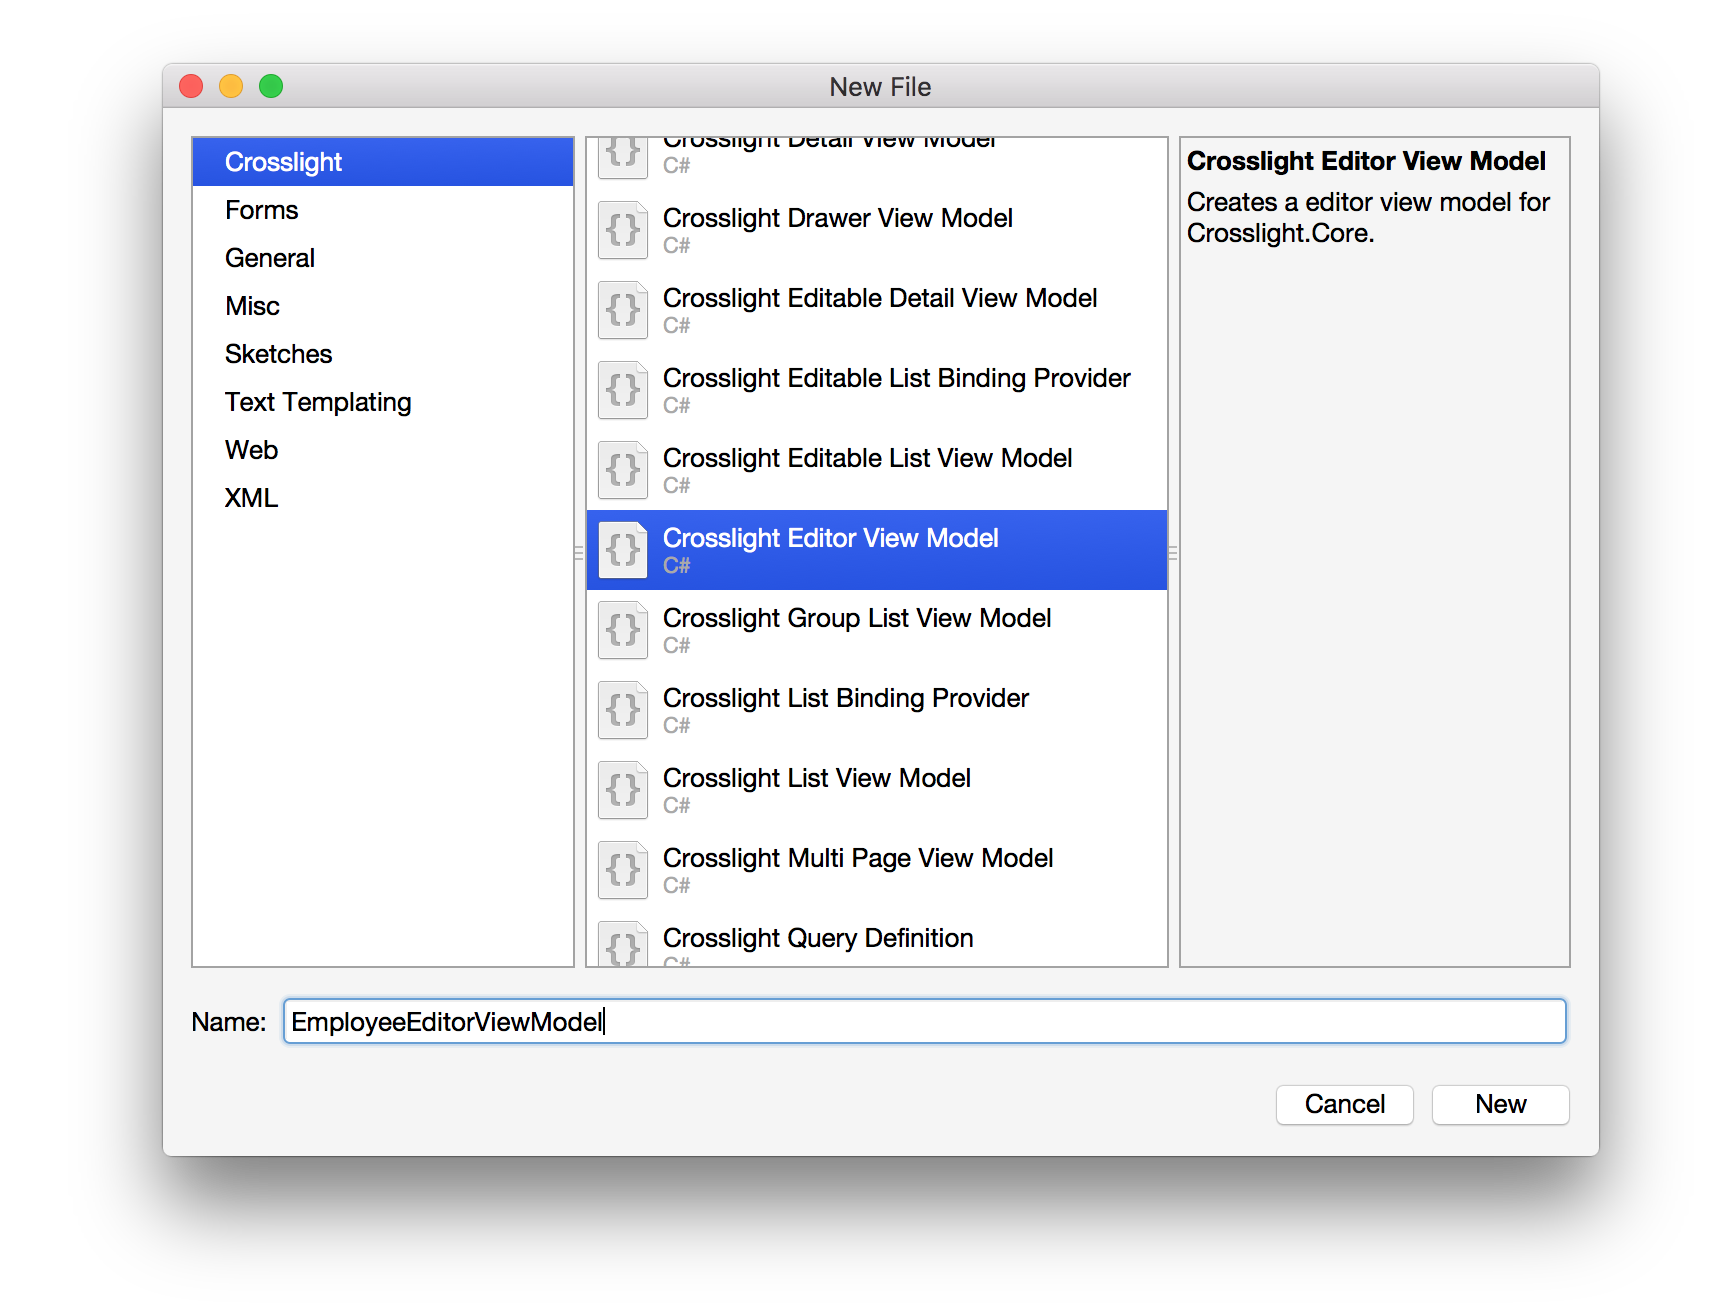
Then use the following code for the file.
using Intersoft.Crosslight;
using Intersoft.Crosslight.Input;
using Intersoft.Crosslight.ViewModels;
using XamarinFormsSample.Model;
namespace XamarinFormsSample.Core.ViewModels
{
public class EmployeeEditorViewModel : EditorViewModelBase<Employee>
{
#region Constructors
public EmployeeEditorViewModel()
{
this.DeleteCommand = new DelegateCommand(ExecuteDelete);
}
#endregion
#region Properties
public DelegateCommand DeleteCommand { get; set; }
public EmployeeListViewModel ParentViewModel { get; set; }
#endregion
#region Methods
private void ExecuteDelete(object parameter)
{
this.ParentViewModel.SourceItems.Remove(this.Item);
this.NavigationService.Close();
}
#region Overrides of EditorViewModelBase<Employee>
protected override void ExecuteSave(object parameter)
{
base.ExecuteSave(parameter);
//Needed in iOS to notify that the item has changed
this.OnDataChanged(this.Item);
}
#endregion
public override void Navigated(Intersoft.Crosslight.NavigatedParameter parameter)
{
base.Navigated(parameter);
EmployeeListViewModel employeeListViewModel = parameter.Sender as EmployeeListViewModel;
if (employeeListViewModel != null)
this.ParentViewModel = employeeListViewModel;
this.Item = parameter.Data as Employee;
}
#endregion
}
}
In the Navigated method of the above ViewModel, we simply pass the selected item from the previous ViewModel (EmployeeListViewModel) to be used as the Item for the Form. Here, we also prepared the Save and Delete methods that will be used for the form.
Lastly, let’s create the EmployeeFormBindingProvider inside the XamarinFormsSample/BindingProviders folder. Then use the following code.
using Intersoft.Crosslight;
namespace XamarinFormsSample.BindingProviders
{
public class EmployeeFormBindingProvider : BindingProvider
{
#region Constructors
public EmployeeFormBindingProvider()
{
this.AddBinding(“SaveButton“, BindableProperties.CommandProperty, “SaveCommand“);
}
#endregion
}
}
Here, we simply bound the BarItem to the SaveCommand property in the ViewModel. And before we forgot, uncomment the commented line in the EmployeeListBindingProvider. Then build and run your project to see it in action.
When you navigate to the Form Fragment, notice that the shared element transition effect is applied automatically. We’ve finished the Android app. Now let’s move on to the iOS project.
Bootstrapping the iOS Project
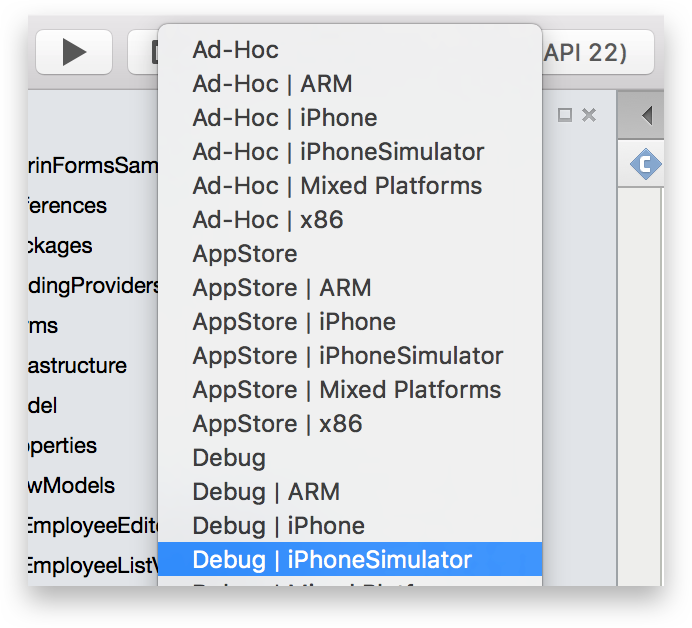
Similar to the Android project, the iOS project also need to be re-bootstrapped since it also comes from Xamarin.Forms. First, change the debug configuration to Debug | iPhone Simulator so you can run the iOS project.
Let’s remove the unnecessary Xamarin.Forms references in iOS project.
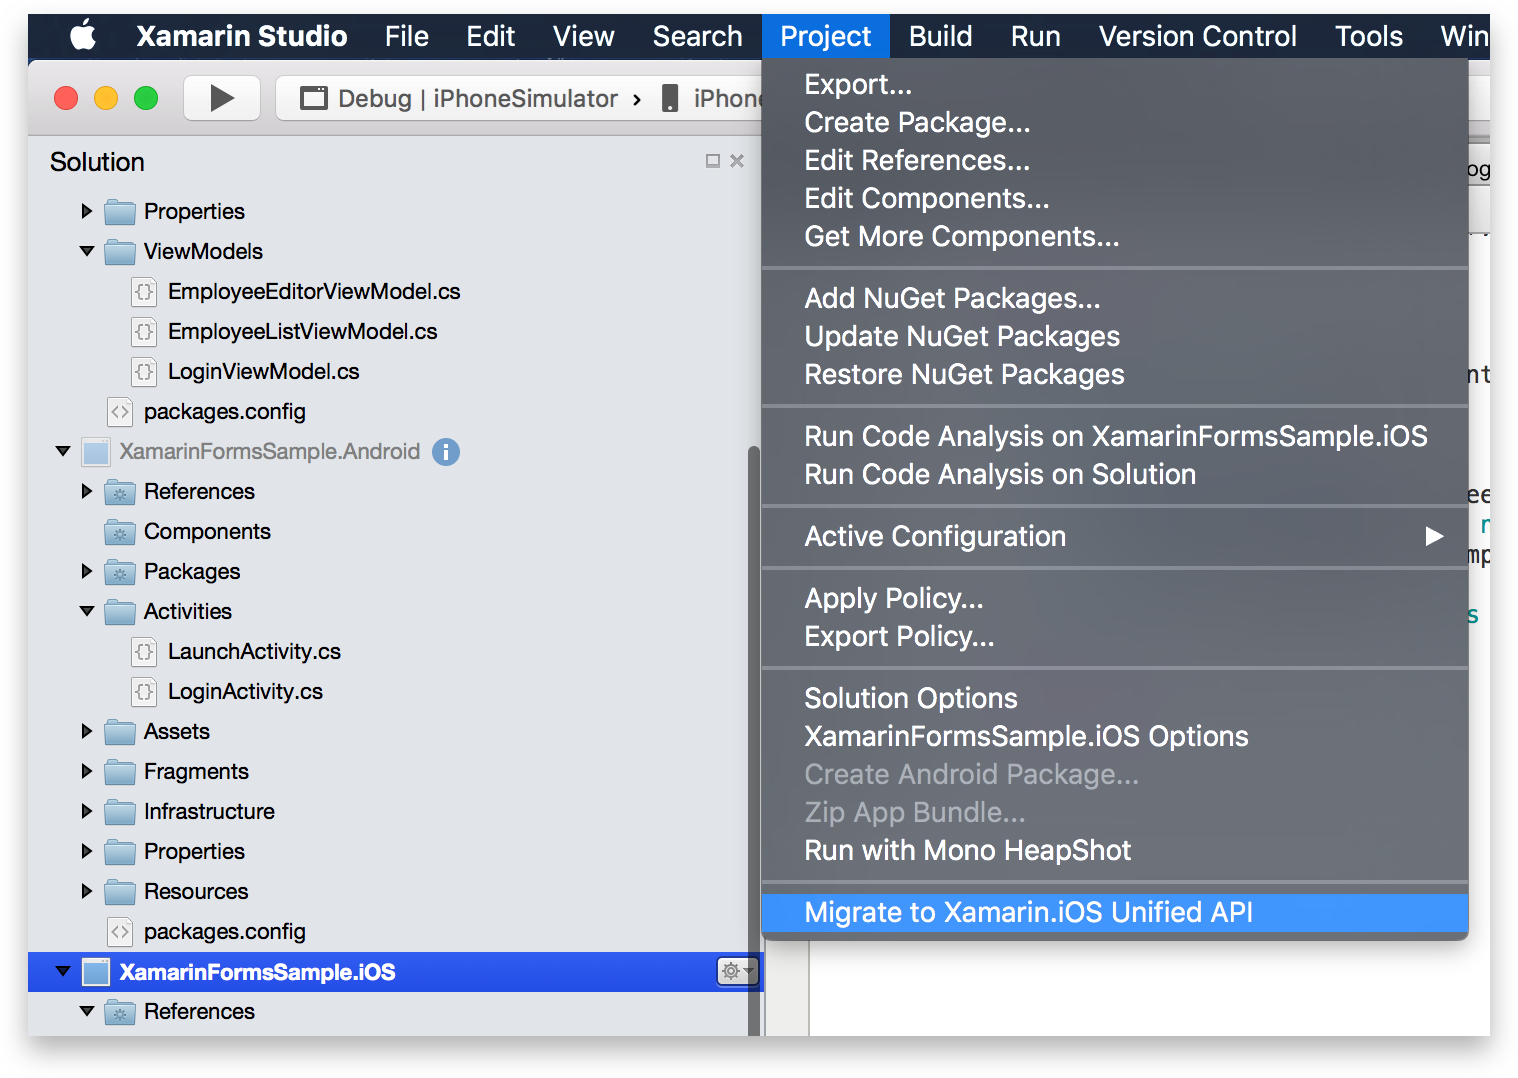
Next, we have to migrate the sample to use the new iOS.Unified API. To do this, select the project, and select Project, Migrate to Xamarin.iOS Unified API.
Then install Crosslight.iOS using NuGet by running the following command (if you’re on Mac Xamarin Studio) with the iOS project selected.
Install-Package Intersoft.Crosslight

Ensure that the packages are installed correctly by inspecting the References folder.
Next, open AppDelegate.cs and replace the contents as follows.
using IntersoftCore = Intersoft.Crosslight.iOS;
using Foundation;
using UIKit;
namespace XamarinFormsSample.iOS
{
// The UIApplicationDelegate for the application. This class is responsible for launching the
// User Interface of the application, as well as listening (and optionally responding) to
// application events from iOS.
[Register(“AppDelegate“)]
public class AppDelegate : IntersoftCore.UIApplicationDelegate
{
#region Methods
/// <summary>
/// Wraps the content view controller into the root view controller.
/// </summary>
/// <param name=“contentViewController“>Content view controller.</param>
/// <returns>
/// The root view controller.
/// </returns>
protected override UIViewController WrapRootViewController(UIViewController contentViewController)
{
if (contentViewController is UISplitViewController || contentViewController is UITabBarController)
return contentViewController;
return new UINavigationController(contentViewController);
}
#endregion
}
}
This is needed for Crosslight.iOS to create the navigation controllers automatically when performing navigation between ViewModels. Then, create a new folder at the root of the iOS project called Infrastructure, and create a new empty class with the name of AppInitializer.cs.
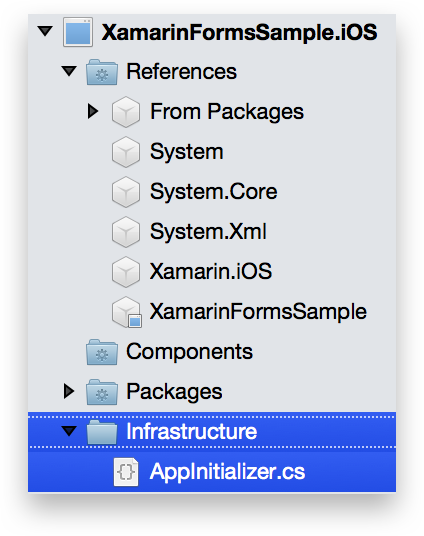
Replace the contents of the file as follows.
using Intersoft.Crosslight;
using System;
using XamarinFormsSample.Infrastructure;
namespace XamarinFormsSample.iOS
{
/// <summary>
/// iOS’s application initializer.
/// </summary>
/// <seealso cref=“Intersoft.Crosslight.IApplicationInitializer“ />
public sealed class AppInitializer : IApplicationInitializer
{
#region Implementation of IApplicationInitializer
/// <summary>
/// Gets the application service based on the current context.
/// </summary>
/// <param name=“context“>The context of the application.</param>
/// <returns>
/// The application service.
/// </returns>
public IApplicationService GetApplicationService(IApplicationContext context)
{
return new CrosslightAppAppService(context);
}
/// <summary>
/// Initializes and prepares the application for launch.
/// </summary>
/// <param name=“appHost“>The application host.</param>
public void InitializeApplication(IApplicationHost appHost)
{
}
/// <summary>
/// Initializes the components required for the application to run properly.
/// </summary>
/// <param name=“appHost“>The application host.</param>
public void InitializeComponents(IApplicationHost appHost)
{
}
/// <summary>
/// Initializes the services for the application to start properly.
/// </summary>
/// <param name=“appHost“>The application host.</param>
public void InitializeServices(IApplicationHost appHost)
{
}
#endregion
}
}
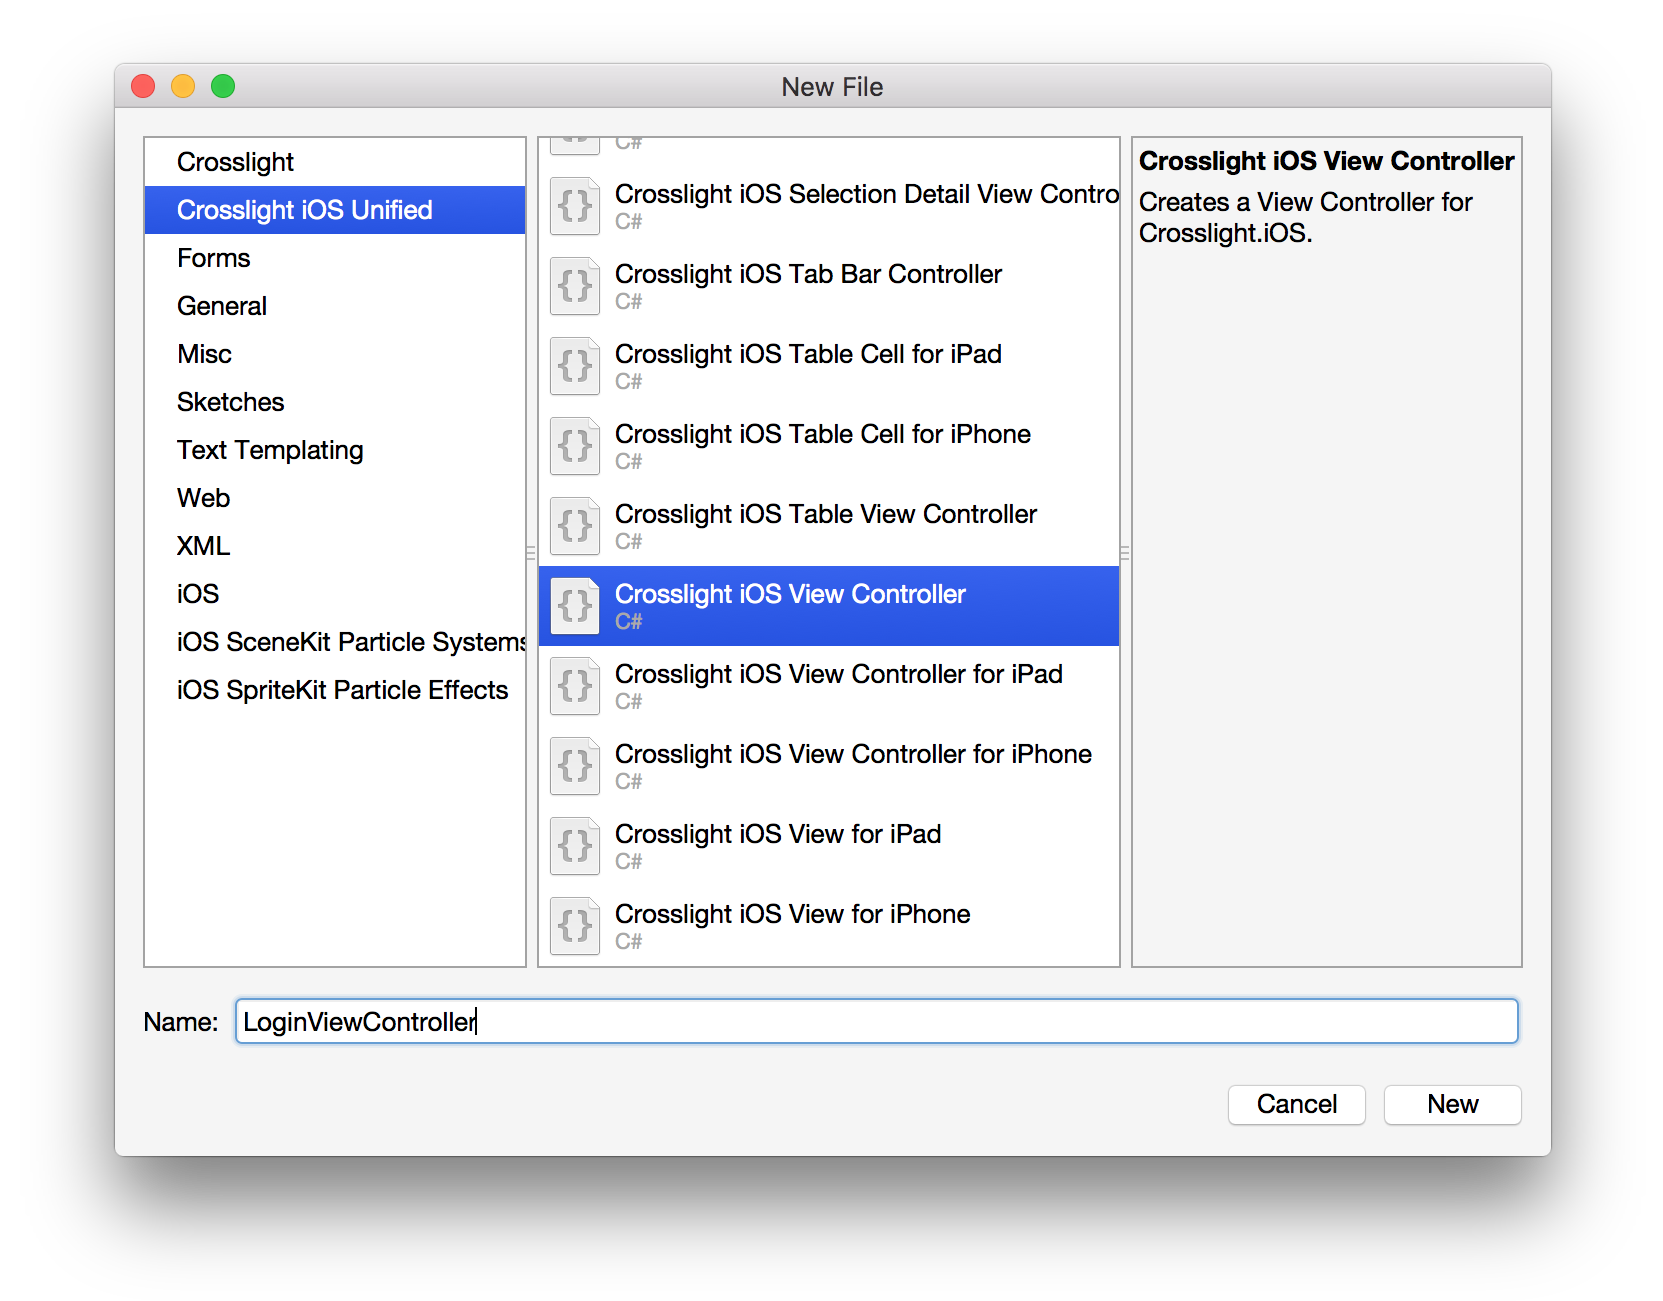
Similar to Android, this is the application initializer for iOS, where you can register custom view components, services, iOS views, and more. However, in this tutorial, we won’t register any additional services. Now, if you try to build the project, you should be able to build it successfully. Great, let’s create the ViewControllers for iOS. Start by creating a new folder called ViewControllers. Then create a new ViewController called LoginViewController.
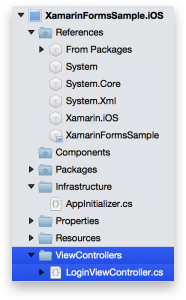
Your current folder structure should look like this.
Replace the contents as follows.
using XamarinFormsSample.Core.ViewModels;
using System;
using System.Drawing;
using Intersoft.Crosslight;
using Intersoft.Crosslight.iOS;
using Foundation;
namespace XamarinFormsSample.iOS
{
[Register(“EmployeeFormViewController“)]
public class EmployeeFormViewController : UIFormViewController<EmployeeEditorViewModel>
{
}
}
As you can see, in the LoginViewController contains nothing. Before you can run the project, open up the iOS project options by double-clicking on the iOS project, then in the iOS Build menu, ensure that the Supported architectures for the Debug | iPhone Simulator configuration supports the 64-bit emulator. 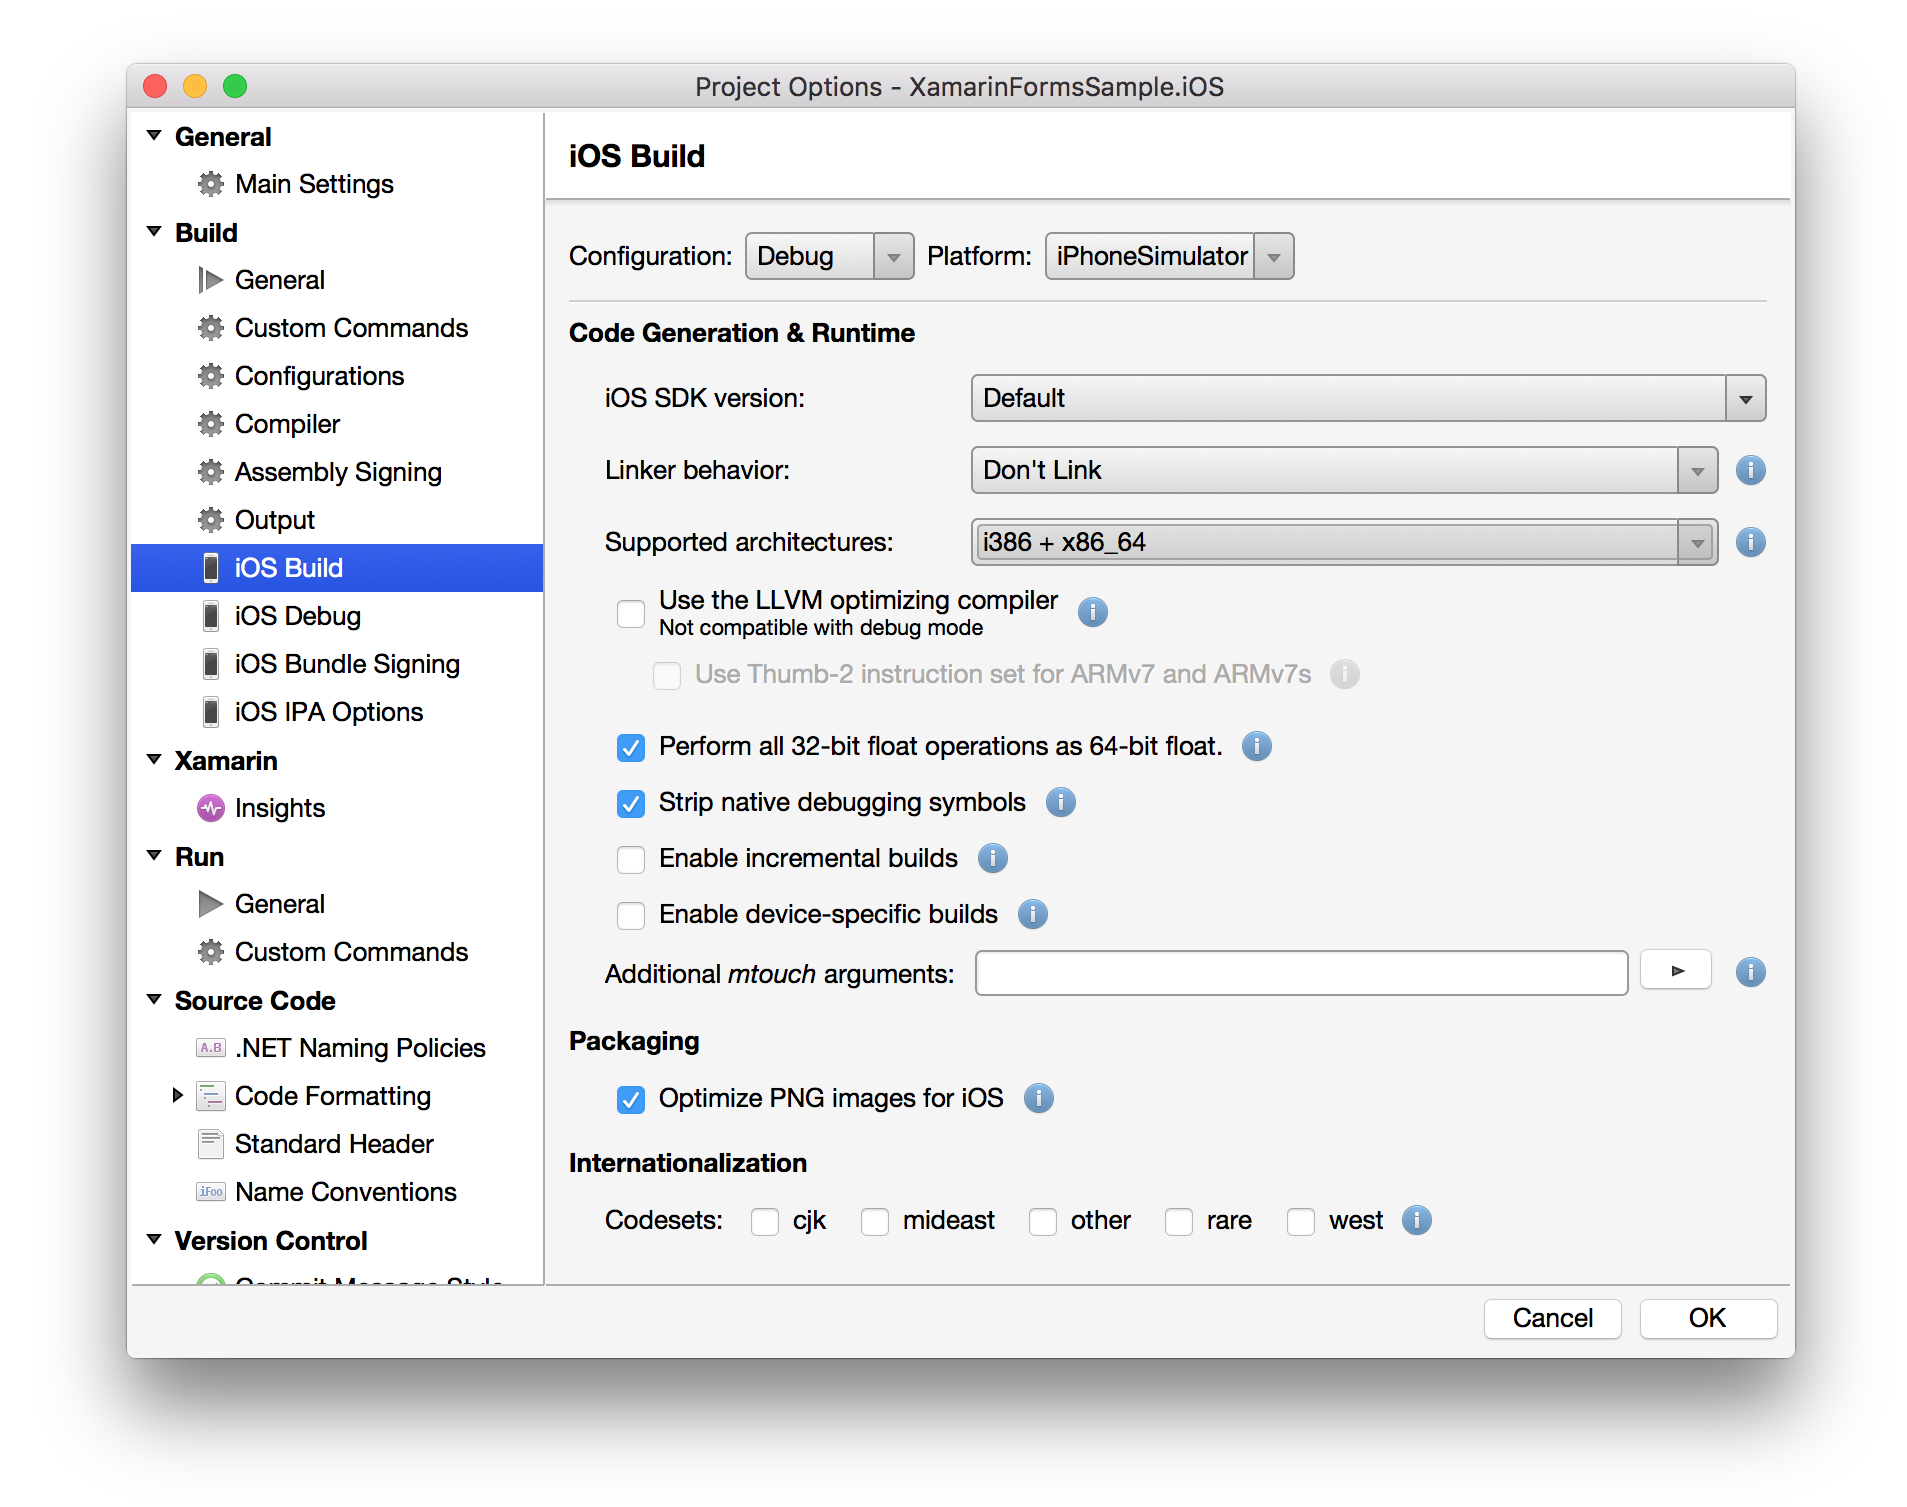
Then try to run the project to the iOS Simulator. You should get the following result.
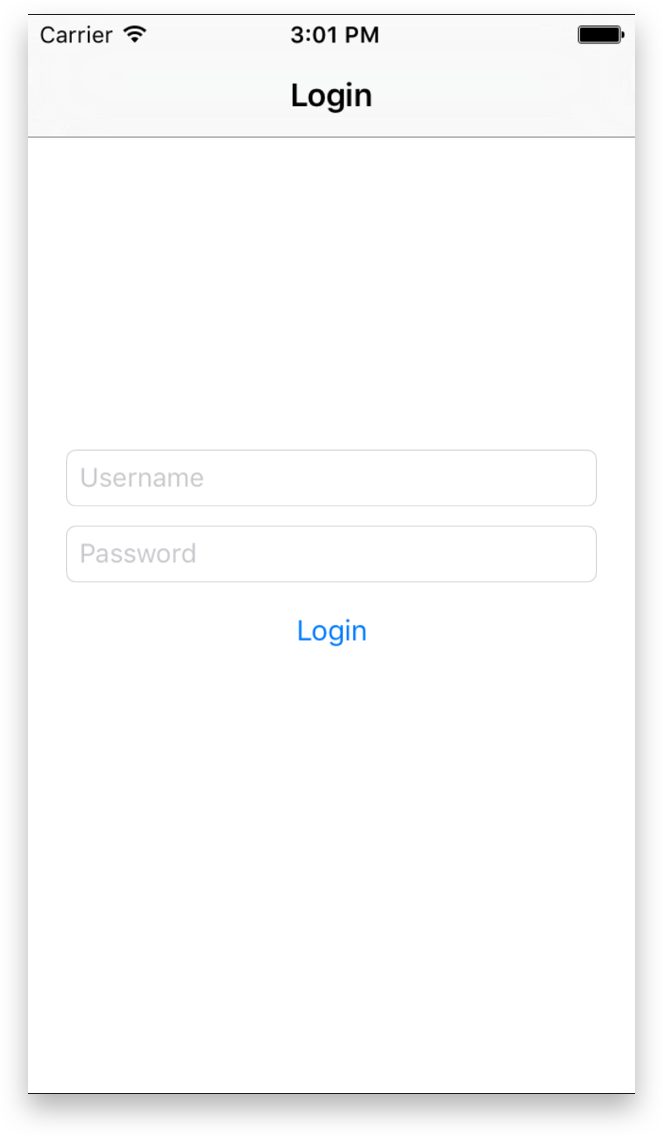
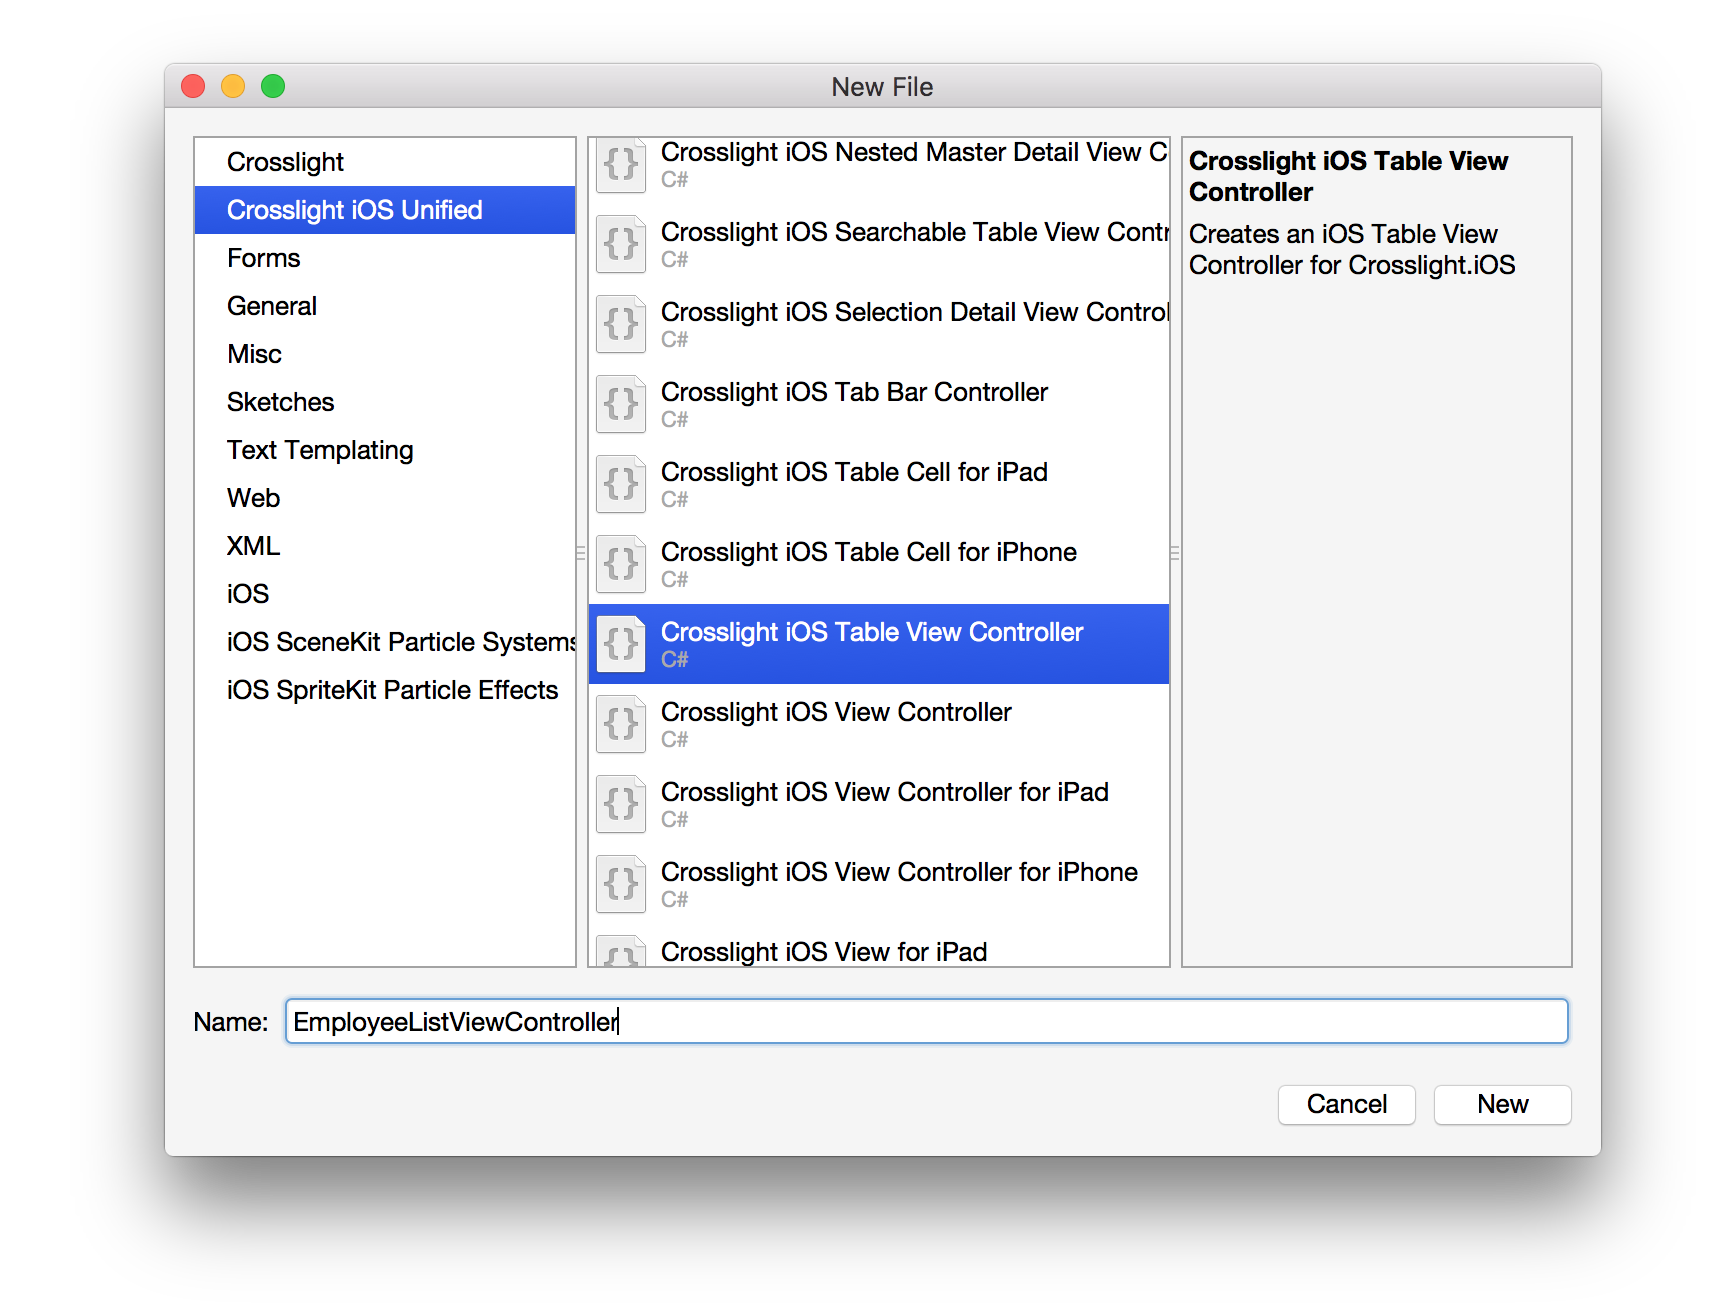
Okay, seems our login screen has worked well. Now let’s move on to creating the rest of the views. This will be a breeze. Proceed by creating a new Table ViewController inside the ViewControllers folder. Name it EmployeeListViewController.
Then use the following code.
using XamarinFormsSample.Core.BindingProviders;
using XamarinFormsSample.Core.ViewModels;
using Intersoft.Crosslight;
using Intersoft.Crosslight.iOS;
using Foundation;
using System.Drawing;
using System;
namespace XamarinFormsSample.iOS
{
[Register(“EmployeeListViewController“)]
[ImportBinding(typeof(EmployeeListBindingProvider))]
public class EmployeeListViewController : UITableViewController<EmployeeListViewModel>
{
#region Properties
public override ImageSettings CellImageSettings
{
get
{
return new ImageSettings
{
ImageSize = new SizeF(36, 36)
};
}
}
public override TableViewCellStyle CellStyle
{
get { return TableViewCellStyle.Subtitle; }
}
public override BasicImageLoaderSettings ImageLoaderSettings
{
get
{
return new BasicImageLoaderSettings
{
AnimateOnLoad = true,
CacheExpirationPolicy = CacheExpirationPolicy.AutoDetect
};
}
}
public override TableViewInteraction InteractionMode
{
get { return TableViewInteraction.Navigation; }
}
#endregion
}
}
Since this ViewController does not require any initialization from the Storyboard, then the constructor is not needed. Here, we’ve configured several properties, such as the CellImageSettings, CellStyle, ImageLoaderSettings and InteractionMode. Let’s create our last ViewController, which is the EmployeeFormViewController.
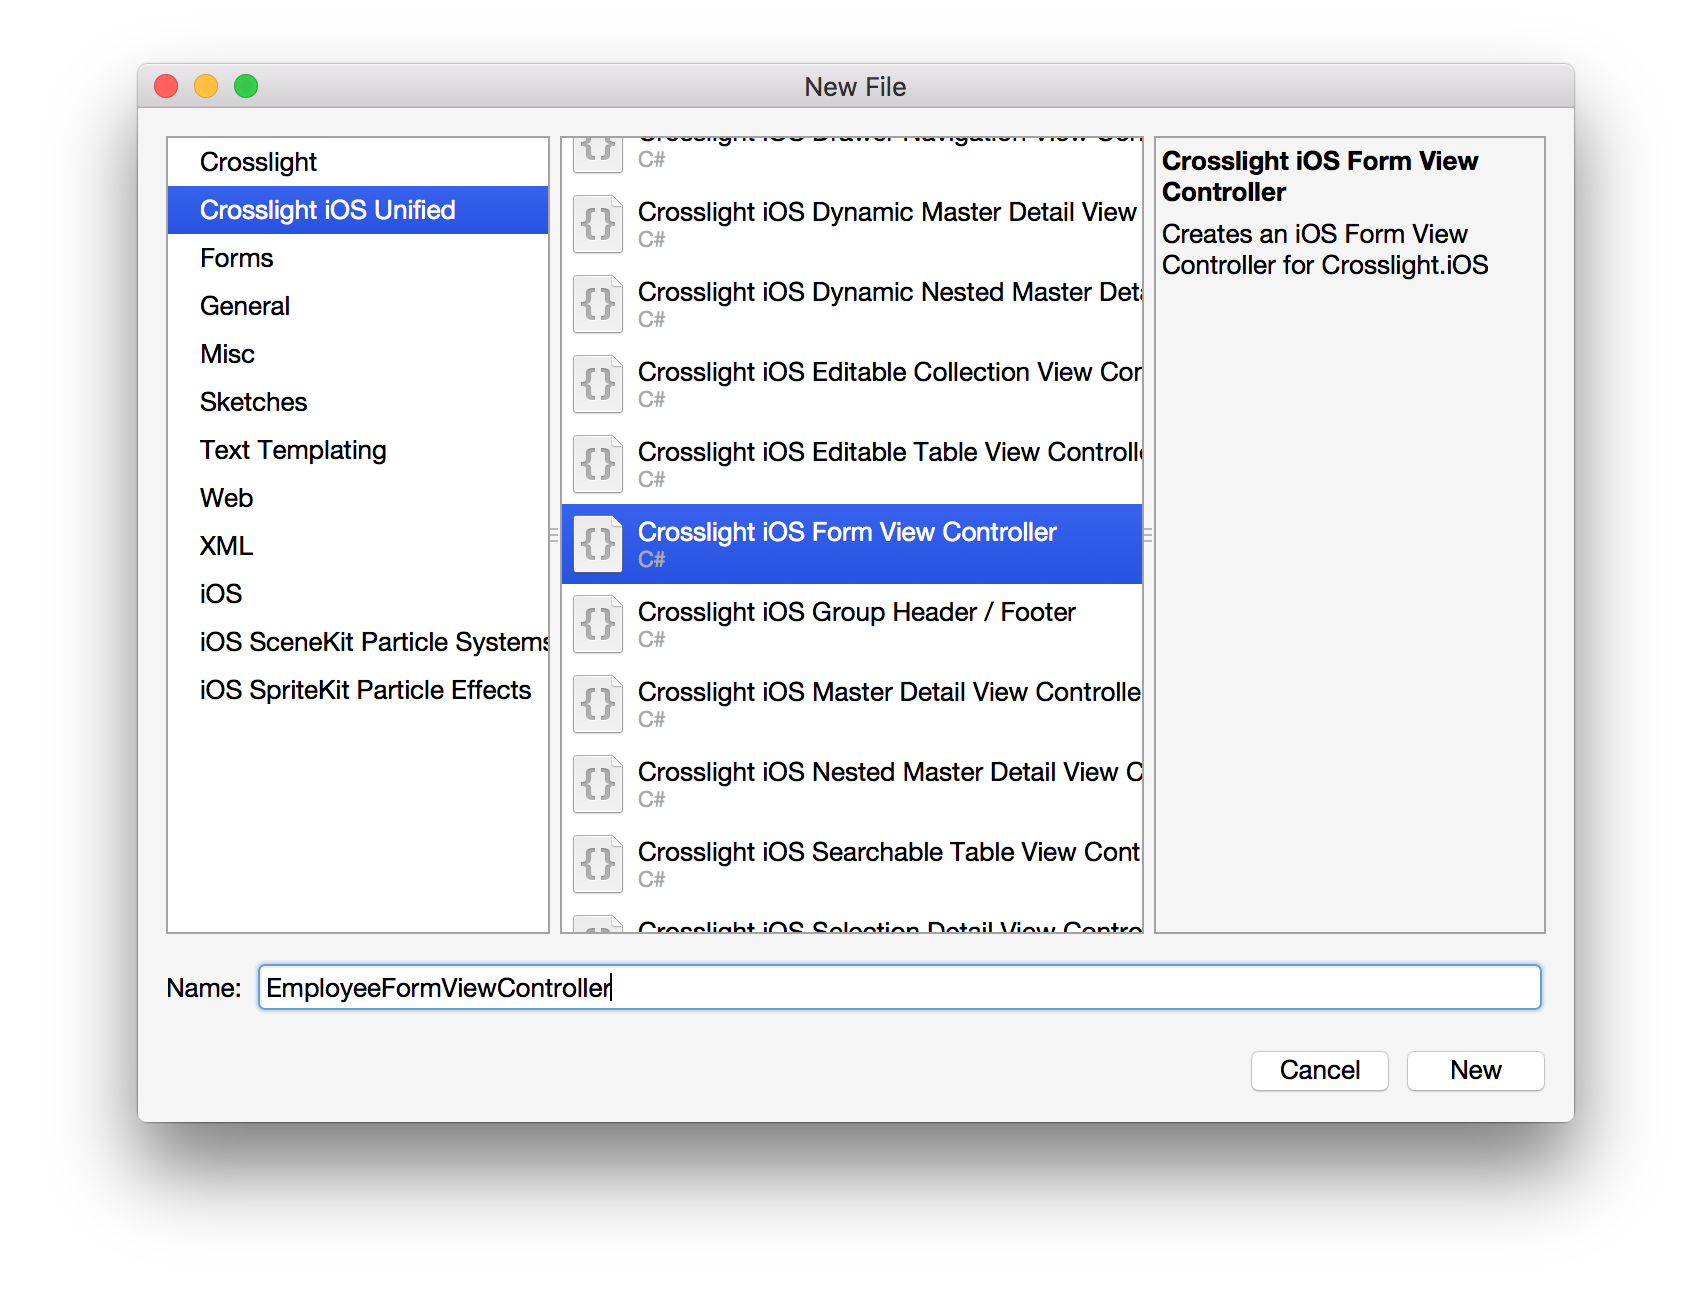
Then use the following code.
using XamarinFormsSample.Core.ViewModels;
using System;
using System.Drawing;
using Intersoft.Crosslight;
using Intersoft.Crosslight.iOS;
using Foundation;
namespace XamarinFormsSample.iOS
{
[Register(“EmployeeFormViewController“)]
public class EmployeeFormViewController : UIFormViewController<EmployeeEditorViewModel>
{
#region Methods
public override void DetermineNavigationMode(NavigationParameter parameter)
{
if (this.GetService<IApplicationService>().GetContext().Device.Kind == DeviceKind.Tablet)
{
// Only customize the navigation mode for editing (default navigation command)
if (parameter.CommandId == null)
{
parameter.PreferPopover = true;
parameter.EnsureNavigationContext = true;
}
}
}
#endregion
}
}
The EmployeeFormViewController is pretty much empty. The DetermineNavigationMode helps to determine whether the app is run from an iPhone or an iPad, and which container should be returned upon navigation. It seems that the iOS app is ready. Let’s try to give it a run.
If you notice, our effort to create the iOS app is much smaller compared to the Android version. This is the power of Crosslight. You an easily reuse 100% of the UI logic for iOS and Android platform, allowing developers to accomplish more in less time.
Samples
You can obtain the finished sample here. Simply restore the NuGet packages and hit Run to run the sample properly. Should have any questions, feel free to leave a comment down below or initiate a live chat session with us directly from our website.
Wrapping Up
In this tutorial, you have learnt how to migrate a Xamarin Form app to Crosslight which is pretty straightforward. Leveraging MVVM pattern, you have learnt the Crosslight fundamentals, particularly the binding providers, ViewModels, Form Metadata, and Views.
Along the way, you might be interested in several topics, such as the Form Builder, or working with the Storyboard, nonetheless, I highly recommend you to go through each of these topics to quench your thirst:
- Building Rich Data Entry Form
- If you’d like to get started with the Form Builder, I highly recommend you to look at the two-part blogpost series I wrote up: Getting Started with Crosslight Form Builder and Extending Crosslight Form Builder.
- Working with iOS Universal Storyboards
- Crosslight Android Material Development
Don’t hesitate to explore the child pages on the documentation as well, as it contains more detailed information on each particular subject. Hopefully this tutorial helps you on grasping the concepts used in Crosslight development and accelerate in building gorgeous cross-platform apps, without sacrificing any user experiences along the way.
Till next post,
Nicholas Lie


