Performing Data Binding to Native Views with Crosslight
In my last post, I wrote an in-depth, step-by-step tutorial on how to create you can migrate a Xamarin.Forms sample and turn it into a Crosslight solution. The process might seem intricate at first, but once you understood the basics of Crosslight and its design pattern, you’ll be able to do things very quickly. That’s made possible as Crosslight enforces clear separation-of-concerns and strong and extensible design patterns.
In this post, I’m going to modify the login screen from the finished sample in the previous blog post to use the native UI views instead of Crosslight Form Builder. Hopefully at the end of tutorial you’ll have rough ideas how to bind data to native UI views with Crosslight, and gain insights how to take advantage of many different Crosslight features to achieve a goal in the most efficient way.
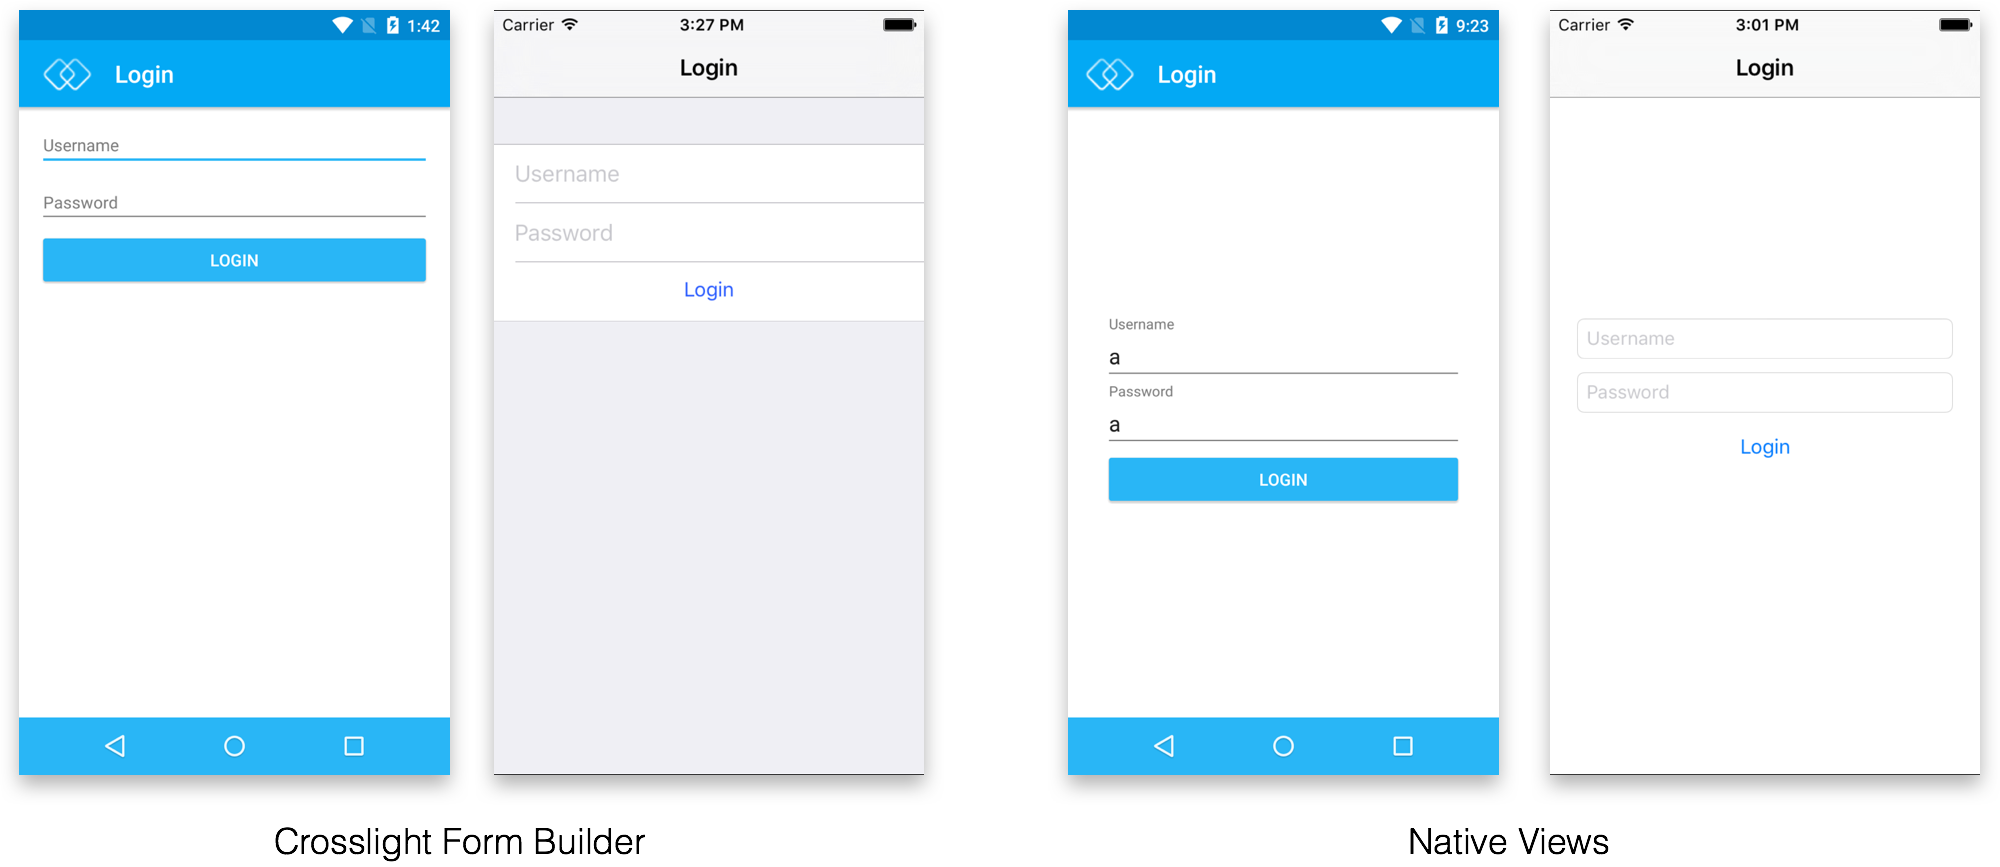
Starting Off
To follow this tutorial perfectly, you’ll need clone this repository. This is the finished sample from the previous blog post. To run this sample, you’ll need to restore the necessary NuGet packages. After you’ve managed to clone and run this sample, you’re ready to begin. If you have any trouble in restoring the NuGet packages, consult the documentation.
Modifying the Android Login View
First, open up the LoginFragment.cs located inside the XamarinFormsSample.Android/Fragments folder. Replace the contents with this code.
using System;
using Android.Runtime;
using XamarinFormsSample.Core.BindingProviders;
using XamarinFormsSample.Core.ViewModels;
using Intersoft.Crosslight;
using Intersoft.Crosslight.Android.v7;
namespace XamarinFormsSample.Android.Fragments
{
/// <summary>
/// The main Fragment contained inside LoginActivity.
/// This class is decorated with the ImportBindingAttribute that indicates
/// the binding provider to be used with this Activity.
/// </summary>
[ImportBinding(typeof(LoginBindingProvider))]
public class LoginFragment : Fragment<LoginViewModel>
{
#region Constructors
/// <summary>
/// Initializes a new instance of the <see cref=“LoginFragment“ /> class.
/// </summary>
public LoginFragment()
{
}
/// <summary>
/// Initializes a new instance of the <see cref=“LoginFragment“ /> class.
/// </summary>
/// <param name=“javaReference“>The java reference.</param>
/// <param name=“transfer“>The transfer.</param>
public LoginFragment(IntPtr javaReference, JniHandleOwnership transfer)
: base(javaReference, transfer)
{
}
#endregion
#region Properties
/// <summary>
/// Gets the content layout identifier.
/// </summary>
/// <value>The content layout identifier.</value>
protected override int ContentLayoutId
{
get { return Resource.Layout.main; }
}
#endregion
#region Methods
/// <summary>
/// Initializes this instance.
/// </summary>
protected override void Initialize()
{
base.Initialize();
this.IconId = Resource.Drawable.ic_toolbar;
}
#endregion
}
}
The FormFragment requires 2 default constructors, which is becoming the new standard for Fragment initialization when using the new Material library. The ContentLayoutId defines the layout file that will be used to render this screen. Then the IconId is provided for the Toolbar icon that will be used with this view. Then create the main.axml layout inside the XamarinFormsSample.Android/Resources/layout folder. Use the following layout.
<?xml version=“1.0“ encoding=“utf–8“?>
<LinearLayout xmlns:android=“http://schemas.android.com/apk/res/android“
android:orientation=“vertical“
android:layout_width=“match_parent“
android:layout_height=“match_parent“
android:gravity=“center“>
<LinearLayout
android:orientation=“vertical“
android:layout_width=“match_parent“
android:layout_height=“match_parent“
android:layout_gravity=“center“
android:gravity=“center_vertical“
android:layout_marginLeft=“30dp“
android:layout_marginRight=“30dp“>
<android.support.design.widget.TextInputLayout
android:layout_width=“match_parent“
android:layout_height=“wrap_content“>
<EditText
android:id=“@+id/TxtUserName“
android:layout_height=“wrap_content“
android:layout_width=“match_parent“
android:layout_gravity=“center“
android:singleLine=“true“
android:hint=“@string/hint_username“ />
</android.support.design.widget.TextInputLayout>
<android.support.design.widget.TextInputLayout
android:layout_width=“match_parent“
android:layout_height=“wrap_content“>
<EditText
android:id=“@+id/TxtPassword“
android:layout_height=“wrap_content“
android:layout_width=“match_parent“
android:layout_gravity=“center“
android:singleLine=“true“
android:hint=“@string/hint_password“ />
</android.support.design.widget.TextInputLayout>
<Button
android:id=“@+id/BtnLogin“
android:text=“@string/login“
android:layout_gravity=“center“
android:layout_width=“match_parent“
android:layout_height=“wrap_content“ />
</LinearLayout>
</LinearLayout>
Similar to previous login form, this screen contains two EditTexts, with the ID TxtUserName and TxtPassword respectively. These two EditTexts are wrapped in inside a TextInputLayout. This is a relatively new layout available in Material Design that provides intuitive hinting when used inside a EditText. Next, we’re going bind these textboxes to the ViewModel using the BindingProvider.
Create a new BindingProvider inside the XamarinFormsSample/BindingProviders folder and call it LoginBindingProvider. Use the following code.
using Intersoft.Crosslight;
namespace XamarinFormsSample.Core.BindingProviders
{
public class LoginBindingProvider : BindingProvider
{
#region Constructors
public LoginBindingProvider()
{
this.AddBinding(“TxtUserName“, BindableProperties.TextProperty, “LoginInfo.UserName“, BindingMode.TwoWay);
this.AddBinding(“TxtPassword“, BindableProperties.TextProperty, “LoginInfo.Password“, BindingMode.TwoWay);
this.AddBinding(“BtnLogin“, BindableProperties.CommandProperty, “LoginCommand“);
}
#endregion
}
}
This is the BindingProvider that provides data binding definitions between the View and the ViewModel. We’re basically binding both of the views with ID TxtUserName and TxtPassword, bind their Text property to the LoginInfo.UserName in the ViewModel. Then we also bind the view with ID BtnLogin to the LoginCommand.
One question we often heard is, why the binding provider is not needed when using Crosslight Form Builder while it’s needed in native views binding? That’s because the form metadata automatically map the defined property to the underlying model, and a binding is created behind the scene as the Form Builder generates the views at runtime.
Since we’re no longer using Form Builder for the login screen, you can safely delete the LoginInfo.FormMetadata file found inside the XamarinFormsSample/Forms folder.
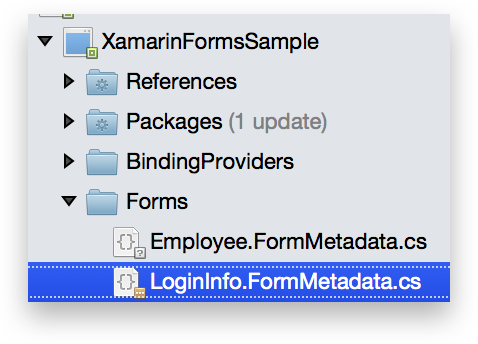
Next, we need to modify the LoginViewModel a bit. Open up the LoginViewModel.cs file inside the XamarinFormsSample/ViewModels folder and modify the ExecuteLogin method. Replace it with the following snippet.
private void ExecuteLogin(object parameter)
{
if (!string.IsNullOrEmpty(this.LoginInfo.UserName) && !string.IsNullOrEmpty(this.LoginInfo.Password))
this.NavigationService.Navigate<EmployeeListViewModel>();
else
this.ToastPresenter.Show(“Please enter any username and password.“);
}
Also, change the base class of this ViewModel to ViewModelBase instead of EditorViewModelBase. EditorViewModelBase is used when you’re taking advantage of Crosslight Form Builder’s capabilities. To learn more about suitable ViewModels to use when designing Crosslight applications, see Selecting a ViewModelBase Class to Get Started.
This is a similar, but a more manual validation that you can use to validate whether the user has entered any username or password before performing login. One more thing, you can now remove the Validate method inside the Login.cs located inside the XamarinFormsSample/Models folder, since we’re not using any built-in validation methods.

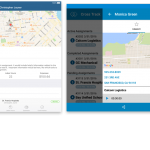
Now you’re ready to see this feature in action. When you run the project, you should get the following result.
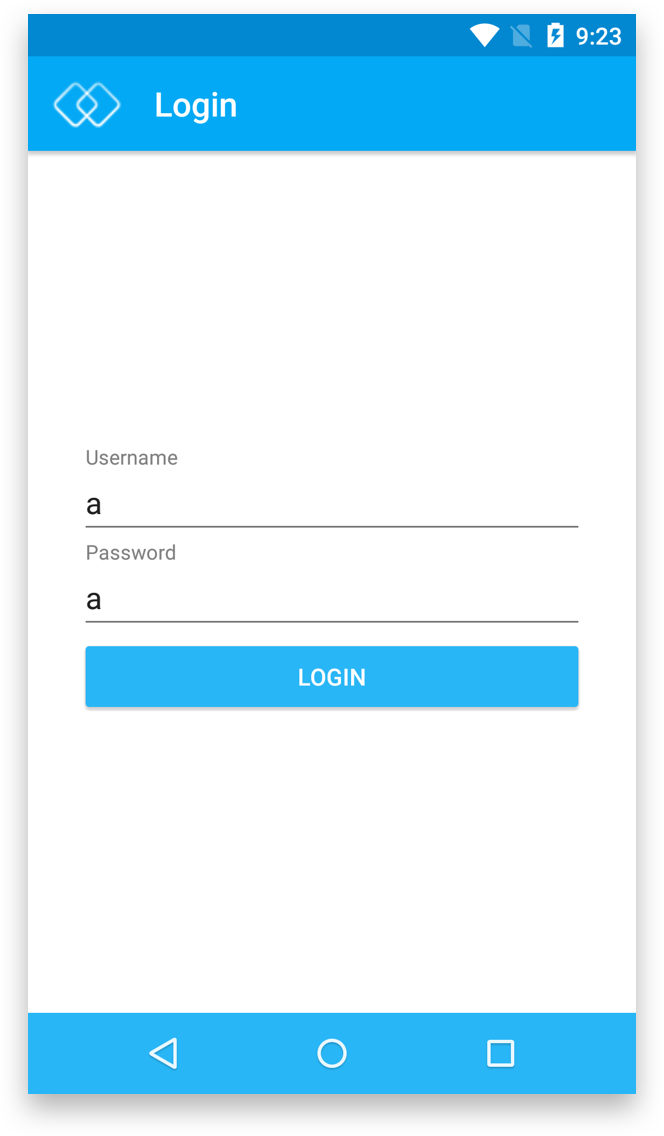
Now that you’ve finished the Android sample, let’s move on to iOS.
Modifying the iOS Login View
To modify the iOS sample, let’s begin by modifying the LoginViewController located inside XamarinFormsSample.iOS/ViewControllers folder. Use the following code.
using XamarinFormsSample.Core.ViewModels;
using XamarinFormsSample.Core.BindingProviders;
using Intersoft.Crosslight;
using Intersoft.Crosslight.iOS;
using System;
namespace XamarinFormsSample.iOS
{
[Storyboard(“MainStoryboard“)]
[ImportBinding(typeof(LoginBindingProvider))]
public partial class LoginViewController : UIViewController<LoginViewModel>
{
#region Constructors
/// <summary>
/// Initializes a new instance of the <see cref=“LoginViewController“ /> class.
/// </summary>
/// <param name=“intPtr“>The int PTR.</param>
public LoginViewController(IntPtr intPtr)
: base(intPtr)
{
}
#endregion
#region Properties
public override bool HideKeyboardOnTap
{
get
{
return true;
}
}
#endregion
}
}
As you can see, for the LoginViewController, all you need to do is provide a default constructor that takes in one IntPtr object, then decorate the ViewController with the StoryboardAttribute. The “MainStoryboard” string inside the StoryboardAttribute indicates the name of the storyboard file that this ViewController will use.
Also notice that we longer subclass from the UIFormViewController, but from a simpler UIViewController instead. Since we already have the ViewModel and BindingProviders ready, all you need to is create the Storyboard file for this view. Begin by creating a new folder called Views inside the iOS project. Then inside the newly created folder, create a new Storyboard file called MainStoryboard.storyboard. Follow this video to learn how to create a Storyboard file.
Basically, we’re creating two UITextFields with outlets set to TxtUserName and TxtPassword. Then we’re placing a UIButton underneath the textboxes, with outlet set to BtnLogin, all stacked inside a StackView. If you prefer to use the finished storyboard file, you can simply use the file here and replace it onto your project.
Before you can run this project, you have to make several adjustments, such as ensuring the Target Deployment for this project is set at least to iOS 9 or higher, this is the due to the usage of the StackView. To do this, simply open the Info.plist file inside the XamarinFormsSample.iOS project.
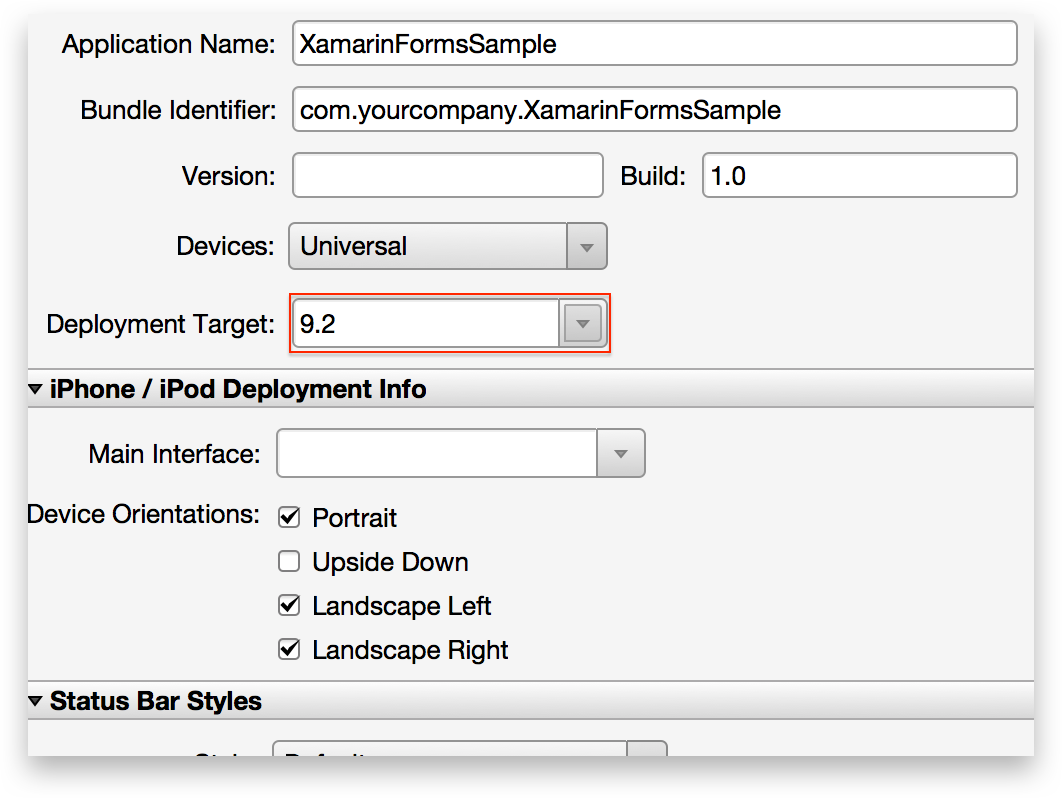
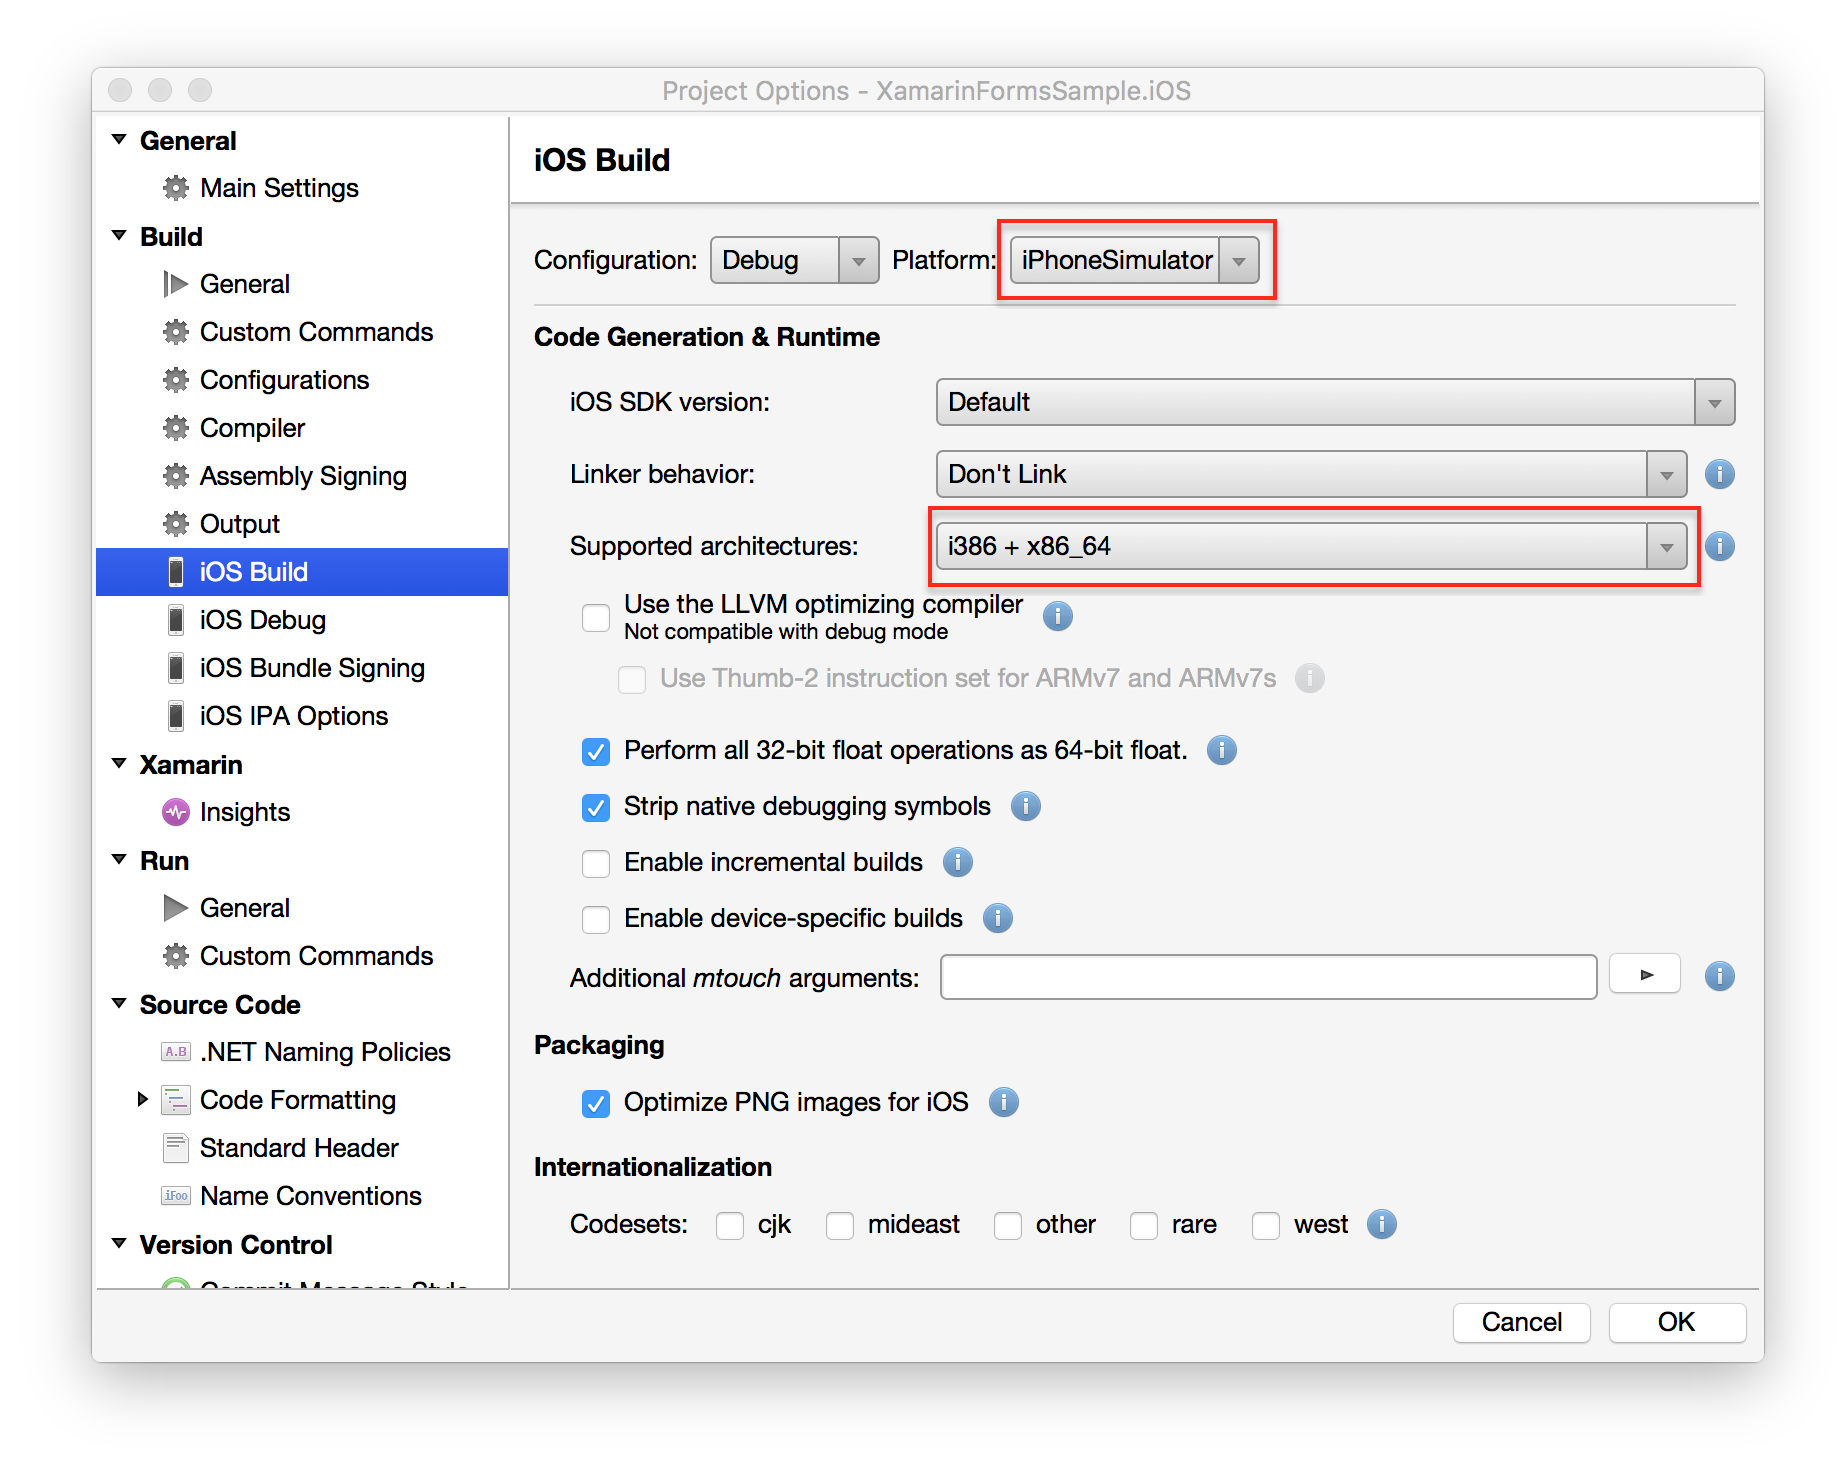
After you’ve made these adjustments, you should be ready to go. Also, if you try to run this project and it suddenly closes on its own, that means you haven’t set the compatibility mode to 64-bit for this project. To do this, simply double-click the iOS project and go to iOS Build and ensure that the build configuration for Debug | iPhone Simulator has been set to the following.
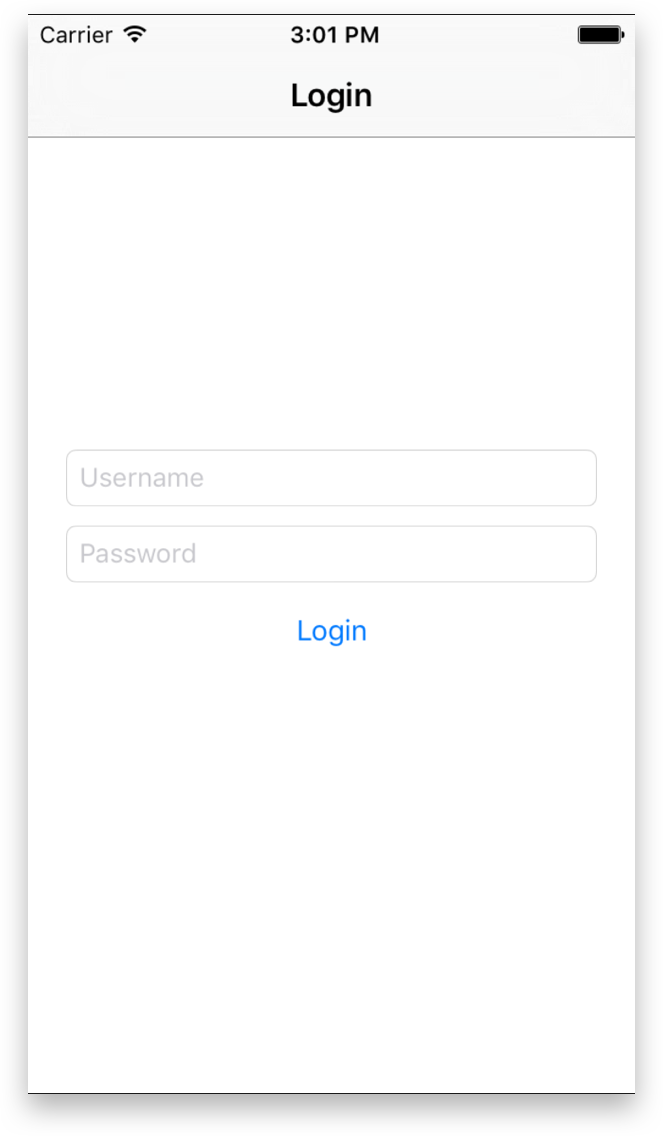
After running the sample, you should get the following result.
Samples
You can find the finished sample to this tutorial here. Simply restore the NuGet packages and you’re ready to go.
Wrapping Up
Hopefully this tutorial gives you a brief idea on how data binding works in Crosslight, especially when you’re binding to native views. By using the native views, you have greater flexibility on how to layout your screen while continue enjoying 100% UI logic sharing.
At this point, you’ve learned two approaches to build data-bound views in Crosslight. The first is through Form Builder, and the other is through native views. Thankfully, you don’t have to choose, as you can always mix both of them in your Crosslight project. However, you might be wondering which one does better than the other, and when to use them. The rule of thumb is, use Form Builder when you need to rapidly build complex data entry screen such as search screens and editing screens. As for native views, it’s best for non editable screens such as detail screen which typically require custom layout and design. Native views can also be considered for input screens with fairly few text input such as login screen which is usually highly customized to represent the app’s branding and styles.
If you’d like to explore further, I highly recommend you to go through each of these topics to quench your thirst:
- Building Rich Data Entry Form
- If you’d like to get started with the Form Builder, I highly recommend you to look at the two-part blogpost series I wrote up: Getting Started with Crosslight Form Builder and Extending Crosslight Form Builder.
- Working with iOS Universal Storyboards
- Crosslight Android Material Development
Don’t hesitate to explore the child pages on the documentation as well, as it contains more detailed information on each particular subject. Hopefully this tutorial helps you on grasping the concepts used in Crosslight development and accelerate in building gorgeous cross-platform apps, without sacrificing any user experiences along the way.
Cheers,
Nicholas Lie
