Getting Started with Unified WebUI Application
Starting from Premier Studio 2016, WebUI took a completely new look and feel with the new Unified Theming made for ASP.NET. As the name implies, Unified Theming allows you to impose a unified design language that applies to the entire suite of WebUI components with a modern CSS theming language that combines mixins and overridable variables.
This blog post is simply made to show you how to create a new Unified Theming project using the new project template that comes with Premier Studio 2016 or higher.
What You Need
To follow this tutorial, simply install Premier Studio 2016 or newer. You’ll also need to have Visual Studio 2012 or higher installed on Windows 7 or newer. If you haven’t installed it yet, please download it from our site. Or, simply login to your account.
Let’s Do This
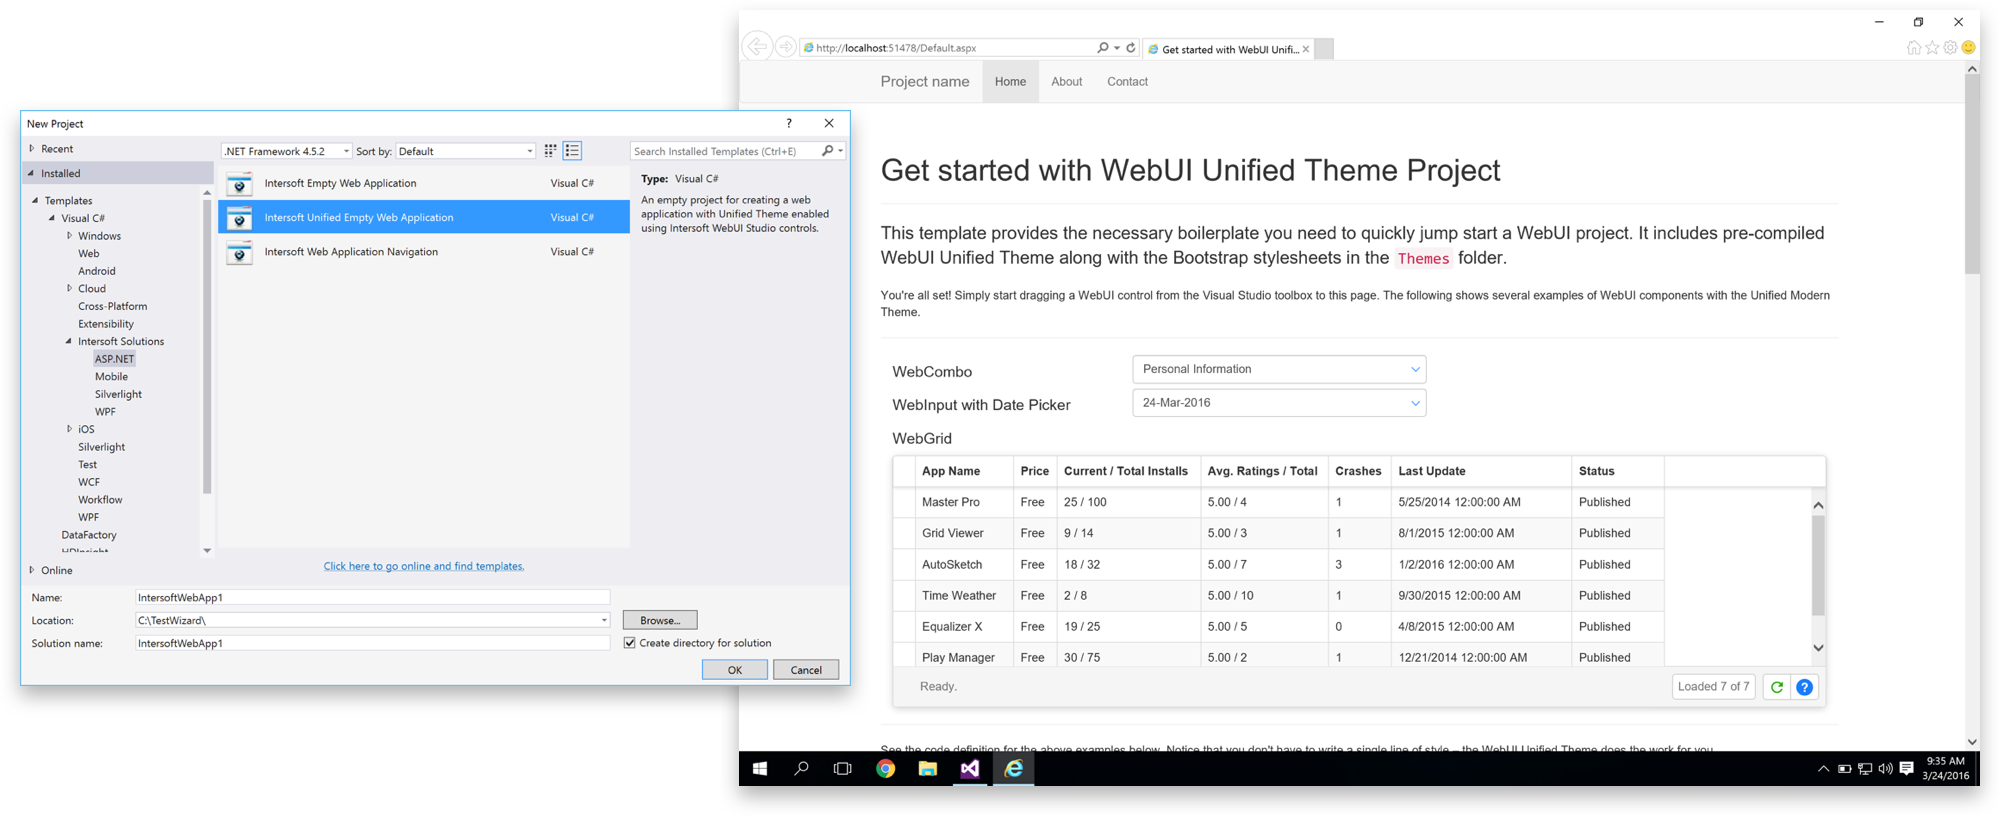
Simply open up your Visual Studio instance, then hit New, Project. From the dialog that appears, choose Visual C#, Intersoft Solutions, ASP.NET, then choose Intersoft Unified Empty Web Application.

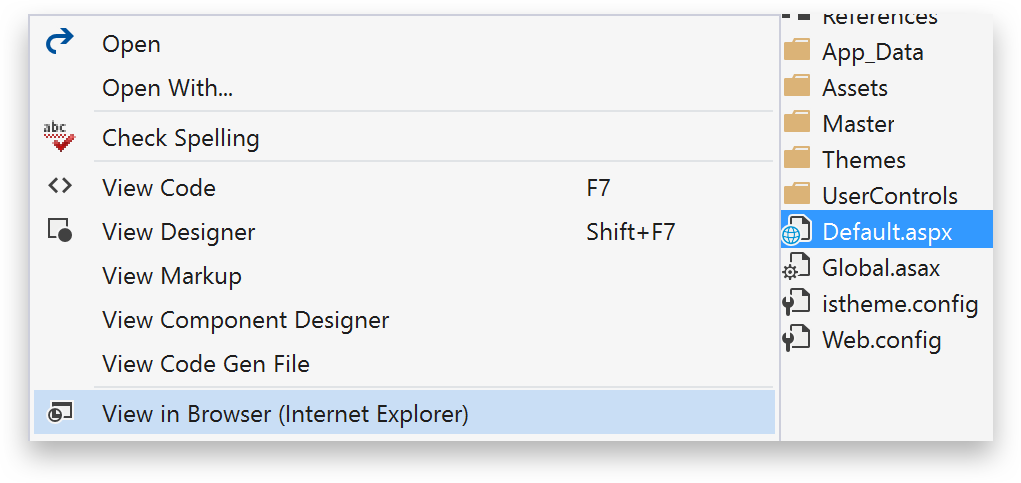
Enter the necessary details such as the project name, location and solution name. Hit OK when you’re done. To run this project, simply right-click on the Default.aspx file, then choose View in Browser.
You’ll get the following screen.
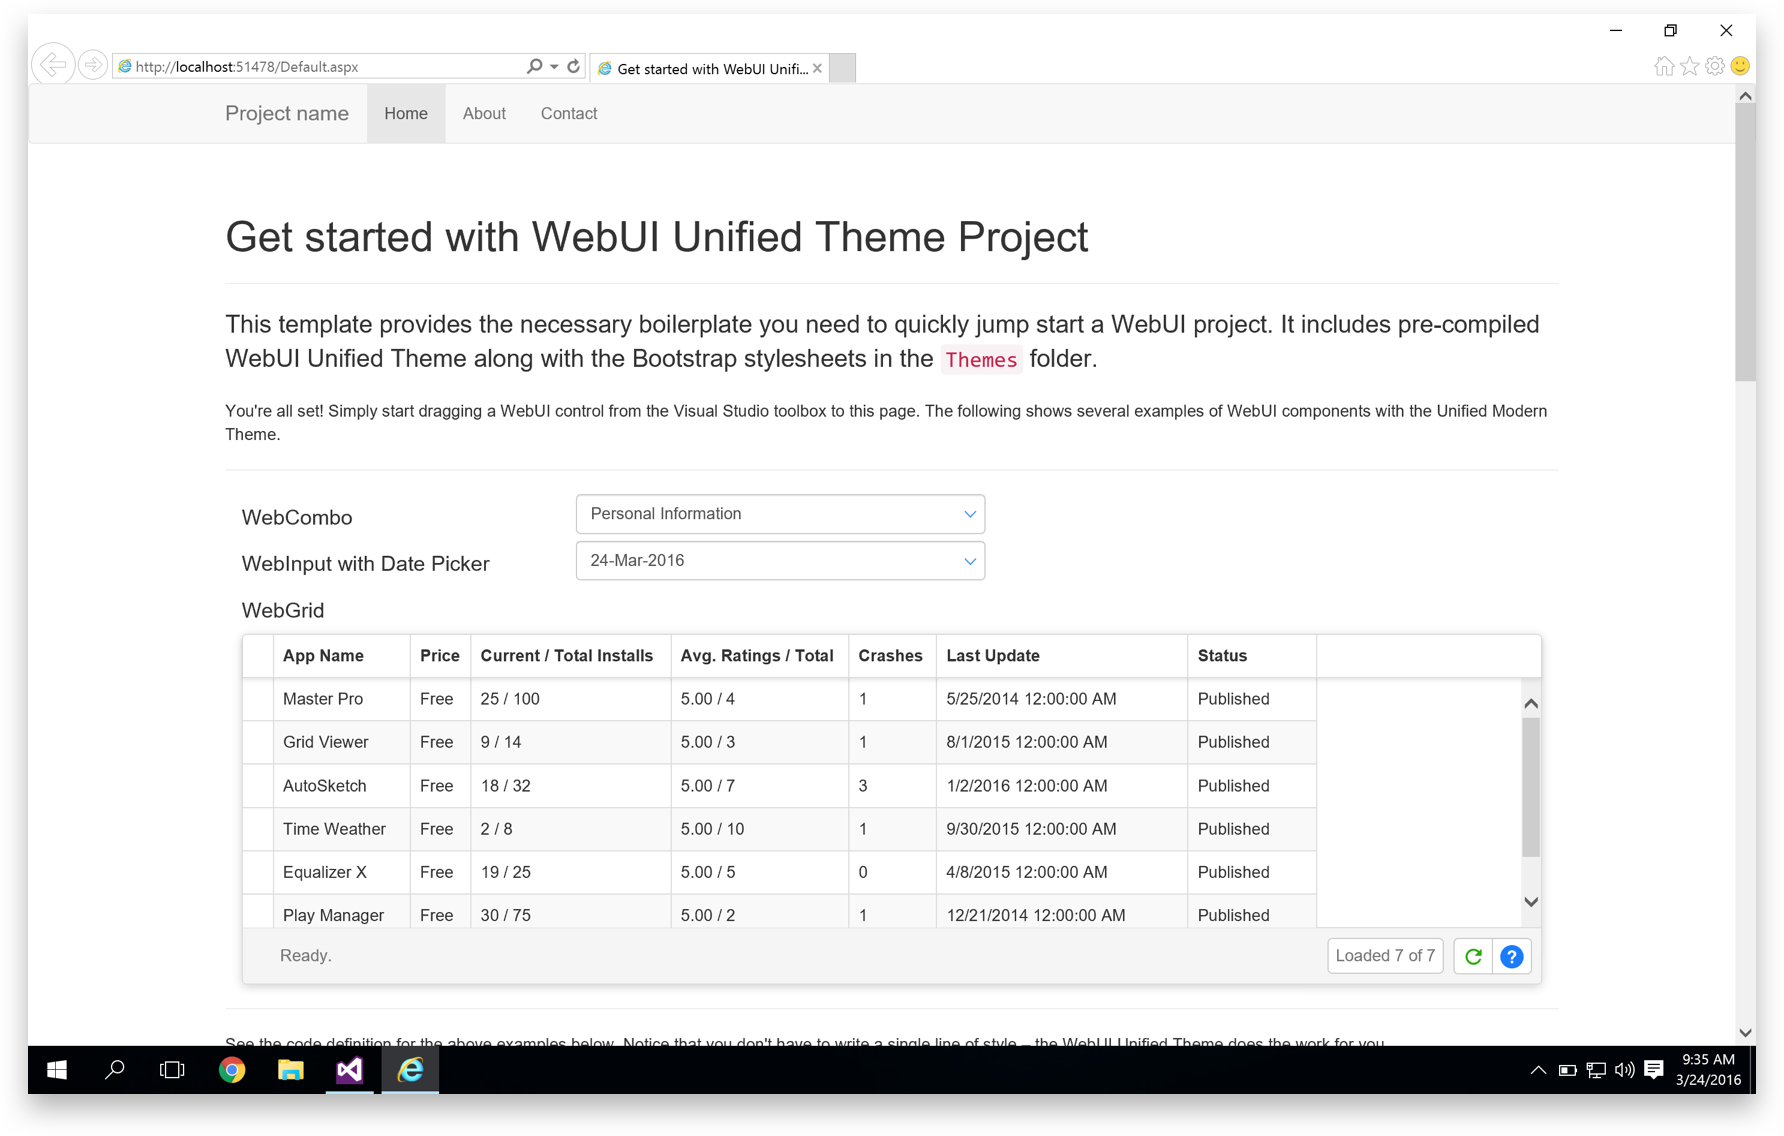
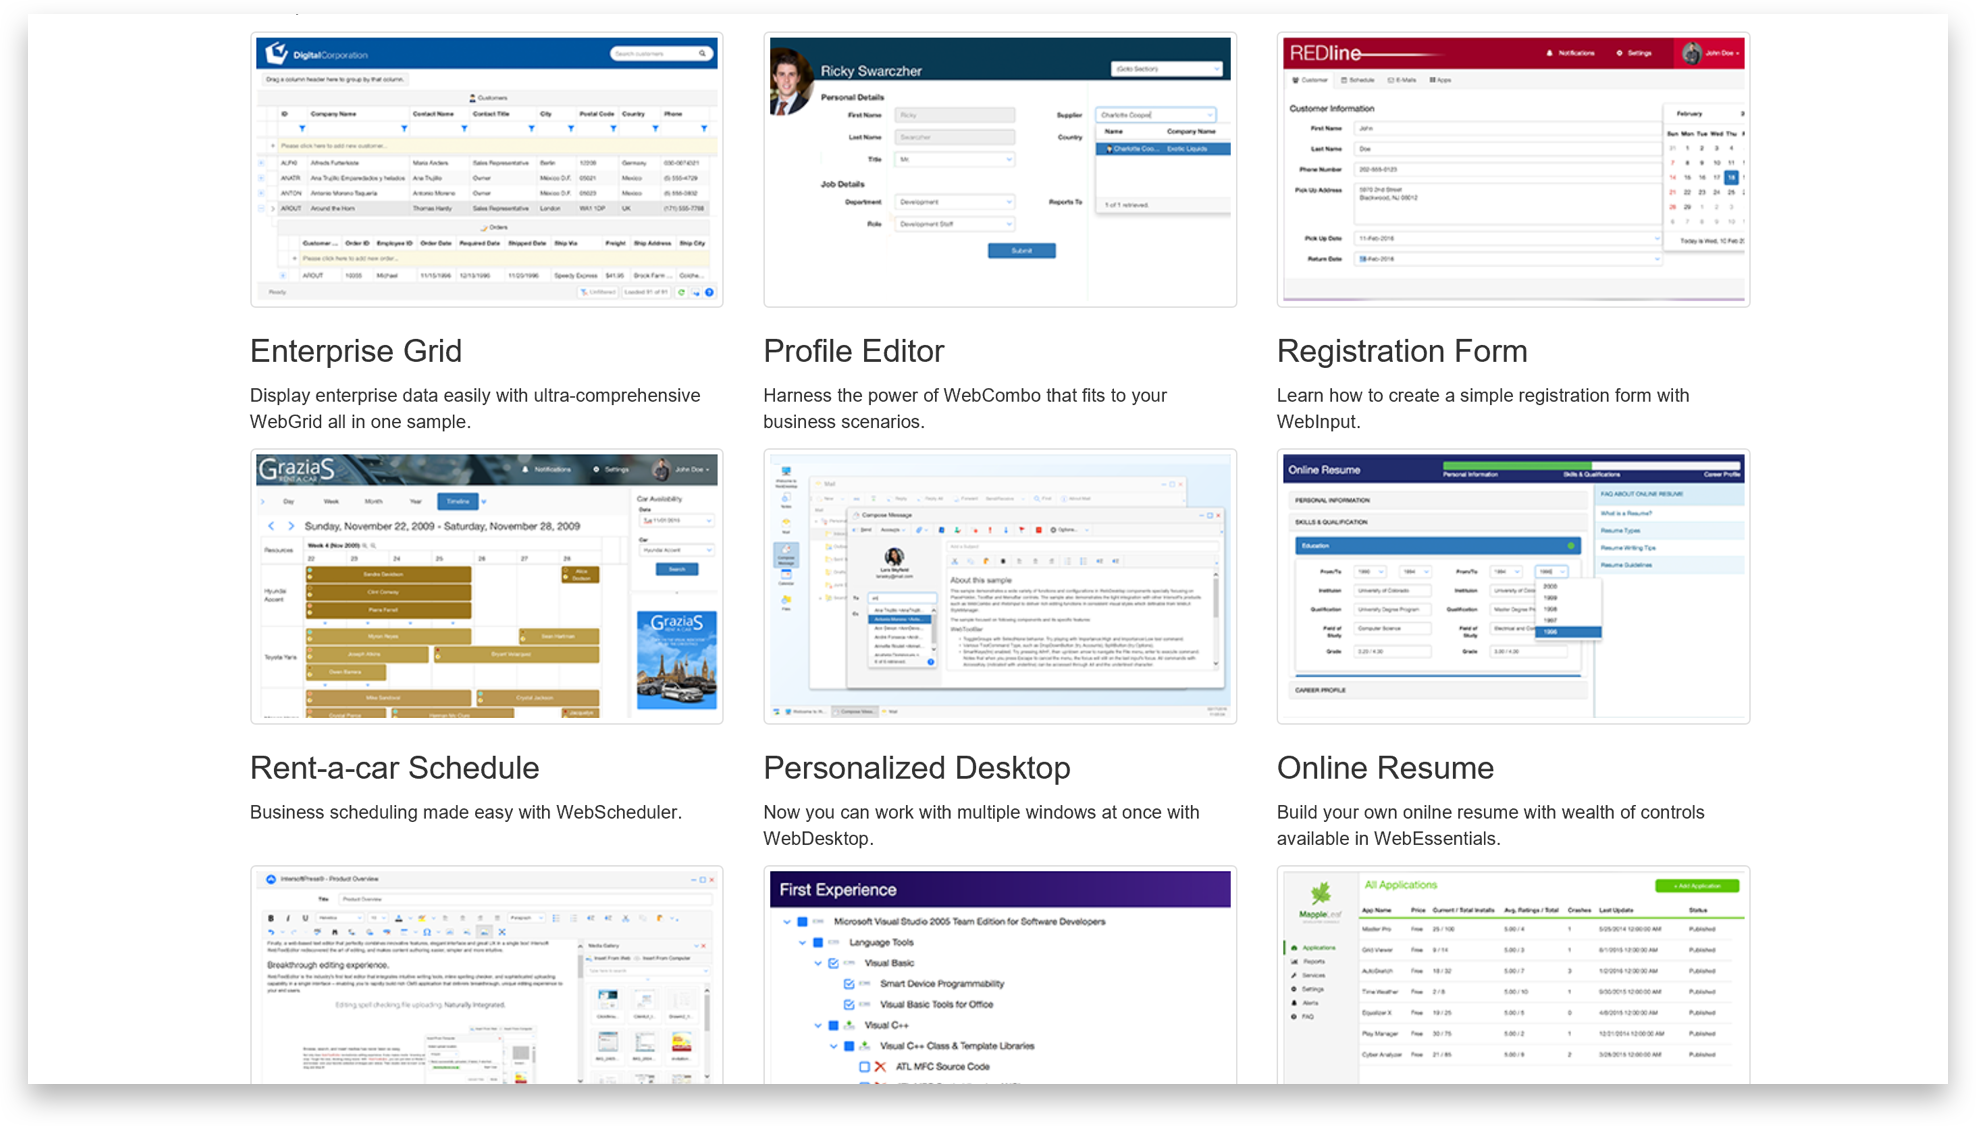
This new Unified Theming template is intuitively design so as to provide basic ideas on how to get started quickly with a new WebUI Unified Theming application, complete with working data bindings for WebCombo, WebInput, WebGrid, and more. At the bottom part of this page we’ve also provided several business-inspiring samples to help inspire your next big web applications.
Wrapping Up
To learn more what you need to do to use the new Unified Theming in your existing applications, check out the documentation. Or, if you prefer to try migrating an existing WebUI sample, for example the WebGrid’s Enterprise sample, I highly recommend you to check out my previous blog post, where I’ve covered a step-by-step walkthrough on how to migrate the sample to use Unified Theming.
To get a better grasp on the Unified Theming feature and what customizable areas available for each control, feel free to check out these great documentations:
- WebGrid Modern Theme Style Reference
- WebCombo Modern Theme Style Reference
- WebInput Modern Theme Style Reference
- WebDesktop Modern Theme Style Reference
- WebScheduler Modern Theme Style Reference
- WebEssentials Modern Theme Style Reference
- WebTextEditor Modern Theme Style Reference
- WebTreeView Modern Theme Style Reference
We can’t wait to see what you’ve built with this new Unified Theming feature. Let us know in the comments section below!
Till next post,
Nicholas Lie


