Getting Started with Crosslight Form Builder
After we’ve improved our customer experience several months ago, we’ve started receiving many great feedbacks from you, our valued customers. One of the feedback that we received is how to get started with the Crosslight Form Builder. We then realized that this feature is a “hidden gem” supported in Crosslight, and most of our customers didn’t realize of its tremendous value in creating functional forms in a very short time. This post will help you learn more about the Crosslight Form Builder and get started.
What is Crosslight Form Builder?
Crosslight Form Builder is a built-in cross-platform form bulider framework that helps developers to create native forms easily with UI aesthetics that conforms to each platform’s user interface guidelines. The metadata definiton itself is shared amongst other platforms as well, resulting in a clean, functional form in minutes.
Several features of the Crosslight Form Builder:
- Simple, metadata-based form
- Intuitive section and property definitions
- Built-in validation support
- Customizable appearance
- Cross-platform native forms on iOS, Android and Windows Phone.
- Customizable behaviors
- Functional forms in 5 minutes.
Creating a driver pickup form

To demonstrate Crosslight Form Builder capabilities, we will create a simple taxi order form, which consists of two sections: Passenger Details and Taxi Choice. In Passenger Details, we’ll have two form fields: Name and Pickup Time whereas in Taxi Choice we’ll have Car Type and Airport choices. In overall, our form structure looks like this:
- Passenger Details
- Name
- Pickup Time
- Taxi Choice
- Car Type
- Airport
Now that we have our form fields, how can we translate that form using Form Builder?
Readying the project
As always, let’s start off from the Blank project created using Crosslight Project Wizard. Let’s name this project as CrosslightFormBuilder.
Creating the form metadata
As we have established earlier, you need to create 2 sections, with 2 property each. And that’s exactly how our form metadata looks like. Let’s create a new Model file that will contain our model as well as the form metadata. I’m going to give it a name of Order.cs and place it under CrosslightFormBuilder.Core/Models folder. Let’s begin by creating the model.
|
1 2 3 4 5 6 7 8 9 10 11 12 13 14 15 16 17 18 19 20 21 22 23 24 25 26 27 28 29 30 31 32 33 34 35 36 37 38 39 40 41 42 43 44 45 46 47 48 49 50 51 52 53 54 55 56 57 58 59 60 61 62 63 64 65 66 67 |
public class Order : ModelBase { #region Fields private CarType _carType; private bool _isAirport; private string _name; private DateTime _pickupTime; #endregion #region Properties public CarType CarType { get { return _carType; } set { if (_carType != value) { _carType = value; OnPropertyChanged("CarType"); } } } public bool IsAirport { get { return _isAirport; } set { if (_isAirport != value) { _isAirport = value; OnPropertyChanged("IsAirport"); } } } public string Name { get { return _name; } set { if (_name != value) { _name = value; OnPropertyChanged("Name"); } } } public DateTime PickupTime { get { return _pickupTime; } set { if (_pickupTime != value) { _pickupTime = value; OnPropertyChanged("PickupTime"); } } } #endregion } |
The Order model derive from ModelBase that is shipped by default in project creation using Crosslight Project Wizard. This class contains the necessary implementations that automatically implements INotifyPropertyChanged, INotifyDataErrorInfo, as well as IDataValidation needed for binding and validation purposes.
All you need is to provide the necessary properties, as shown in the code above, and don’t forget to trigger the OnPropertyChanged method in the property setter to reflect data changes to the UI. This is the standard MVVM-enabled property that is required for data binding to work properly.
Next up, let’s create the form metadata definition. Still in the same file, first we need to create the sections. Simply prepare two classes that will act as the sections. We’ll call this PassengerDetailsSection and TaxiChoiceSection.
|
1 2 3 4 5 6 7 8 9 10 11 12 13 14 15 16 17 |
public class PassengerDetailsSection { #region Fields [Display(Caption = "Name")] [Editor(EditorType.AutoDetect)] [Layout(Style = LayoutStyle.RightDetail)] public string Name; [Display(Caption = "Pickup Time")] [Editor(EditorType.DateTime)] [Layout(Style = LayoutStyle.RightDetail)] [Binding(StringFormat = "{0:d MMM, HH:mm}", Mode = BindingMode.TwoWay)] public DateTime PickupTime; #endregion } |
|
1 2 3 4 5 6 7 8 9 10 11 12 13 14 15 16 |
public class TaxiChoiceSection { #region Fields [Display(Caption = "Car Type")] [Editor(EditorType.AutoDetect)] [Layout(Style = LayoutStyle.RightDetail)] public CarType CarType; [Display(Caption = "Airport?")] [Editor(EditorType.Switch)] [Layout(Style = LayoutStyle.RightDetail)] public bool IsAirport; #endregion } |
Take a look at the code above. It is recommended that fields definitions has the same name as your property to be able to perform binding automatically. There are many attributes that you can choose from to decorate each fields. You can easily customize the appearance, layout, behavior, editor to use, interactivity, binding, and more. If you would like to explore them all, check out these articles:
Also, if you notice, we have defined an enum for the car type. Form Builder automatically supports the use of enums in the form, so you don’t have to create the picker for it. Simply define the editor as AutoDetect and it will create the appropriate editor automatically.
The CarType enum is defined inside the CrosslightFormBuilder.Core/Models folder and is simply defined as follows.
|
1 2 3 4 5 |
public enum CarType { Standard, Executive } |
Now that you have both sections ready, simply create the form by using the following code. Let’s call this OrderFormMetadata.
|
1 2 3 4 5 6 7 8 9 10 11 12 13 |
[Form(Title = "Order Form")] public class OrderFormMetadata { #region Fields [Section(Header = "Passenger Details")] public PassengerDetailsSection PassengerDetails; [Section(Header = "Taxi Choice")] public TaxiChoiceSection TaxiChoiceSection; #endregion } |
The OrderFormMetadata class also contains the fields with the section class types we’ve previously defined. You can also adjust the section header by decorating the fields with the SectionAttribute and fill out the Header property. You can also automatically set the title of the form with any caption you like. In this case, I’ll just simply define it as “Order Form”. This will displayed on top of the navigation controller on iOS, and Activity title on Android.
Creating the ViewModel
Just like any other MVVM apps, you will need to create the ViewModel layer that holds the business logic for the view. To do this, simply create a new OrderViewModel class file inside the CrosslightFormBuilder.Core/ViewModels folder. Its content are as follows.
|
1 2 3 4 5 6 7 8 9 10 11 12 13 14 15 16 17 18 19 20 21 22 23 24 25 26 27 28 29 30 31 32 33 34 35 36 37 38 39 40 41 42 43 44 45 46 47 48 49 50 51 52 53 54 55 56 57 58 59 60 61 62 63 64 65 66 67 68 69 70 71 72 73 74 75 76 77 78 79 80 81 82 |
#region Usings using System; using System.Text; using Intersoft.Crosslight; using Intersoft.Crosslight.Input; using Intersoft.Crosslight.ViewModels; #endregion namespace CrosslightFormBuilder.Core.ViewModels { public class OrderViewModel : EditorViewModelBase<Order> { #region Properties /// <summary> /// Gets the type of the form metadata associated to the editor. /// </summary> /// <value> /// The type of the form metadata. /// </value> public override Type FormMetadataType { get { return typeof(OrderFormMetadata); } } #endregion #region Methods /// <summary> /// Executes the save command. /// </summary> /// <param name="parameter">Parameter.</param> protected override void ExecuteSave(object parameter) { this.Validate(); if (!this.HasErrors) { StringBuilder passengerDetails = new StringBuilder(); passengerDetails.Append("Name: " + this.Item.Name + "\n"); passengerDetails.Append("Pickup Time: " + this.Item.PickupTime + "\n"); passengerDetails.Append("Going to the airport? " + this.Item.IsAirport + "\n"); passengerDetails.Append("Car Type: " + this.Item.CarType); this.MessagePresenter.Show(passengerDetails.ToString(), "Confirm Order", new[] {"Yes", "No"}, selection => { if (selection == 0) //Yes { this.ToastPresenter.Show("Your order has been placed."); } else { this.ToastPresenter.Show("You cancelled the order."); } }); } else { this.MessagePresenter.Show(this.ErrorMessage); } } /// <summary> /// Called when this instance is navigated. /// </summary> /// <param name="parameter">Parameter.</param> public override void Navigated(NavigatedParameter parameter) { base.Navigated(parameter); this.Item = new Order(); this.Item.PickupTime = DateTime.Now; } #endregion } } |
Let’s take it slowly from above. First things first, to use the Crosslight Form Builder, it’s highly recommended to use our built-in EditorViewModelBase<TModel> as this ViewModel holds the important data operations that can be done automatically at the background, such as performing save and validation, which we’ll explore in just a moment.
In the ViewModel, we’ve also overridden the FormMetadataType property. This will tell the Form Builder which class holds the FormAttribute that will act as the form.
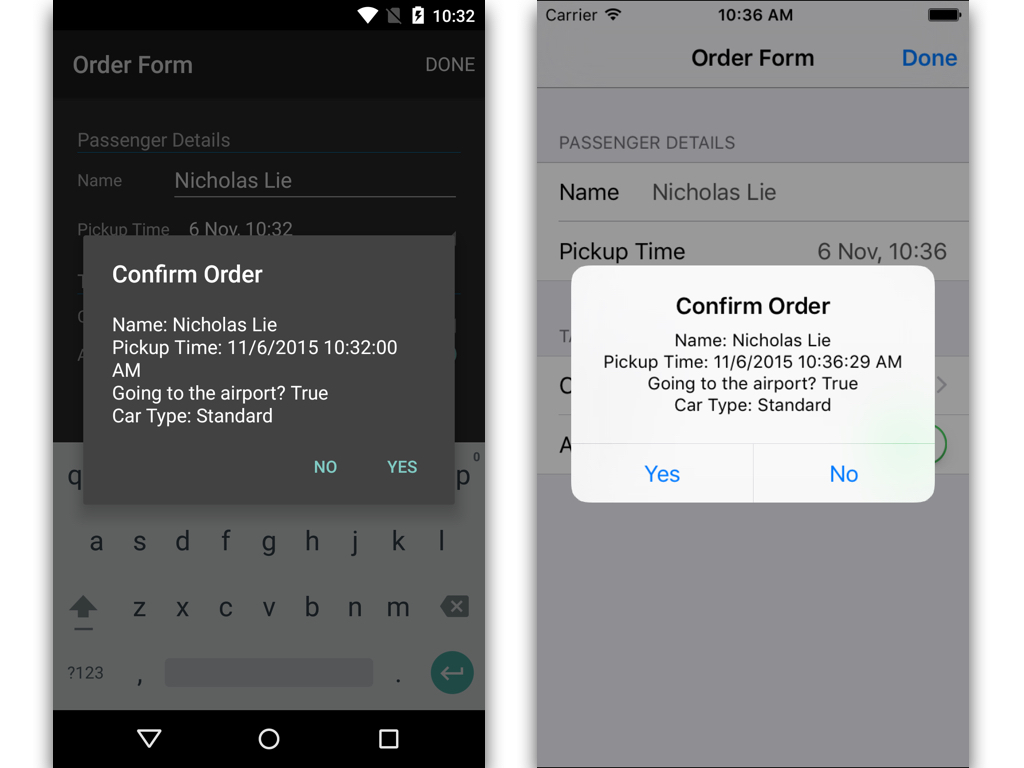
In the next section, we’ve also overridden the ExecuteSave method. Inside the method, you’ll see that we’ve called the Validate method. This will validate the form with the conditions we’ve specified as our form validation. We’ll discuss the form validation in the next section. Next, if the form has no errors, then we can proceed with our business logic. In this case, I’m going to display the inputted data and display them using Crosslight Message Presenter. So when the Done button is pressed, the ExecuteSave method will be called.
Last but not least, we’ve also instantiated our Order model as new item for the Form Builder.
Enabling form validation
To enable form validation, there are several things to be done. First, open up the model file. In our Order model, override the Validate method.
|
1 2 3 4 5 6 7 8 |
public override void Validate() { base.Validate(); this.ClearAllErrors(); if (string.IsNullOrEmpty(this.Name)) this.SetError("Please enter your name.", "Name required"); } |
Here, we set the error when the user did not enter their name in the form. The ClearAllErrors method should be called to reset the validation state. If any of the validation hits the condition, then SetError will be called, which in turn be displayed using Message Presenter that we’ve defined previously in ExecuteSave method.
|
1 2 3 4 5 6 7 8 9 10 11 12 13 |
protected override void ExecuteSave(object parameter) { this.Validate(); if (!this.HasErrors) { ... } else { this.MessagePresenter.Show(this.ErrorMessage); } } |
This is why it’s very important to use the built-in EditorViewModelBase shipped with Crosslight, since Crosslight has taken care of these details in the background, leaving you to focus only on your business logic.
Creating the Views
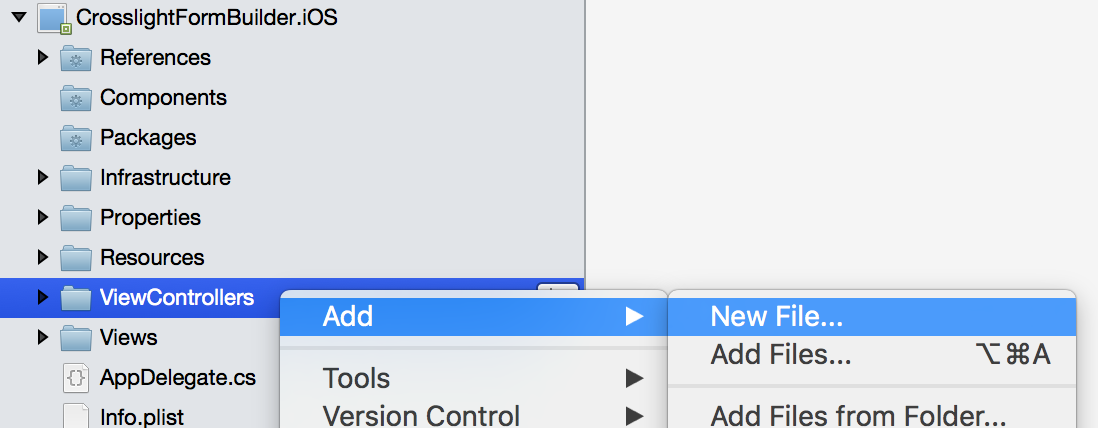
After you’re done set the M and VM in MVVM, let’s set up the Vs. We’ll proceed by creating the Views on iOS and Android that consumes the ViewModel. Right click on the ViewController folder in CrosslightFormBuilder.iOS project and choose Add, New File.
In the dialog that appears, choose Crosslight and select Crosslight iOS Form View Controller. Give it a name of OrderViewController.

In the newly created OrderViewController.cs file, simply specify the TViewModel as OrderViewModel that you’ve just created and remove this line.
|
1 |
[ImportBinding (typeof(TBindingProvider))] |
The ImportBindingAttribute is used only when you want to add additional bindings to the form, which we’re not going to use in this scenario.
In addition, the DetermineNavigationMode overload method and the preferred content size can be completely removed since our app is not targeting iPad.
Here’s the final content of the OrderViewController.cs.
|
1 2 3 4 5 6 7 8 9 10 |
using CrosslightFormBuilder.Core.ViewModels; using Intersoft.Crosslight.iOS; namespace CrosslightFormBuilder.iOS.ViewControllers { [Register("OrderViewController")] public class OrderViewController : UIFormViewController<OrderViewModel> { } } |
As seen above, it’s really only a simple class definition remaining since all the heavy lifting is done by the UIFormViewController class itself.
You’ve finished the iOS views. Let’s move on to Android.
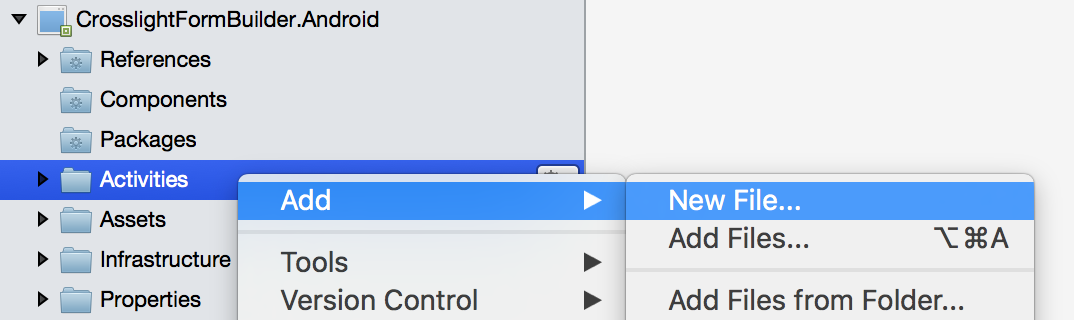
Begin by right clicking on the Activities folder in the CrosslightFormBuilder.Android project. Select Add, New File.
In the preceding dialog, select Crosslight, then Crosslight Android Form Activity, give it a name of OrderActivity.
Similar to iOS, remove this line
|
1 |
[ImportBinding (typeof(TBindingProvider))] |
And set the TViewModel to OrderViewModel. Since we’ll not be using any binding providers for now. If you notice in the OrderActivity.cs file we have just created, we have these codes.
|
1 2 3 |
protected override int MenuLayoutId { get { return Resource.Menu.editing_actions_id; } } |
This means we need to provide the action bar options to be used with the Activity. This defines the actions that resides in the Action Bar of Android Activity, usually located on the top right hand corner of the screen. In this case, we want to set it as the Save button. To do that, right-click on the Resource/layout folder in the CrosslightFormBuilder.Android project. Click Add, New File.
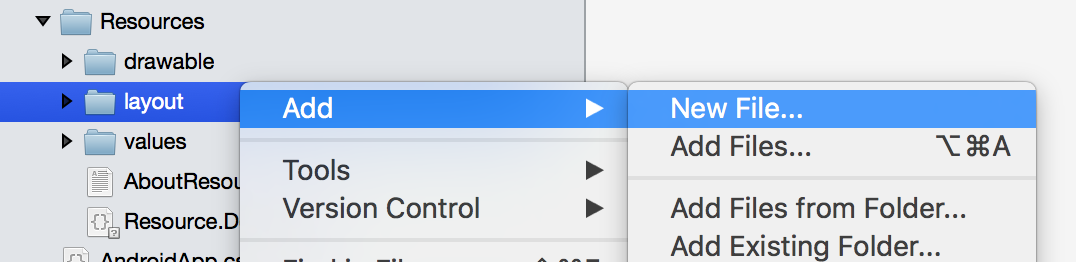
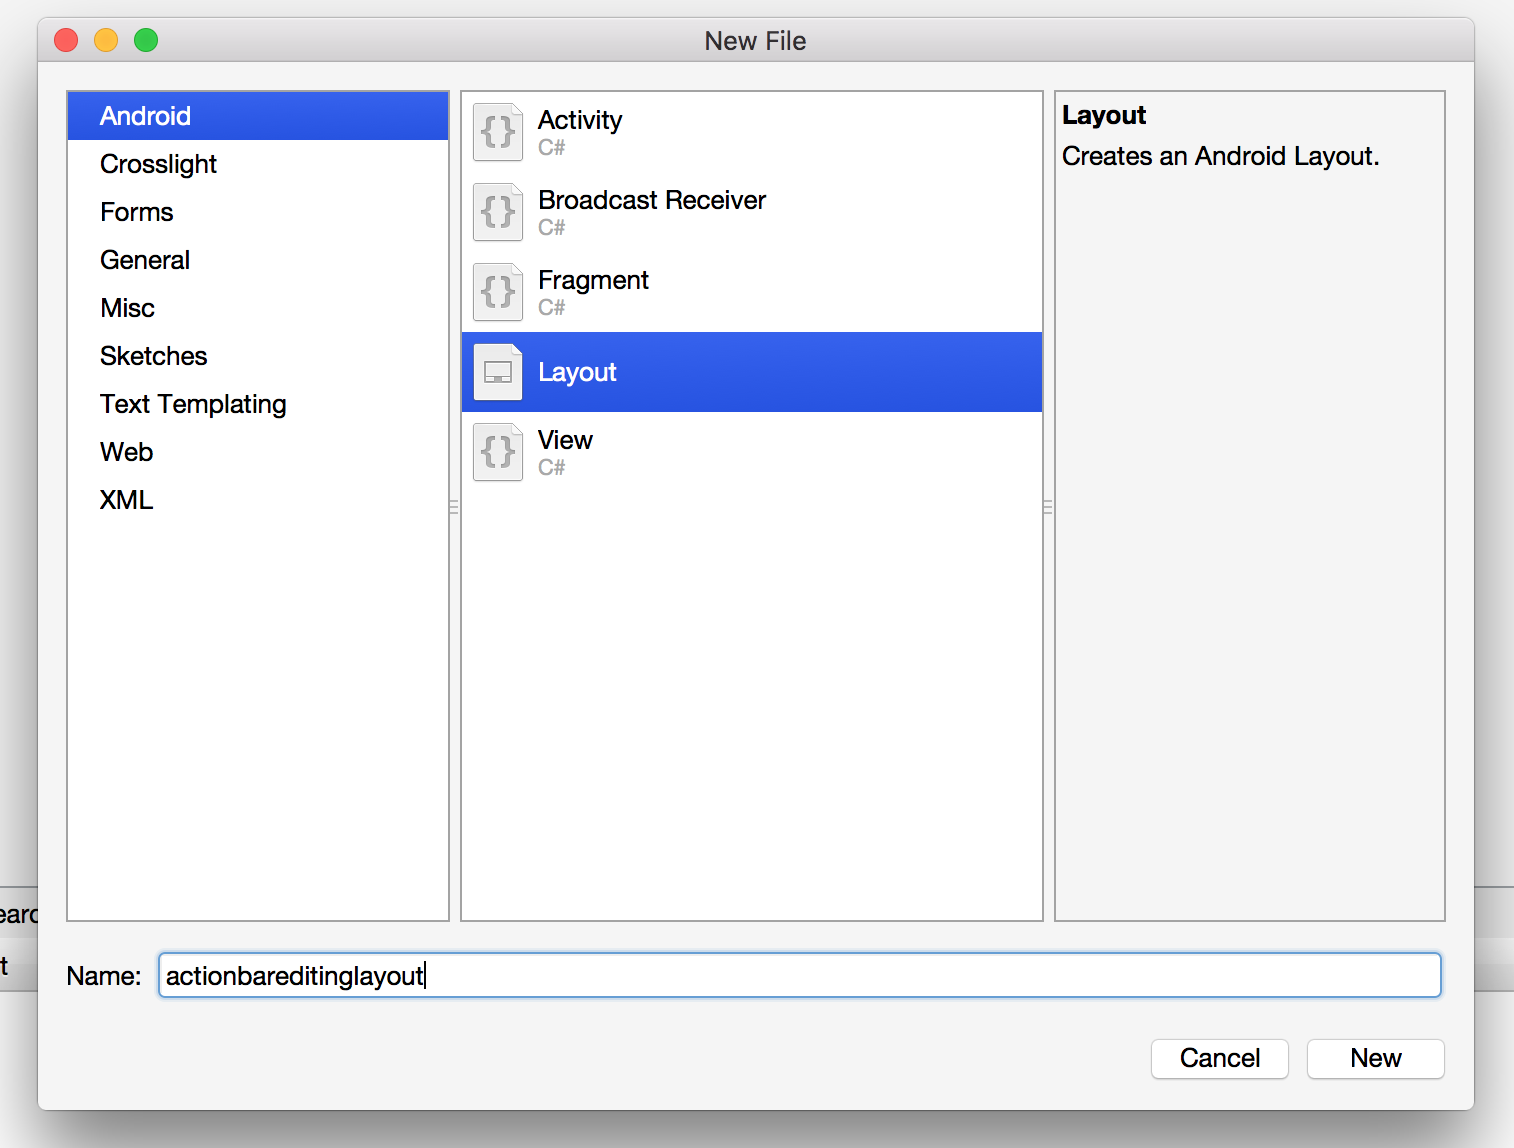
From the dialog, select Android, Layout. Give it a name of actionbareditinglayout.
Use the following code.
|
1 2 3 4 5 6 7 |
<?xml version="1.0" encoding="utf-8"?> <menu xmlns:android="http://schemas.android.com/apk/res/android"> <item android:id="@+id/SaveButton" android:title="@string/Save" android:showAsAction="ifRoom|withText" /> </menu> |
On the 5th line, you’ll see @string/Save. This corresponds to the key of the string value that’s located inside the strings.xml file. You can find this file inside the Resources/values folder. Simply add this line as a child of the resources node.
|
1 |
<string name="Save">Done</string> |
Back to the OrderActivity.cs, we can now use the new layout that we’ve created as MenuLayoutId so that it’ll appear on the ActionBar. Change it to
|
1 2 3 4 |
protected override int MenuLayoutId { get { return Resource.Layout.actionbareditinglayout; } } |
You’re done with the views. One last thing before running the project.
Setting the Root ViewModel
Since you have everything ready, the last thing to do is tell the app which ViewModel to use as the root ViewModel. To do this, open up AppService.cs located inside CrosslightFormBuilder.Core/Infrastructure folder. In the OnStart method, change the root ViewModel to OrderViewModel.
|
1 2 3 4 5 |
protected override void OnStart(StartParameter parameter) { base.OnStart(parameter); this.SetRootViewModel<OrderViewModel>(); } |
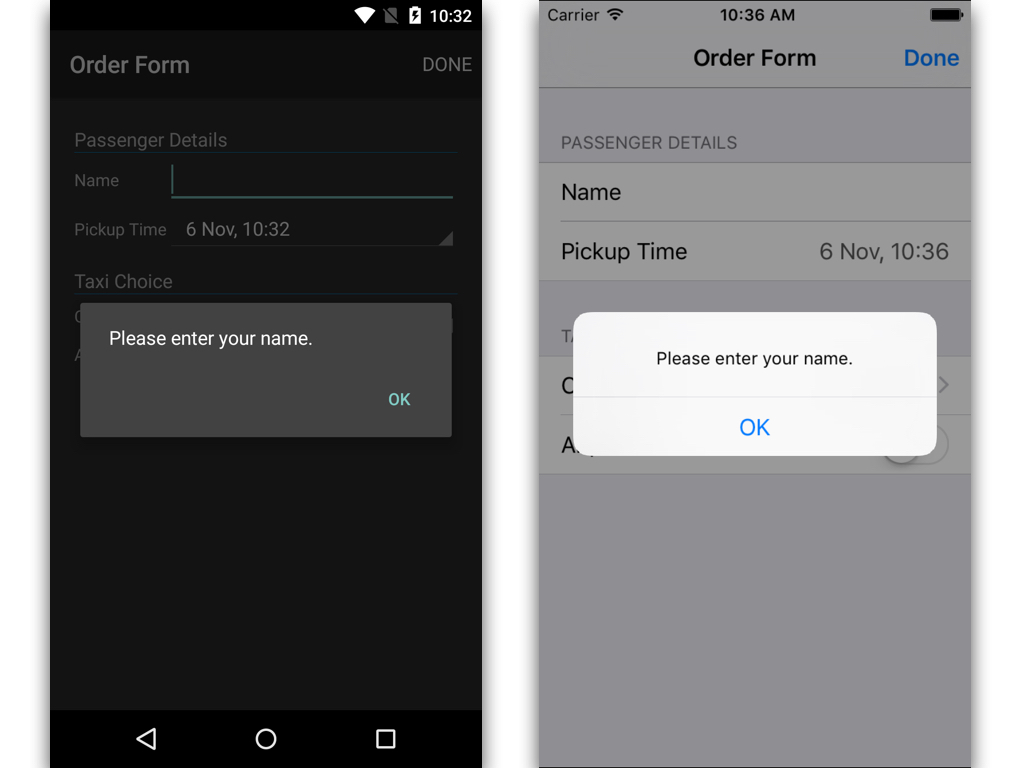
You’re now ready to run the project. See that the validation works as well. Here’s how it looks like when the user hit the Done button and no Name is entered.
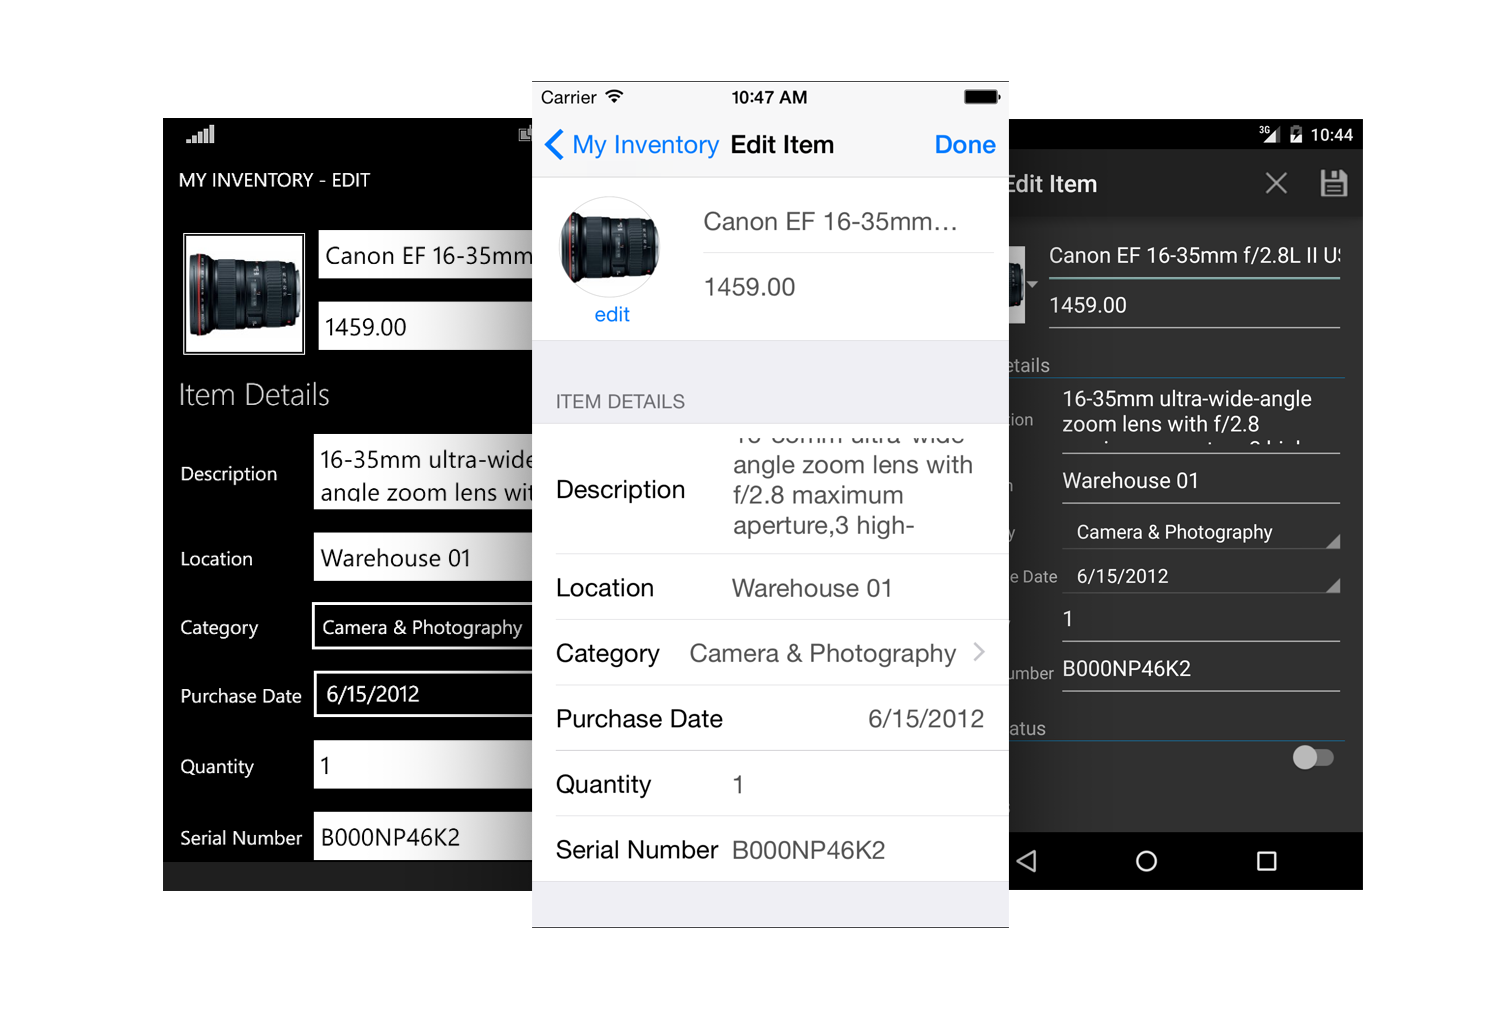
A deeper look at the result
Let’s take a deeper look at the resulting form created with Crosslight Form Builder. As you might have already noticed, the forms generated by Crosslight Form Builder are unlike any other. With Crosslight Form Builder, in just minutes, developers can easily build gorgeous-looking forms and provides the best user experience with mobile forms.
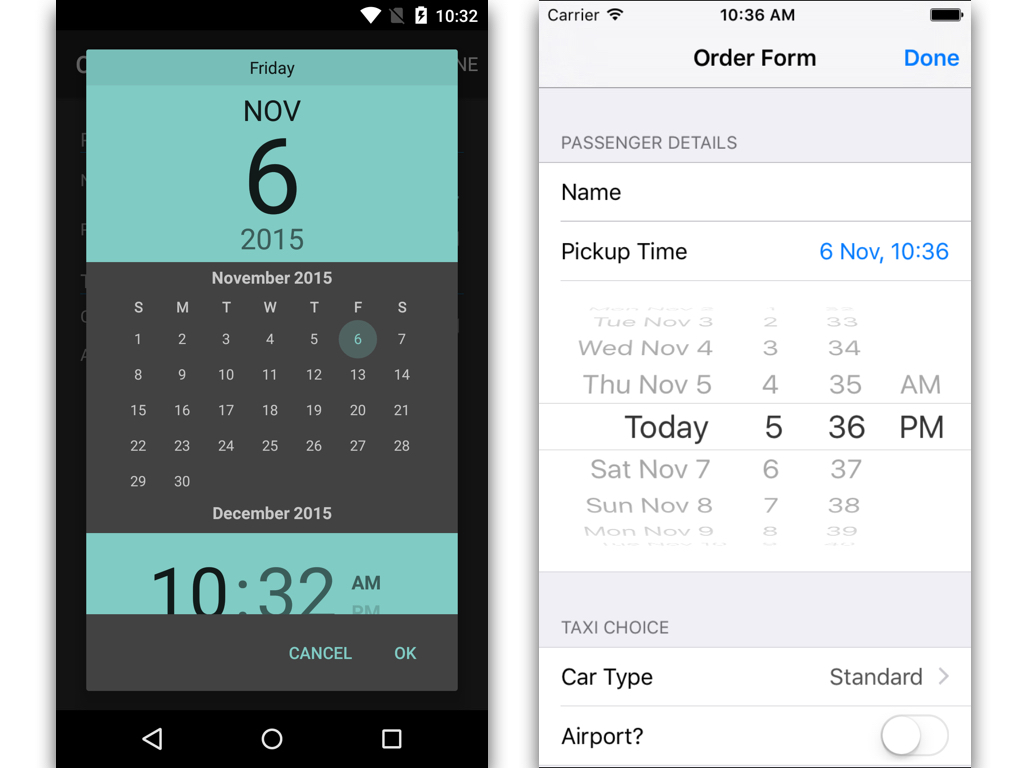
Just look at the screenshot above. The date time picker resulted from Crosslight Form Builder displays native inline iOS date picker, and the native Android date time picker as well.
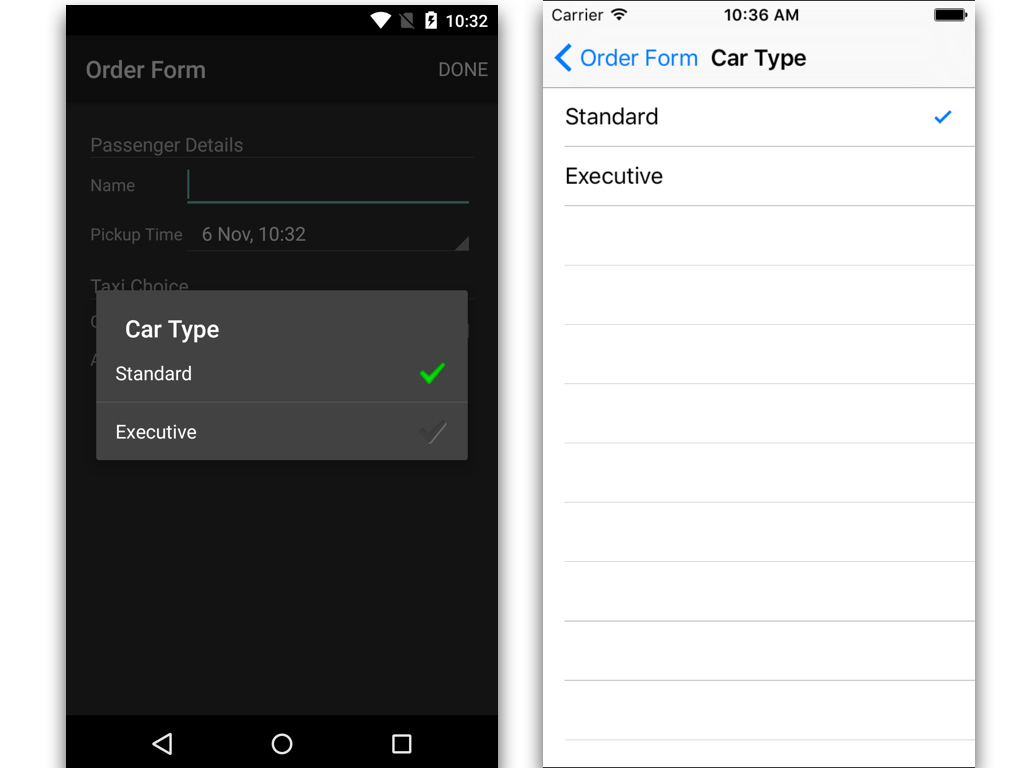
Not only that, take a look at the automatic enum picker provided by Crosslight Form Builder. In Android, it shows a modal dialog with the choices, and on iOS, it performs push navigation that allows the user to choose between the choices. iOS users and Android users will definitely appreciate this native behavior exhibited by the form.
Creating this definition takes only minutes, saving you lots of time and money on development and implementation, while still providing ultra-great user experience. Other cross-platform frameworks might offer quick-and-dirty solution to the date time picker by showing small modal dialogs that hardly complies with each platforms UI guidelines. This is the power of the Crosslight Form Builder.
Where to go from here?
After you’ve completed this short tutorial blog post, I would definitely recommend you to jump in to the FormBuilderSamples, where you can easily explore various editors Form Builder can support as well as various customizability for each editor with different layouts as well. Check out the Form Builder Samples here.
Summing up
I hope this post helps you to learn Crosslight Form Builder and get started with it. In the next post, I’ll enhance the Form Builder to add minimum value to the Pickup Time as well as extending the Form Builder with our own custom views, complete with binding capabilities.
You can find the source files for this project in our Git repository here: http://git.intersoftsolutions.com/projects/CT/repos/crosslightformbuilder/browse.
To learn more about the Crosslight Form Builder, check out these links in the Developer Center:
- Building Rich Data Entry Form
- Form Builder Overview
- Supported Editor Types
- Configuring Editor Behaviors
- Enabling Form Interactivity
- Extending Form Builder
- Form Metadata Example
- Presenting a Form with EditorViewModel
Should you have any questions, feel free to initiate a live chat session with us on our website, or, leave your comments below and let me know what you think!
See you in the next post!
Nicholas Lie


