Timeline view’s Client Paging in WebScheduler 3
Hello everyone, Happy New Year 2010! In this post, I’m going to discuss one of the most exciting features that we added in the recently released WebScheduler. As you may already aware, WebScheduler 3 is strongly focused on performance and usability, especially when used in enterprise applications where they require to display large dataset in consistently fast performance. The new Client Paging feature in WebScheduler 3 elegantly addresses many of these performance issues.
In the following section, we’ll learn how client paging work specifically in Timeline View (the other views will be discussed in future blog posts). We introduce several client paging modes which can help improving overall application response based on your scenarios.
Let’s start by enabling the client paging in Timeline view. We’ve made it extremely easy to use, so that you can enable the feature by simply setting EnableClientPaging property to true. The property can be found in ViewSettings, then expand TimelineView property.
After enabling the client paging, the next step is to choose the client paging mode that is more suitable to your application scenario. WebScheduler 3 introduces three client paging mode to choose from:
- Paging based on number of events
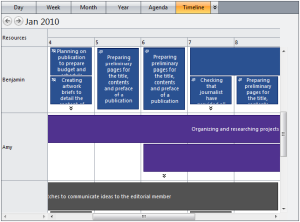
Called EventPageSize mode, this paging mode restricts the numbers of event displayed in each Timeline cell. If the total number of events exceeds the value of the EventPageSize property, an arrow indicator will appear notifying that more events are available. Click on the arrow indicator to reveal the complete events in the Timeline cell.To use this paging mode, simply set the ClientPagingMode property to EventPageSize. - Paging based on screen viewport
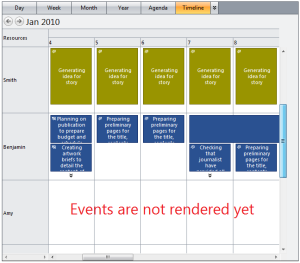
Called ViewPort, this paging mode will render all events based on the currently visible viewport. This means that even if you have hundreds of resources, WebScheduler will present your events in consistently fast performance. When scrolled down, WebScheduler seamlessly render the complete events of the new visible viewport. As the result, this advanced paging mode significantly improves overall responsiveness and user experiences.
You should consider using this paging mode if you have fairly large number of resources bound to your WebScheduler.To activate this mode, set the ClientPagingMode property to ViewPort.
- The combination of both event size and viewport paging
This mode combines the best of both EventPageSize and ViewPort client paging for the most efficient event rendering. With this mode, the events will be rendered based on the visible viewport and also be restricted based on the number of allowed events. This mode is best used for applications with considerably large number of resources and events bound to WebScheduler.To enable this mode, set ClientPagingMode property to Both.
At this point, you should have learnt the new key features in WebScheduler 3 that elegantly address critical performance limitations in web-based scheduling application. So if you’ve got large, enterprise data to be presented in scheduling interface, go ahead, download and try WebScheduler 3, and impress your users big time!
Last but not least, you can find out more information on WebScheduler 3’s new features here and the live demos here. For questions and feedback, please drop by our forum.
Happy scheduling!
Warm Regards,
Budianto Muliawan.


Comments