WebTextEditor Integration with WebFileUploader
As described in our website, WebTextEditor includes three components: WebTextEditor, WebSpellChecker and WebFileUploader. Besides used as a stand-alone component, each product can be integrated to each other to provide a more powerful development tool.
After configuring HTTPModules and HTTPHandlers needed for WebFileUploader, you can simply integrate WebFileUploader to WebTextEditor by configuring FileUploaderSettings >> Enabled to True.
|
1 |
<FileUploaderSettings Enabled="true" /> |
There are several properties available in FileUploaderSettings.
| Property Name | Property Description |
|---|---|
| Enabled | Specifies whether or not file uploader is enabled. |
| DefaultUploadPath | Specifies the default upload path in case none is specified in media resource. |
| DefaultUploadMediaResource | Specifies the default media resource that is used as default upload path. |
| AllowCancel | Specifies whether or not the uploading process can be cancelled. |
| FilesCount | Specifies the maximum number of files that can be uploaded in a single uploading process. |
| FileTypes | Specifies the types of files that can be uploaded. |
| UploadSizeLimit | Specifies the maximum size of the file that can be uploaded. |
| TotalUploadSizeLimit | Specifies the maximum size of the total uploaded files. |
| ShowFileUploaderCommand | Specifies whether or not FileUploader command should be displayed in main toolbar. |
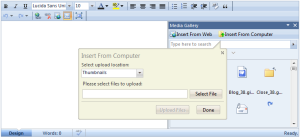
When integrated to WebTextEditor, users can use the integrated WebFileUploader in built-in Media Gallery. When enabled, a tool command, Insert from Computer, will be added to Media Gallery toolbar. When it is clicked, a callout that contains integrated WebFileUploader will be displayed. Users will be able to choose a file and upload it to the selected media resource or selected path.
As explained in previous blog, you can specify MediaResource collection where each resource represents a resource where user can perform media search. In each MediaResource object, you can specify AllowUserUpload property to True.
|
1 2 3 4 5 6 7 8 |
<MediaResources> <ISWebTextEditor:WebTextEditorMediaResourceGroup Name="media1" Text="Photos"> <resources> <ISWebTextEditor:WebTextEditorResource Name="Images" Url="Images/" AllowUserUpload="true" /> <ISWebTextEditor:WebTextEditorResource Name="Thumbnails" Url="Thumbnails/" AllowUserUpload="true" /> </resources> </ISWebTextEditor:WebTextEditorMediaResourceGroup> </MediaResources> |
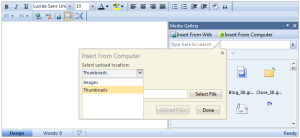
When this property is enabled, the media resource will be listed in the upload location combo. If there are more than one media resources that enable AllowUserUpload property, you can specify the default selected location in DefaultUploadMediaResource property. Users can select a location in the combo and upload the media to the selected resource.
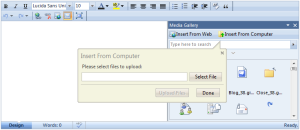
Instead of allowing users to upload to media resource collections, you can allow users to upload media to a specific upload path. This can be configured in DefaultUploadPath property. If you have configurations set in media resource collection and DefaultUploadMediaResource property, the upload location in DefaultUploadPath property will be ignored. The configurations in media resources will be used instead.
|
1 |
<FileUploaderSettings Enabled="true" DefaultUploadPath="Images/" /> |
Note that the upload location combo is not displayed. Users only need to select the file and it will be uploaded to the location specified in DefaultUploadPath property automatically.
Besides the above configurations, you can also specify the maximum number of files that can be uploaded, the types of files that can be uploaded, the size limitation, and whether or not users can cancel the upload progress. WebTextEditor already specifies these configurations by default, but it can be customized easily using the properties in FileUploaderSettings. For details of the property name, see the FileUploaderSettings properties table above.
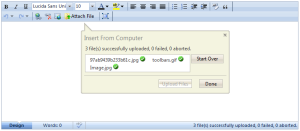
Although WebFileUploader is used mostly in Media Gallery pane, its usage is not limited to Media Gallery only. When you don’t enable Media Gallery pane, you can still use integrated WebFileUploader. You can enable ShowFileUploaderCommand property to include Attach File command in main toolbar. The command has the same behavior as Insert from Computer command in Media Gallery toolbar.
In this case, since Media Gallery is disabled, you need to specify DefaultUploadPath property.
|
1 2 3 4 5 6 |
<TaskPaneSettings> <MediaGallery Enabled="false" /> </TaskPaneSettings> <FileUploaderSettings Enabled="true" DefaultUploadPath="Images/" ShowFileUploaderCommand="true" /> |
Users can click Attach File command and select the file to upload. The file will be uploaded to the location specified in DefaultUploadPath property. The uploading progress bar and the uploaded file status will still be displayed properly.
If the default upload path used in your application is dynamic, you can specify it programmatically in OnPreInitialize server-side event.
|
1 2 3 4 5 6 7 8 9 10 11 12 13 14 15 |
protected void WebTextEditor1_PreInitialize1(object sender, EventArgs e) { // set upload path // check whether the specified uploadPath has already exists DirectoryInfo dir = new DirectoryInfo(Server.MapPath(uploadPath)); if (!dir.Exists) Directory.CreateDirectory(Server.MapPath(uploadPath)); // set the upload path as DefaultUploadPath WebTextEditor1.FileUploaderSettings.DefaultUploadPath = uploadPath; // you can specify other file uploader settings in here WebTextEditor1.FileUploaderSettings.FileTypes = "*.zip, *.rar;"; } |
The above code will check whether or not the uploadPath has already existed. If not, the folder will be created and then set as DefaultUploadPath. In this event, you can specify the default upload path dynamically based on the requirements of your application. The uploader behavior, including the uploading progress and upload file status, will not changed when this approach is used. Users will still be able to select the file and it will be uploaded to the specified upload path.
Both components can be combined to provide a text editor complete with built-in file uploader. You can configure the available settings provided and use it instantly. Give it a try!
