How-To: Create an event via Button Click In WebScheduler
Hi all,
WebScheduler provides comprehensive APIs that allows you to perform functions programmatically. Often times, developers need the ability to create new events programmatically — such as from their own user interface or business logic. In this post, I’ll show you how you can create an event programmatically by using client-side API, without the need to use built-in CallOut or Editing Form.
The following Javascript codes show you how:
function Button1_onclick()
{
var s = ISGetObject(“WebScheduler1″);
var eventView = s.CreateNewEvent();
var originalObject = eventView.GetOriginalObject();
originalObject.ResourceID = “1”;
originalObject.Subject = “Support Meeting”
originalObject.Location = “Office”;
originalObject.StartTime = new Date(2009, 1, 9, 10, 0, 0); // Feb—is entered as 1
originalObject.EndTime = new Date(2009, 1, 9, 10, 30, 0);�
originalObject.AllDayEvent = false;
s.InitializeEventView(eventView);
s.InsertEvent(originalObject);
}
When you click the Button, the result should look like the screenshot below:
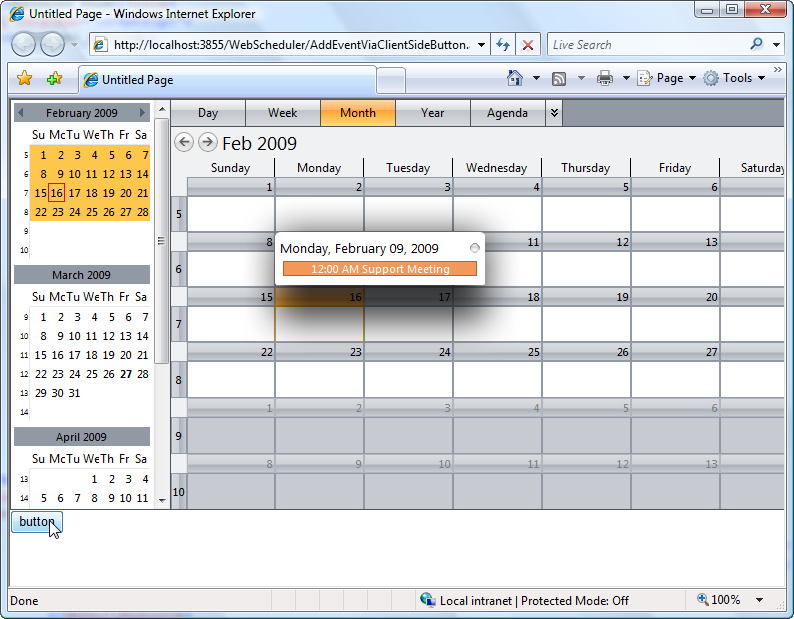
To learn more, you can download the attached sample by clicking this link and try it out yourself. Happy scheduling!
Regards,Handy.
