Enable Multiple Cell Selection in WebScheduler.NET 2.0
One of the new features that available in WebScheduler.NET 2.0 SP1 is Multiple Cell Selection feature. Usually, to create a new event, user can simply click on an empty cell and fill the necessary data in the callout. However, this approach is not simple enough when user wants to create a new event with broader duration. This is now possible in WebScheduler.NET when Multiple Cell Selection feature is enabled.
Enabling Multiple Cell Selection
To enable the feature, simply set EnableMultipleCellSelection property to True. This feature works in conjunction with adding functionality, so DataEditing >> AllowAdd property must also be set to Yes.
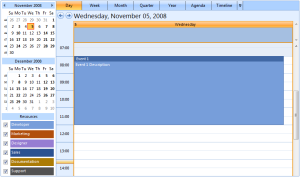
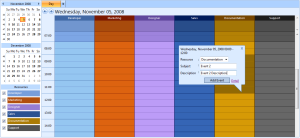
Try to select multiple cells, fill the necessary data in callout and click Add Event. A new event will be created within the range. For example: select the cells which start from 8 AM – 12 AM. Note that the callout will display the date range of the selected cells.
When Add Event button is created, a new event which starts from 8 AM – 12 AM will be inserted.
As an alternative, user can select multiple cells and open the editing form. The selected date range will automatically be persisted in the start date and end date controls.
When enabled, this feature works consistently in all views that support data operation. Quarter and Year views don’t have this feature since the events are displayed for summary view only. Agenda view also doesn’t support this feature because the events are displayed as text based list only.
In Day view
In Day view, user can select multiple cells in the content. The same behavior is also supported in Split view. However, in Split view, user cannot select multiple resources. The selected cells will be limited to one resource only and the selected resources will be automatically persisted in callout and editing form.
In Week view, user can select multiple cells in all day event area and content area. When user selects multiple cells in all day event area, the event will be inserted as all-day type event.
In content area, when user selects multiple cells in different columns, the event will be created as switch-day event and thus will be displayed in all day event area.
In Month view, user can select multiple cells and the event will be inserted as all-day type event.
In Timeline view
In Timeline view, user can selects multiple cells in the selected resource. The selection is limited to the selected resource only. The duration of the new event will be calculated according to the selected Timeline view mode. Note that the selected resource and date range are persisted in callout and editing form.
Date range displayed in callout
Previously, only the start date and time is displayed in the callout when an event or an empty cell is selected. In some scenarios, the ability to see the date range of the event or selected cells is very critical. Therefore, the date range is now displayed in the callout when an event or empty cell(s) are selected.
To synchronize the detail info in all view, the date range is also displayed in Agenda view detail.
When multiple cells are selected, developer can specify custom actions in OnMultipleCellSelected client side event. Five parameters will be passed to this event:
- controlId, specifies the id of WebScheduler control.
- startDate, specifies the start date of the selected date range.
- endDate, specifies the end date of the selected date range.
- isAllDay, specifies whether or not the event inserted will be all-day-typed event.
- resource, specifies the selected resource object.
To use this client side event, you need to get WebScheduler.NET 2.0 Build 211 from Update Manager or My Components in TDN (http://dev2.intersoftpt.com).
Live Demo
For the real life experience, please browse the sample in the following link: Enable Multiple Cell Selection.
As usual, feel free to drop a comment or send your feedback to feedback@intersoftpt.com. Thanks!





Comments