Add a Button with Command Binding in Custom Table Cell
This page discuss how you can customize the appearance and presentation of cell template in a table view for iOS by adding a button with command binding. It is expected that you have successfully displayed a list of data and create custom cell template for iOS UITableView before continuing.
Your apps look better when the cell template are presented more intuitively, for instances, adding a button to a TableViewCell. Crosslight has provided techniques that will help you easily customizing the look of your cell template.
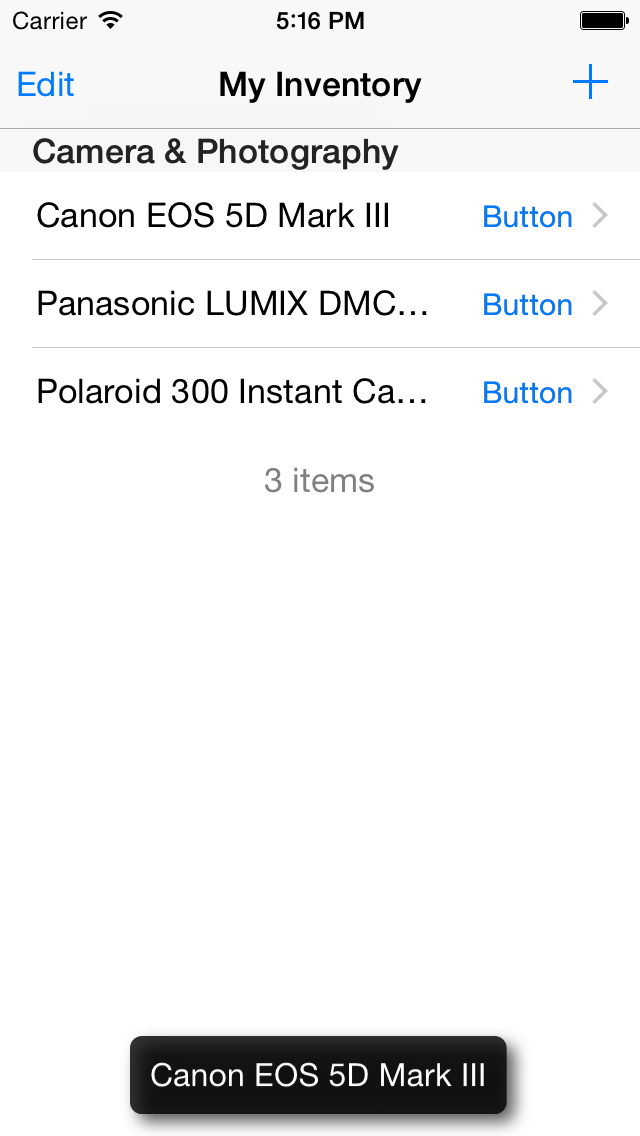
In this guide, you will learn how to display a button with command bindings in a custom UITableViewCell. When tapped, the name of the item will be shown in a toast presenter. Follow the simple steps below.
Add a Button to Custom Cell Template View
Let’s start by creating a custom cell template for iOS UITableView and add a Label to the view. Double click the CrosslightiPhoneTableCell1.xib file in Xamarin Studio and it will open up Xcode. In this sample, a Button will be added.

Add Command to ViewModel
In the ViewModel, a DelegateCommand called TestCommand, is added. This command will be bind to the button so that when user click, it will show a ToastPresenter with the item.Name information.
Changes in ViewModel is as follow.
|
1 2 3 4 5 6 7 8 9 10 11 12 13 14 |
public DelegateCommand TestCommand { get; set; } public ItemListViewModel() { // commands this.TestCommand = new DelegateCommand(ExecuteTest); } private void ExecuteTest(object obj) { Item item = obj as Item; if (item != null) this.ToastPresenter.Show(item.Name); } |
Configure Binding in BindingProvider
You will need to configure two binding provider entries to bind the button to the command and the command parameter to be sent, which is the item itself. After adding button in our own custom cell template in the view level, then bind the Button using the BindingProvider class that contains the definition for the view bindings.
The code below shows how to configure the binding for the Button in custom cell template.
|
1 2 |
itemBinding.AddViewModelBinding("TestButton", BindableProperties.CommandProperty, "TestCommand"); itemBinding.AddBinding("TestButton", BindableProperties.CommandParameterProperty, "."); |
After saving all the changes, you should see the result similar to the following image when the button is tapped.

Samples
The sample code for this article can be downloaded from our Git server: http://git.intersoftpt.com/projects/CROS-SUPP/repos/add-button-with-commandbinding-in-customtablecell/browse.


