Use custom Editing Form in WebScheduler.NET
WebScheduler.NET comes with built-in advanced editing form. However, we received some feedbacks on how to use custom editing form in WebScheduler. Here are the steps to implement that.
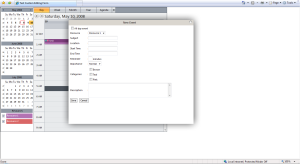
- Create the custom editing form and set the EditingUrl property. The custom editing form used in this sample uses .NET standard control. Advanced client behavior can be implemented manually.
- Add the following code in OnEditingFormShow client side event. The code is needed to reload the editing form every time it’s opened.
function WebScheduler1_OnEditingFormShow(controlId, action, eventView, eventType, newType) �
{ �
var WebScheduler1 = ISGetObject(controlId); �
var dlg = WebScheduler1.EditingDialogBox; �
var path = “./EditingForm_Custom.aspx?action=” + action; �
if (action == “Edit”) �
path += “&eventID=” + eventView.GetOriginalObject().EventID;
dlg.SetContentURL(path); �
return true; �
}
You can manually implement the database updates in the custom editing form. After you save the changes to database, you need to refresh the scheduler so the changes can be displayed in the scheduler. In this sample, I use the following code to call the Refresh method after save action.
server side:
Page.ClientScript.RegisterStartupScript(typeof(Page), “OnLoad”, “Load();”, true);
client side:
function Load() �
{ �
var wnd = window.parent;
var scheduler = wnd.ISGetObject(‘WebScheduler1′);
scheduler.EditingDialogBox.CloseDialog();
scheduler.Refresh();
}
To close the dialog box, use the following code:
var wnd = window.parent;
var scheduler = wnd.ISGetObject(“WebScheduler1″);
scheduler.EditingDialogBox.CloseDialog();
Note that you are unable to add custom fields in the editing form, because WebScheduler architecture has not supported it yet. Don’t worry though, we will implement the extensibility feature in next version of WebScheduler, which would be available in WebUI Studio.NET 2008 R2.
For further information, please try this sample. Note that you need to use the latest WebScheduler.NET build 112, which can be retrieved from Update Manager. This build is newer than the one included in WebUI Studio.NET 2008 R1 SP1.
As usual, please send any feedback to feedback@intersoftpt.com 
