Extending Crosslight Form Builder
Since you’ve managed to get started with Crosslight Form Builder, let’s move on a bit to see how we can extend the capabilities of the Crosslight Form Builder beyond its original capabilities. In this post we’re going to learn how to add an option to choose the driver in CrosslightFormBuilder sample, as well as showing a custom view with the driver’s photo in the form, with the driver’s phone number, which when tapped, will initiate a call to the driver.
There are two major enhancements to be done:
- Providing driver selection
- Providing custom driver view
Providing Driver Selection
Let’s try to create the Driver selection. At a quick overview, here’s a list of subtasks to be done in order to achieve this functionality:
- Prepare the Driver model
- Prepare the Driver Repository that populates the list of drivers.
- Prepare the DriverListViewModel that populates the items from the repository.
- Update the Form Metadata and connect the DriverListViewModel.
Let’s go through each one, step-by-step.
Prepare the Driver model
To create the Driver model, let’s create a new file named Driver.cs under CrosslightFormBuilder.Core/Models folder. The contents are as follows.
|
1 2 3 4 5 6 7 8 9 10 11 12 13 14 15 16 17 18 19 20 21 22 23 24 25 26 27 28 29 30 31 32 33 34 35 36 37 38 39 40 41 42 43 44 45 46 47 48 49 50 51 52 53 54 55 56 57 58 59 60 61 62 63 64 65 66 67 68 69 70 71 72 73 74 75 76 77 78 79 80 81 82 83 84 85 86 87 88 |
#region Usings using CrosslightFormBuilder.Models; #endregion namespace CrosslightFormBuilder.Core.Models { public class Driver : ModelBase { #region Constructors public Driver(int id, string name, string phone, byte[] image) { this.Id = id; this.Name = name; this.Phone = phone; this.Image = image; } #endregion #region Fields private int _id; private byte[] _image; private string _name; private string _phone; #endregion #region Properties public int Id { get { return _id; } set { if (_id != value) { _id = value; OnPropertyChanged("Id"); } } } public byte[] Image { get { return _image; } set { if (_image != value) { _image = value; OnPropertyChanged("Image"); } } } public string Name { get { return _name; } set { if (_name != value) { _name = value; OnPropertyChanged("Name"); } } } public string Phone { get { return _phone; } set { if (_phone != value) { _phone = value; OnPropertyChanged("Phone"); } } } #endregion } } |
The Driver model contain 4 MVVM-ready properties: ID (int), Image (byte[]), Name (string), and Phone (string). That’s basically it. I’ve also prepared a constructor for quick and easy initialization. Now your Driver model is ready. Let’s move on.
Prepare the Driver Repository
Upon reading the heading, you might have two questions: What is this repository thingy and why do I need it? The repository pattern is more of a best-practice design pattern that handles the actual data processing for your applications. A data repository for your app.
For example, right now your app might currently retrieve data by performing queries to a database server, then one day you decided to change the data retrieval process. Rather than making changes to each and every ViewModel, you can do so by just replacing the data repository. No changes in ViewModel needed. To learn more about the Repository Pattern, check out our Developer Center documentation here.
So, let’s get started in creating our Driver repository. First thing you need to do is define the interfaces needed for the repository. Create a new interface in CrosslightFormBuilder.Core/ModelServices, named IDataRepository.cs, also creating the folder as necessary. The contents of the file are as follows.
|
1 2 3 4 5 6 7 8 9 |
public interface IDataRepository<TEntity, in TKey> where TEntity : class { #region Methods TEntity Get(TKey id); IEnumerable<TEntity> GetAll(); #endregion } |
We’ll prepare an interface to get the Driver entity based on the given ID. Notice that everything is defined as generic here. Also another interface to return all entities when calling GetAll() method.
Proceed by creating the interface for the Driver repository in CrosslightFormBuilder.Core/ModelServices folder, named IDriverRepository.cs, also creating the folder as necessary.
|
1 2 3 4 5 6 7 8 |
public interface IDriverRepository : IDataRepository<Driver, int> { #region Methods Driver GetByName(string name); #endregion } |
There’s nothing much to see here, we simply added a new method to get the Driver entity by the driver’s Name by subclassing the previously created IDataRepository interface. Let’s move on by creating the concrete DriverRepository implementation. Create a new file called DriverRepository.cs inside CrosslightFormBuilder.Core/ModelServices folder.
|
1 2 3 4 5 6 7 8 9 10 11 12 13 14 15 16 17 18 19 20 21 22 23 24 25 26 27 28 29 30 31 32 33 34 35 |
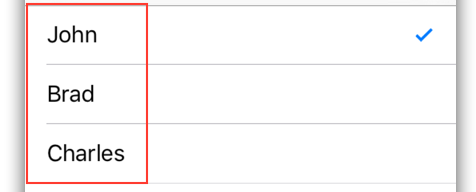
public class DriverRepository : IDriverRepository { #region Properties public List<Driver> _items { get; set; } #endregion #region Methods public Driver Get(int id) { return this.GetAll().FirstOrDefault(o => o.Id == id); } public IEnumerable<Driver> GetAll() { if (_items == null) { _items = new List<Driver>(); _items.Add(new Driver(1, "John", "+123456", this.GetType().Assembly.GetManifestResourceStream("CrosslightFormBuilder.Core.Assets.john.png").ToByte())); _items.Add(new Driver(2, "Brad", "+134567", this.GetType().Assembly.GetManifestResourceStream("CrosslightFormBuilder.Core.Assets.brad.png").ToByte())); _items.Add(new Driver(2, "Charles", "+145678", this.GetType().Assembly.GetManifestResourceStream("CrosslightFormBuilder.Core.Assets.charles.png").ToByte())); } return _items; } public Driver GetByName(string name) { return this.GetAll().FirstOrDefault(o => o.Name == name); } #endregion } |
Here, you can then provide the real implementation to retrieve the list of drivers, also getting the drivers by name and ID. The highlighted line shows how the list of Drivers are populated, by utilizing the constructor we’ve provided for our Driver model earlier. Also notice that we’ve provided the image to be used for each driver. Oh yeah, before we forget, let’s go ahead and use these images for the drivers and put it inside the CrosslightFormBuilder.Core/Assets folder, also creating the folder as needed.


Make sure that these images’ BuildAction is set to EmbeddedResource so that they can be used in your application. Also, if you try to build the project now, you might get an error on the ToByte() method. To fix this, create a new file that contains an extension method to convert a Stream to array of bytes. Create a file named StreamExtensions.cs, and put it inside the CrosslightFormBuilder.Core/Extensions folder.
|
1 2 3 4 5 6 7 8 9 10 11 12 13 14 15 |
public static class StreamExtensions { #region Methods public static byte[] ToByte(this Stream input) { using (MemoryStream ms = new MemoryStream()) { input.CopyTo(ms); return ms.ToArray(); } } #endregion } |
A handy tip for you: these extension method provides an easy way to extend the functionalities of a certain class, that is reusable within your application. For example, if you wish to create an extension, for let’s say, converting a string to a byte[], you can definitely do something similar to this.
Now that you’ve the got the repository part ready, let’s hook it up to the ViewModel.
Prepare the DriverListViewModel
Start by creating a new ViewModel file called DriverListViewModel.cs and put it inside CrosslightFormBuilder.Core/ViewModels folder. Here’s the contents of the file.
|
1 2 3 4 5 6 7 8 9 10 11 12 13 14 15 16 17 18 19 20 21 22 23 24 25 |
public class DriverListViewModel : ListViewModelBase<Driver> { #region Constructors public DriverListViewModel() { this.SourceItems = this.Repository.GetAll().ToObservable(); } #endregion #region Properties private IDriverRepository Repository { get { if (Container.Current.CanResolve<IDriverRepository>()) return Container.Current.Resolve<IDriverRepository>(); return new DriverRepository(); } } #endregion } |
Here, we populate the SourceItems when the DriverListViewModel is constructed, just by calling the previously created GetAll() method from our interface. Also notice that we’ve provided the Repository property which is resolved upon the property’s getter. This is also called as IoC (Inversion of Control). To use the IoC pattern, you’ll need to register the previously created DriverRepository to be used globally in the application. To do this, open up the AppService.cs file in the CrosslightFormBuilder.Core/Infrastructure folder and add this line in the constructor.
|
1 2 3 4 |
public CrosslightAppAppService(IApplicationContext context) : base(context) { Container.Current.Register<IDriverRepository, DriverRepository>().WithLifetimeManager(new ContainerLifetime()); } |
Your ViewModel is now ready to be used to populate the list of Drivers.
Update the FormMetadata
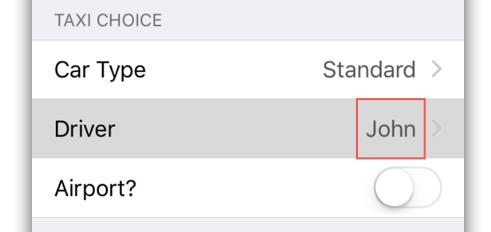
Since you already have the list of drivers properly populated from the DriverListViewModel, we’ll need to modify the OrderFormMetadata a bit. From the initial OrderFormMetadata class in the Order.cs file, let’s modify the TaxiChoiceSection class to include the driver selection.
|
1 2 3 4 5 6 7 8 9 10 11 12 13 14 15 16 17 18 19 20 21 22 |
public class TaxiChoiceSection { #region Fields [Display(Caption = "Car Type")] [Editor(EditorType.AutoDetect)] [Layout(Style = LayoutStyle.RightDetail)] public CarType CarType; [Editor(EditorType.Selection)] [SelectedItemBinding(Path = "Driver")] [Binding(Path = "Driver.Name")] [SelectionInput(SelectionMode.Single, DisplayMemberPath = "Name", ListSourceType = typeof(DriverListViewModel))] public Driver Driver; [Display(Caption = "Airport?")] [Editor(EditorType.Switch)] [Layout(Style = LayoutStyle.RightDetail)] public bool IsAirport; #endregion } |
The highlighted lines above shows the added definition for the driver selection. Let’s inspect this line by line.
- [Editor(EditorType.Selection)]
This determines which editor type to be used.

- [SelectedItemBinding(Path = “Driver”)]
This attribute determines which binding path for the selected item used in the Form Builder. In this case, the item for the Form Builder is of type Order, which has the Driver property. That’s where we’re going to bind our selection into. (OrderViewModel.Item.Driver) - [Binding(Path = “Driver.Name”)]
The BindingAttribute determines which property of the Driver model that is going to be displayed in the form after selection has completed.
- [SelectionInput(SelectionMode.Single, DisplayMemberPath = “Name”, ListSourceType = typeof(DriverListViewModel))]
The SelectionInputAttribute determines the selection editor behavior, which ViewModel provides the items source for the list, as well as the property to be displayed on the list of selection, or also often known as DisplayMemberPath.
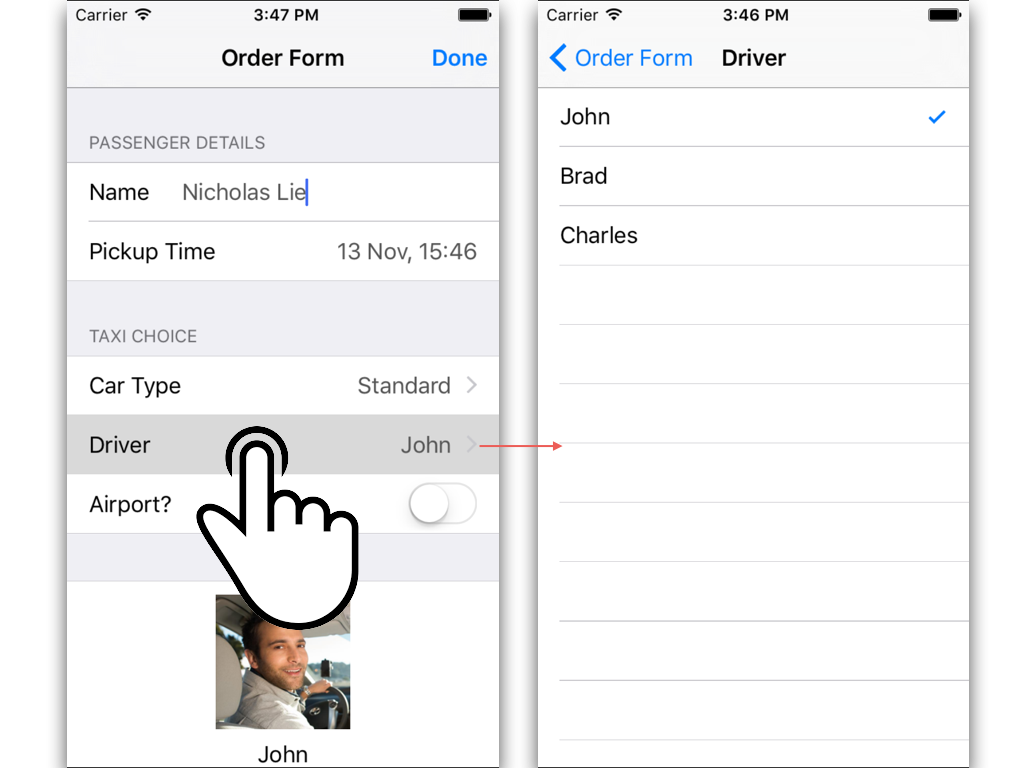
By now, you’ve successfully provided a driver selection for the Form Builder. How about adding the custom view on the bottom of the form?
Providing Custom Driver View
After the user has selected the driver, it’s best for us to show the driver that the user has selected by providing a custom view at the bottom of the form. Let’s learn how you can use a custom view resource to be used along with the Form Builder, complete with data binding capabilities. In overall, there are several steps needed to achieve this:
- Provide the custom driver view for iOS
- Update the Form Metadata
- Provide the Binding Provider
- Bind to ViewModel
- Provide the custom driver view for Android
Let’s go through each step, one-by-one.
Provide the Custom Driver View for iOS
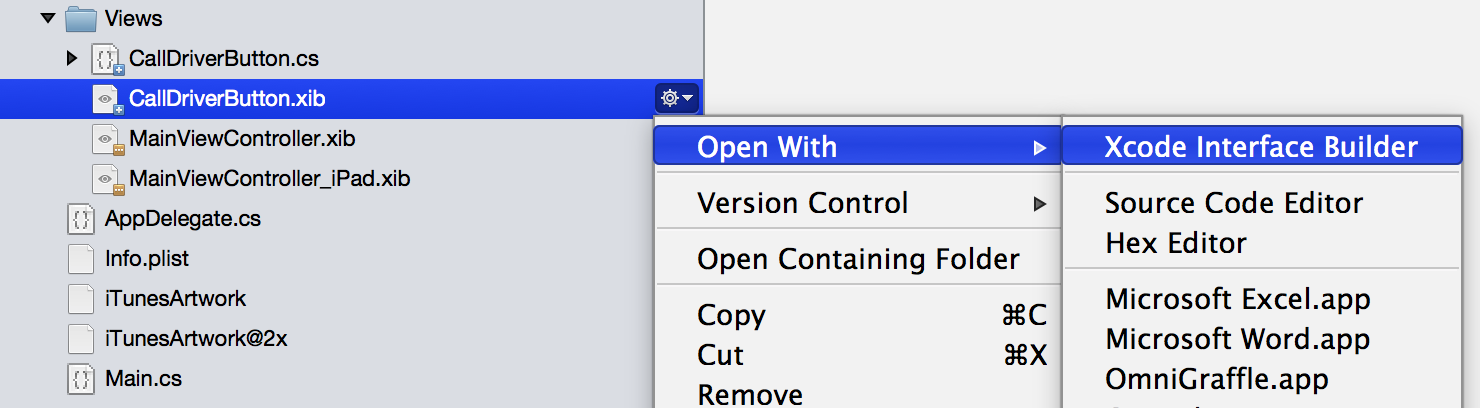
To provide the custom driver view for iOS, all you need to do is creating a new Crosslight view for iPhone. To do this, you can utilize the item template shipped with Crosslight. In your iOS project, in the Views folder, right-click and add a new file. Under Crosslight, choose Crosslight iOS View for iPhone.

Let’s give it a name of CallDriverButton. What this will do is Crosslight will create two files, namely CallDriverButton.xib and CallDriverButton.cs. All you need to do is create a new layout by opening the CallDriverButton.xib in Xcode Interface Builder.
Create your layout any way you want it. Just create an ImageView, a Label, and a Button.
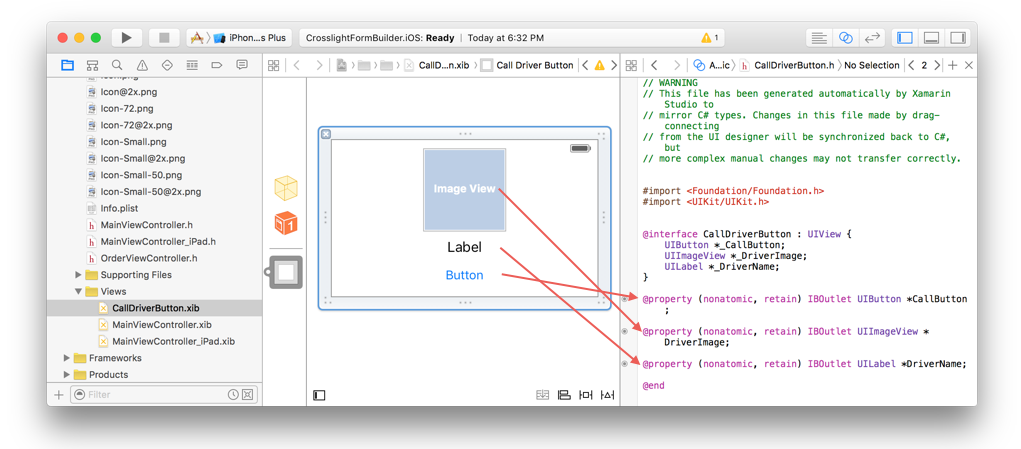
Set the outlet for each.
- ImageView: DriverImage
- Label: DriverName
- Button: CallButton
I know, my layout looks awful. But all I really want to show you is how you can inject your own custom views into the form using the Form Builder. So, after your layout’s done, save it and go back to Xamarin Studio.
Update the Form Metadata
Now that your layout is done, let’s update our OrderFormMetadata a bit to include this new view in our form layout. Open up Order.cs, and let’s create a new section and call it CallDriverSection, or anything you want.
|
1 2 3 4 5 |
public class CallDriverSection { [Editor(EditorType.Custom, CustomEditorIdentifier = "CallDriverButton")] public object CallDriver; } |
Now I’d like you to pay attention how easy it is to embed a custom view into a Crosslight Form. From the definition above, you can see that we simply set the editor type to custom, then set the CustomEditorIdentifier set to CallDriverButton. In iOS, this corresponds to the name of the XIB that we’ve defined for our custom view. While on Android, this also corresponds to the name of the Android Layout file we’ve defined for our custom view layout. Simple as that.
We’ve made it super easy for developers to create a beautiful platform-specific data form by combining robust pre-built editors for common input and flexible custom views for more complex user interface. This allows you to mix and match what works best for you, and let Crosslight do the magic at runtime.
After you’ve created this section, let’s add this at the bottom of our form.
|
1 2 3 4 5 6 7 8 9 10 11 12 13 14 15 16 |
[Form(Title = "Order Form")] public class OrderFormMetadata { #region Fields [Section(Header = "Passenger Details")] public PassengerDetailsSection PassengerDetails; [Section(Header = "Taxi Choice")] public TaxiChoiceSection TaxiChoiceSection; [Section] public CallDriverSection CallDriverSection; #endregion } |
You’re done with the form metadata. But there’s something missing. What about those outlets we’ve defined earlier? How can we bind data to it?
Provide the Binding Provider
Simple. It’s basically the way you would do any data binding with Crosslight. Yes, you should provide a BindingProvider for the form. In addition to automatic bindings, Form Builder also supports natural data binding process through the use of BindingProvider. In this case, let’s create a new BindingProvider called OrderBindingProvider.cs. Let’s put this under CrosslightFormBuilder.Core/BindingProviders folder. The contents of the OrderBindingProvider are as follows.
|
1 2 3 4 5 6 7 8 9 10 11 12 13 14 |
public class OrderBindingProvider : BindingProvider { #region Constructors public OrderBindingProvider() { this.AddBinding("DriverImage", BindableProperties.ImageProperty, "Item.Driver.Image"); this.AddBinding("DriverName", BindableProperties.TextProperty, "Item.Driver.Name"); this.AddBinding("CallButton", BindableProperties.TextProperty, "Item.Driver.Phone"); this.AddBinding("CallButton", BindableProperties.CommandProperty, "CallCommand"); } #endregion } |
Here, we’ve simply used the outlets we’ve defined earlier and bind them automatically to the selected Driver in the form. We’ve also added a binding from the CallButton to the CallCommand in the ViewModel, which can be used to call the driver immediately upon click. And don’t forget to use the newly created OrderBindingProvider in your OrderViewController.
Again, Crosslight does a lot of magic behind the scene which enables you to define data binding in such a simple definition. Looking back, we just need to create a view, define the outlets, and provide the bindings. Crosslight takes care the connection between all those layers at runtime.
|
1 2 3 4 5 6 |
[Register("OrderViewController")] [ImportBinding(typeof(OrderBindingProvider))] public class OrderViewController : UIFormViewController<OrderViewModel> { ... } |
Bind to ViewModel
Afterwards, in the OrderViewModel, we simply add a new DelegateCommand for the phone number.
|
1 2 3 4 5 6 7 8 9 10 11 12 13 14 15 16 17 18 19 20 21 22 23 24 25 26 27 28 29 30 31 32 33 34 35 36 37 38 39 40 41 42 43 44 45 46 47 48 49 50 51 52 53 54 55 56 57 58 59 60 61 62 63 64 65 66 67 68 69 70 71 72 73 74 75 76 77 78 79 80 81 82 83 84 85 86 |
public class OrderViewModel : EditorViewModelBase<Order> { #region Properties /// <summary> /// Gets the type of the form metadata associated to the editor. /// </summary> /// <value> /// The type of the form metadata. /// </value> public override Type FormMetadataType { get { return typeof(OrderFormMetadata); } } public DelegateCommand CallCommand { get; set; } #endregion #region Constructors public OrderViewModel() { this.CallCommand = new DelegateCommand(ExecuteCall); } #endregion #region Methods private void ExecuteCall(object obj) { this.MobileService.Telephony.Call(this.Item.Driver.Phone); } /// <summary> /// Executes the save command. /// </summary> /// <param name="parameter">Parameter.</param> protected override void ExecuteSave(object parameter) { this.Validate(); if (!this.HasErrors) { StringBuilder passengerDetails = new StringBuilder(); passengerDetails.Append("Name: " + this.Item.Name + "\n"); passengerDetails.Append("Pickup Time: " + this.Item.PickupTime + "\n"); passengerDetails.Append("Going to the airport? " + this.Item.IsAirport + "\n"); passengerDetails.Append("Car Type: " + this.Item.CarType + "\n"); passengerDetails.Append("Driver: " + this.Item.Driver.Name); this.MessagePresenter.Show(passengerDetails.ToString(), "Confirm Order", new[] {"Yes", "No"}, selection => { if (selection == 0) //Yes { this.ToastPresenter.Show("Your order has been placed."); } else { this.ToastPresenter.Show("You cancelled the order."); } }); } else { this.MessagePresenter.Show(this.ErrorMessage); } } /// <summary> /// Called when this instance is navigated. /// </summary> /// <param name="parameter">Parameter.</param> public override void Navigated(NavigatedParameter parameter) { base.Navigated(parameter); this.Item = new Order(); this.Item.PickupTime = DateTime.Now; } #endregion } |
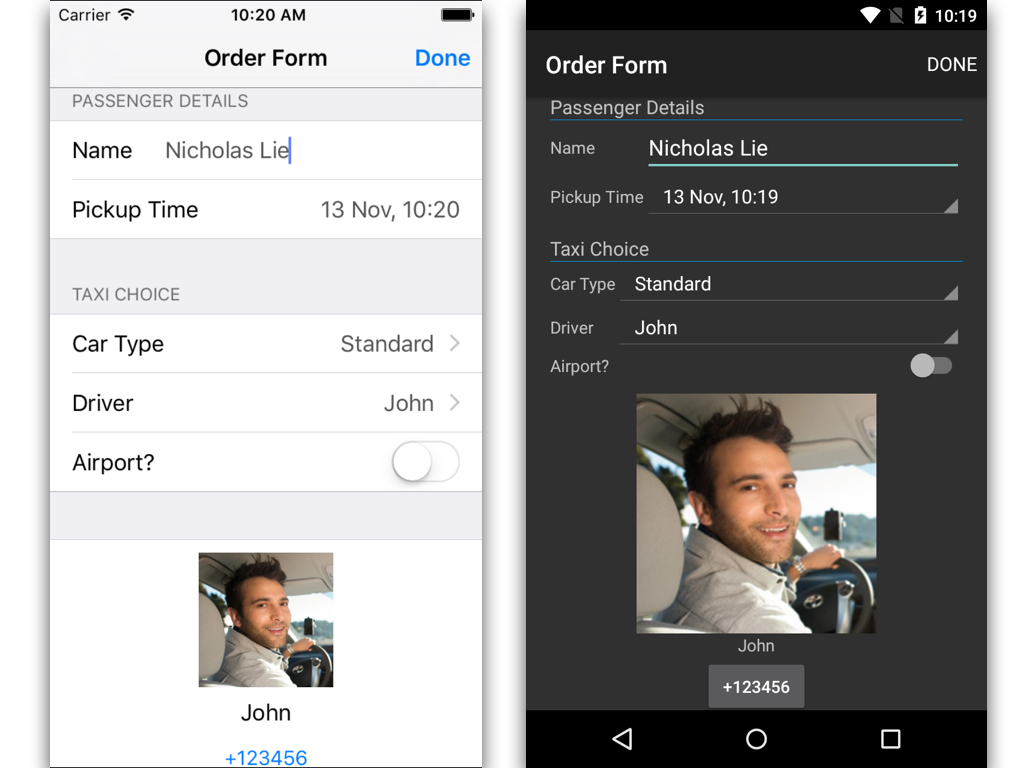
Everything seems pretty much the same, except for the additional CallCommand we’ve defined for the CallButton. Run the project and you should now see iOS version is now working properly. Try selecting a driver and that driver detail will be automatically shown in the custom view you’ve defined. When you run this on an iPhone, you can even immediately perform a phone call to the driver’s number directly.
What about Android?
Provide the Custom Driver View for Android
This is where the Form Builder excels. Since you’ve completed the iOS version, all you need to do is just provide the custom layout and use the previously created OrderBindingProvider. Let’s take a look how to achieve this.
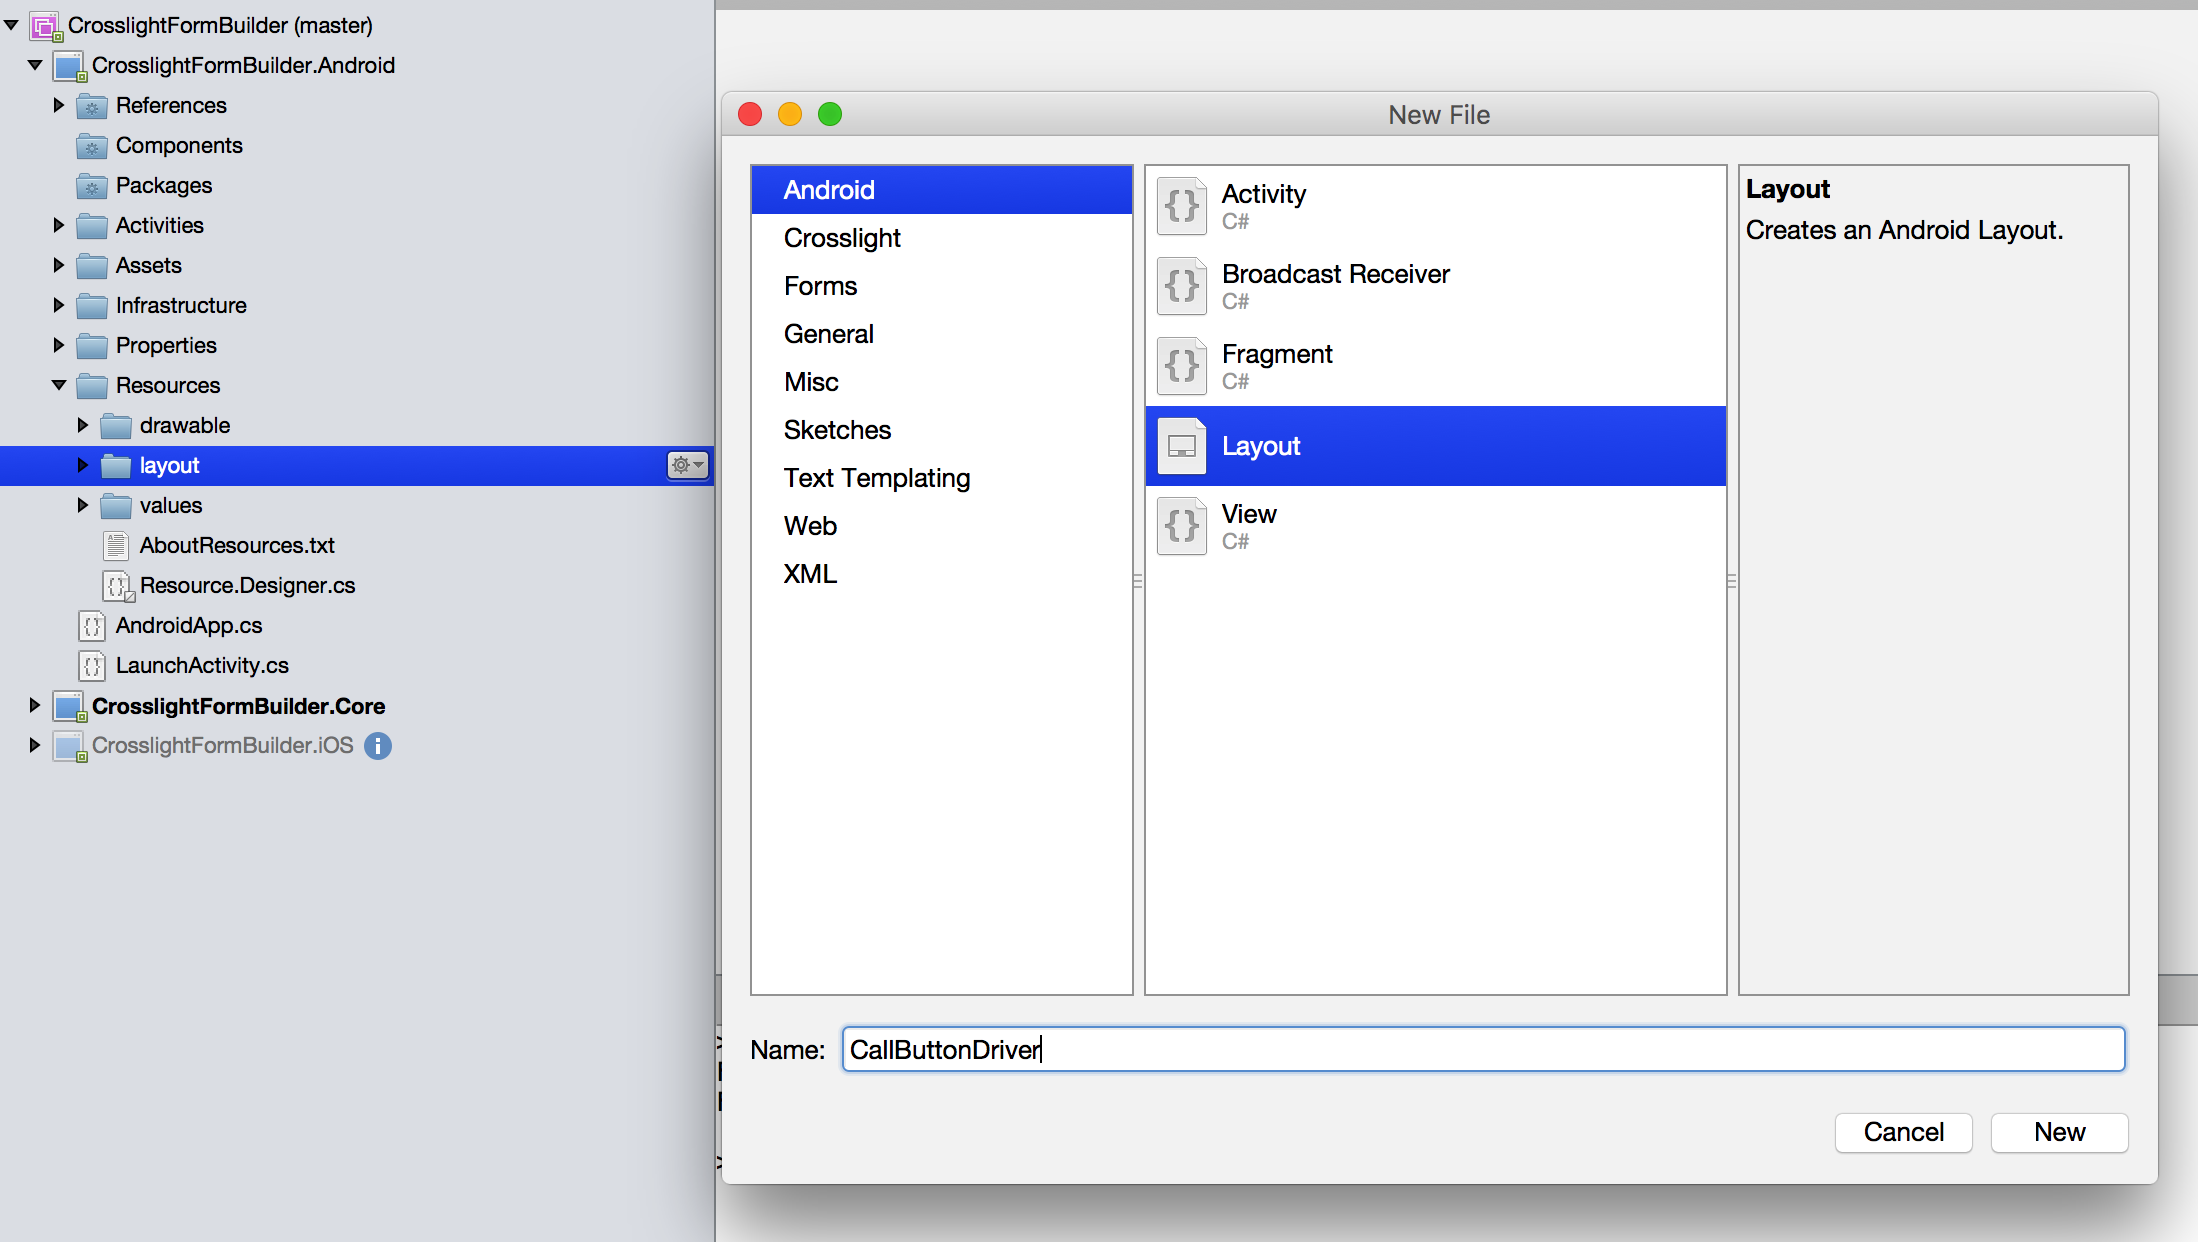
First, create a new Android Layout file by right clicking on the CrosslightFormBuilder.Android/Resources/layout folder. Then choose Add, New Item. Select Android, Layout. Remember to give it a name of CallDriverButton, as this corresponds to the CustomViewIdentifier defined in the FormMetadata earlier.
Provide the layout as follows.
|
1 2 3 4 5 6 7 8 9 10 11 12 13 14 15 16 17 18 19 20 21 22 23 24 25 |
<?xml version="1.0" encoding="utf-8"?> <RelativeLayout xmlns:android="http://schemas.android.com/apk/res/android" android:layout_width="fill_parent" android:layout_height="wrap_content"> <LinearLayout android:orientation="vertical" android:layout_width="fill_parent" android:layout_height="wrap_content"> <ImageView android:id="@+id/DriverImage" android:layout_width="200dp" android:layout_height="200dp" android:layout_gravity="center" /> <TextView android:id="@+id/DriverName" android:layout_width="wrap_content" android:layout_height="20sp" android:layout_gravity="center" /> <Button android:id="@+id/CallButton" android:layout_width="wrap_content" android:layout_height="wrap_content" android:layout_gravity="center" /> </LinearLayout> </RelativeLayout> |
After ensuring the IDs are correct, you’re only left to hook up the OrderBindingProvider in your OrderActivity. Let’s do that now.
|
1 2 3 4 5 6 |
[Activity(Label = "Order Form")] [ImportBinding(typeof(OrderBindingProvider))] public class OrderActivity : FormActivity<OrderViewModel> { ... } |
You’re done. Run the project and you’ll get the same result with iOS version.
Beautiful, isn’t it?
Wrapping Up
The entire project for this tutorial can be found here. To use this sample, you’ll need to use at least Crosslight 4.0.5000.321 and above. Hopefully this will help you learn more about the Crosslight Form Builder.
You’ve seen how you can easily inject a custom view to the form by using the ViewResource custom editor. Probably some time in the future I’ll add a custom ViewBuilder tutorial as well. This will be very useful for those of you who wants to build a custom control that works seamlessly with the FormBuilder. We’ve also used this approach in building Crosslight Form Builder for each platform inside Crosslight framework.
Cheers,
Nicholas Lie


